Introduction & Inspiration
A young martial artist is shattered by a family tragedy. Plagued by guilt, she falls into a deep slumber, only to discover that a nightmare demon in her dreams is devouring her emotions and memories, trapping her in a perpetual sleep.
In this dream world, she possesses greater power than in reality, yet she cowers in the face of the terrifying nightmare. With the aid of countless wandering souls, she gradually uncovers the truth behind her family’s demise, retrieves her lost memories and sealed abilities, and ultimately defeats the nightmare demon to awaken and return to reality. This level is an excerpt from this journey.
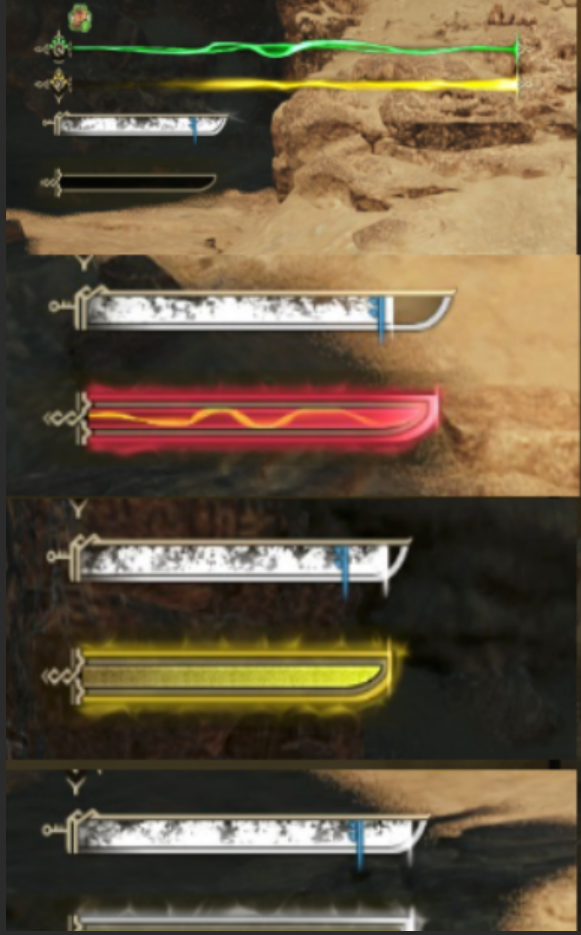
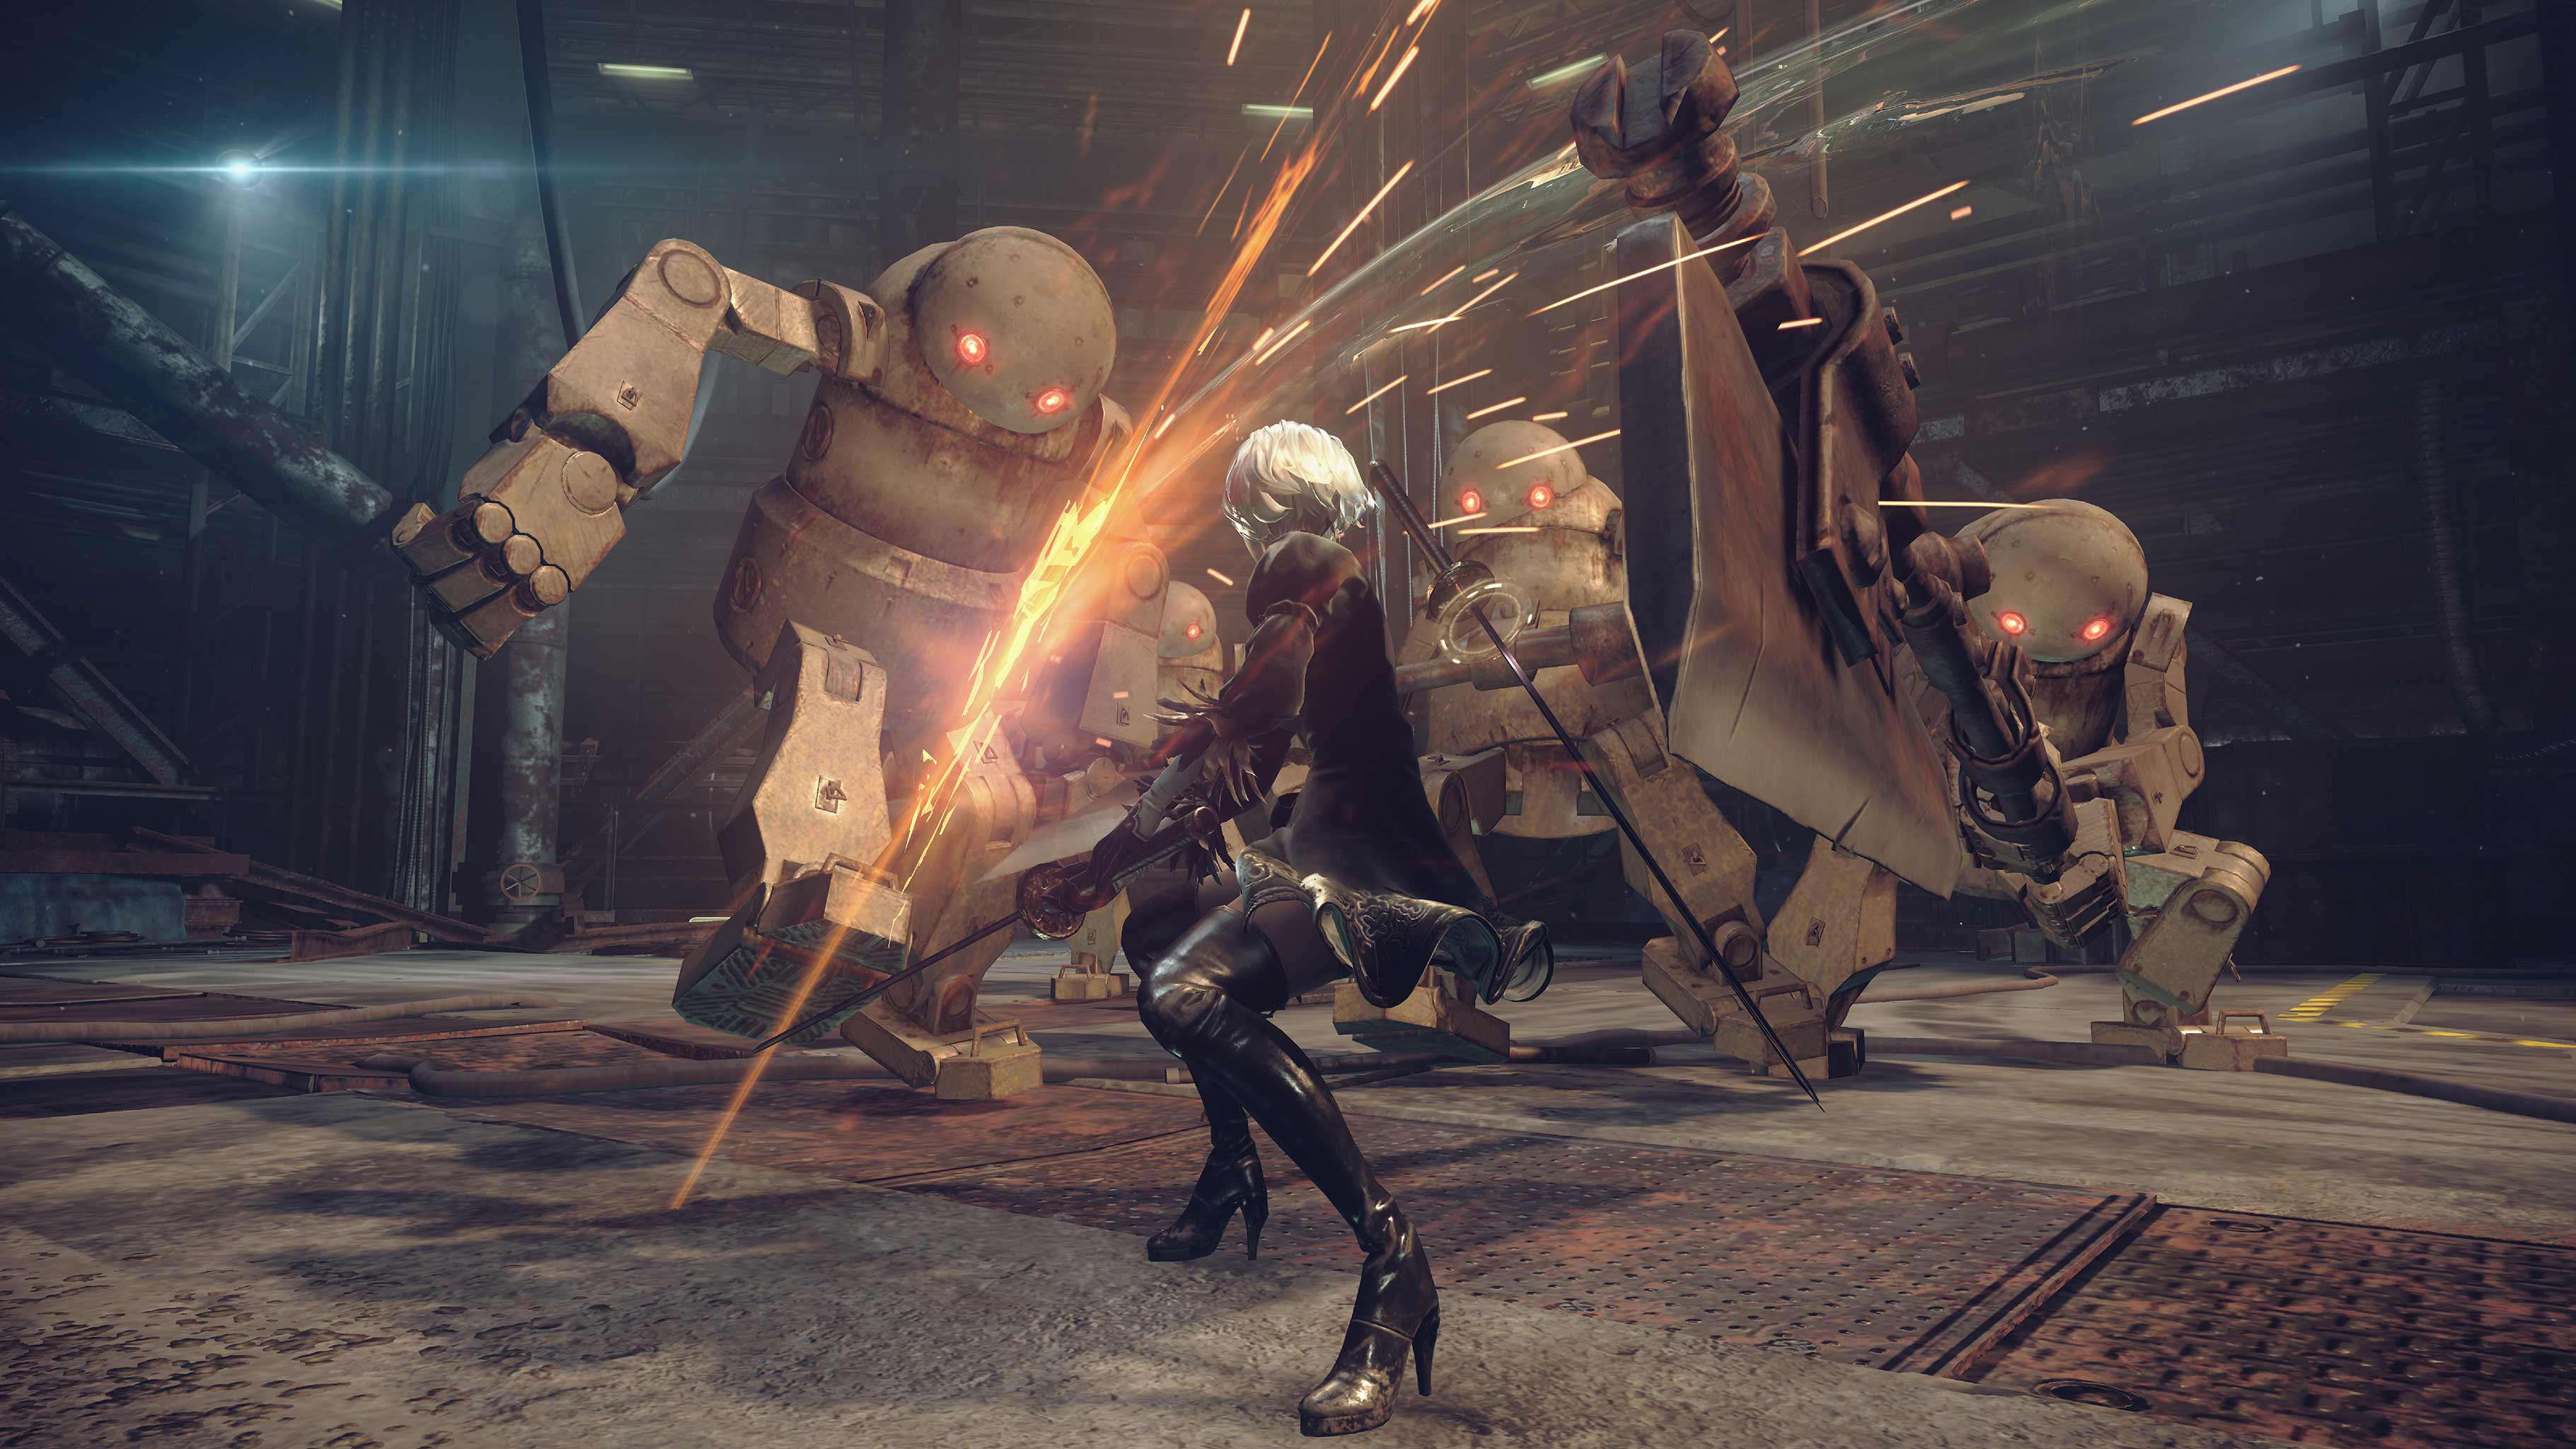
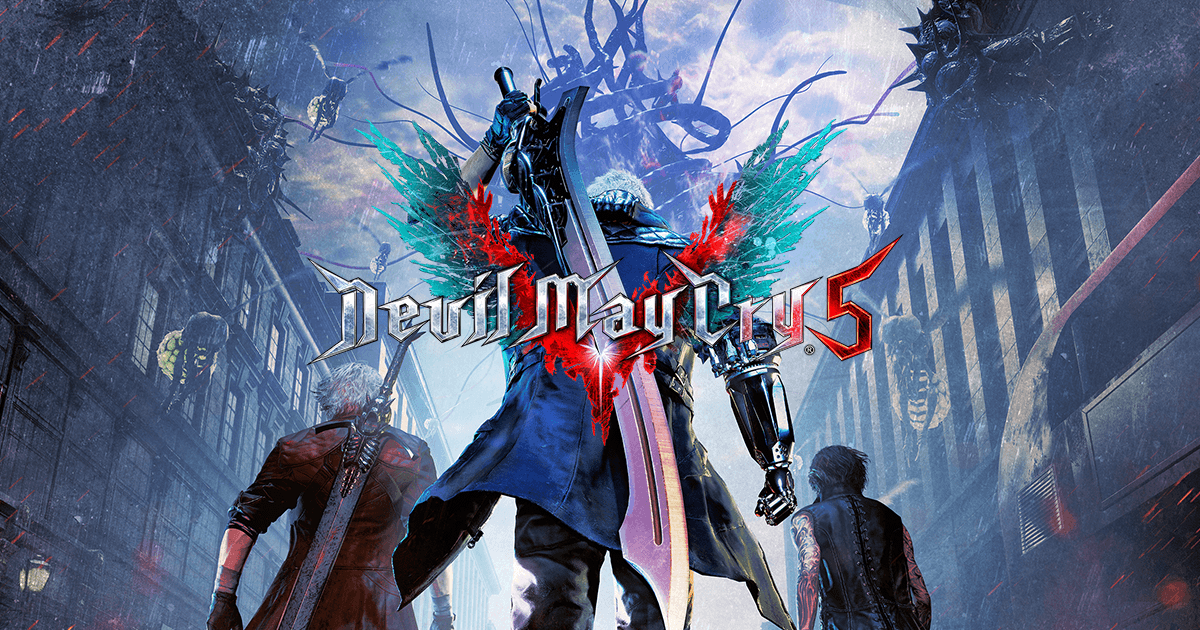
The game draws inspiration from various ARPG/ACT titles. The resource bar design takes reference from ARPGs such as the Monster Hunter series, while the character mechanics are inspired by fast-paced action games like NieR: Automata and the Devil May Cry series.
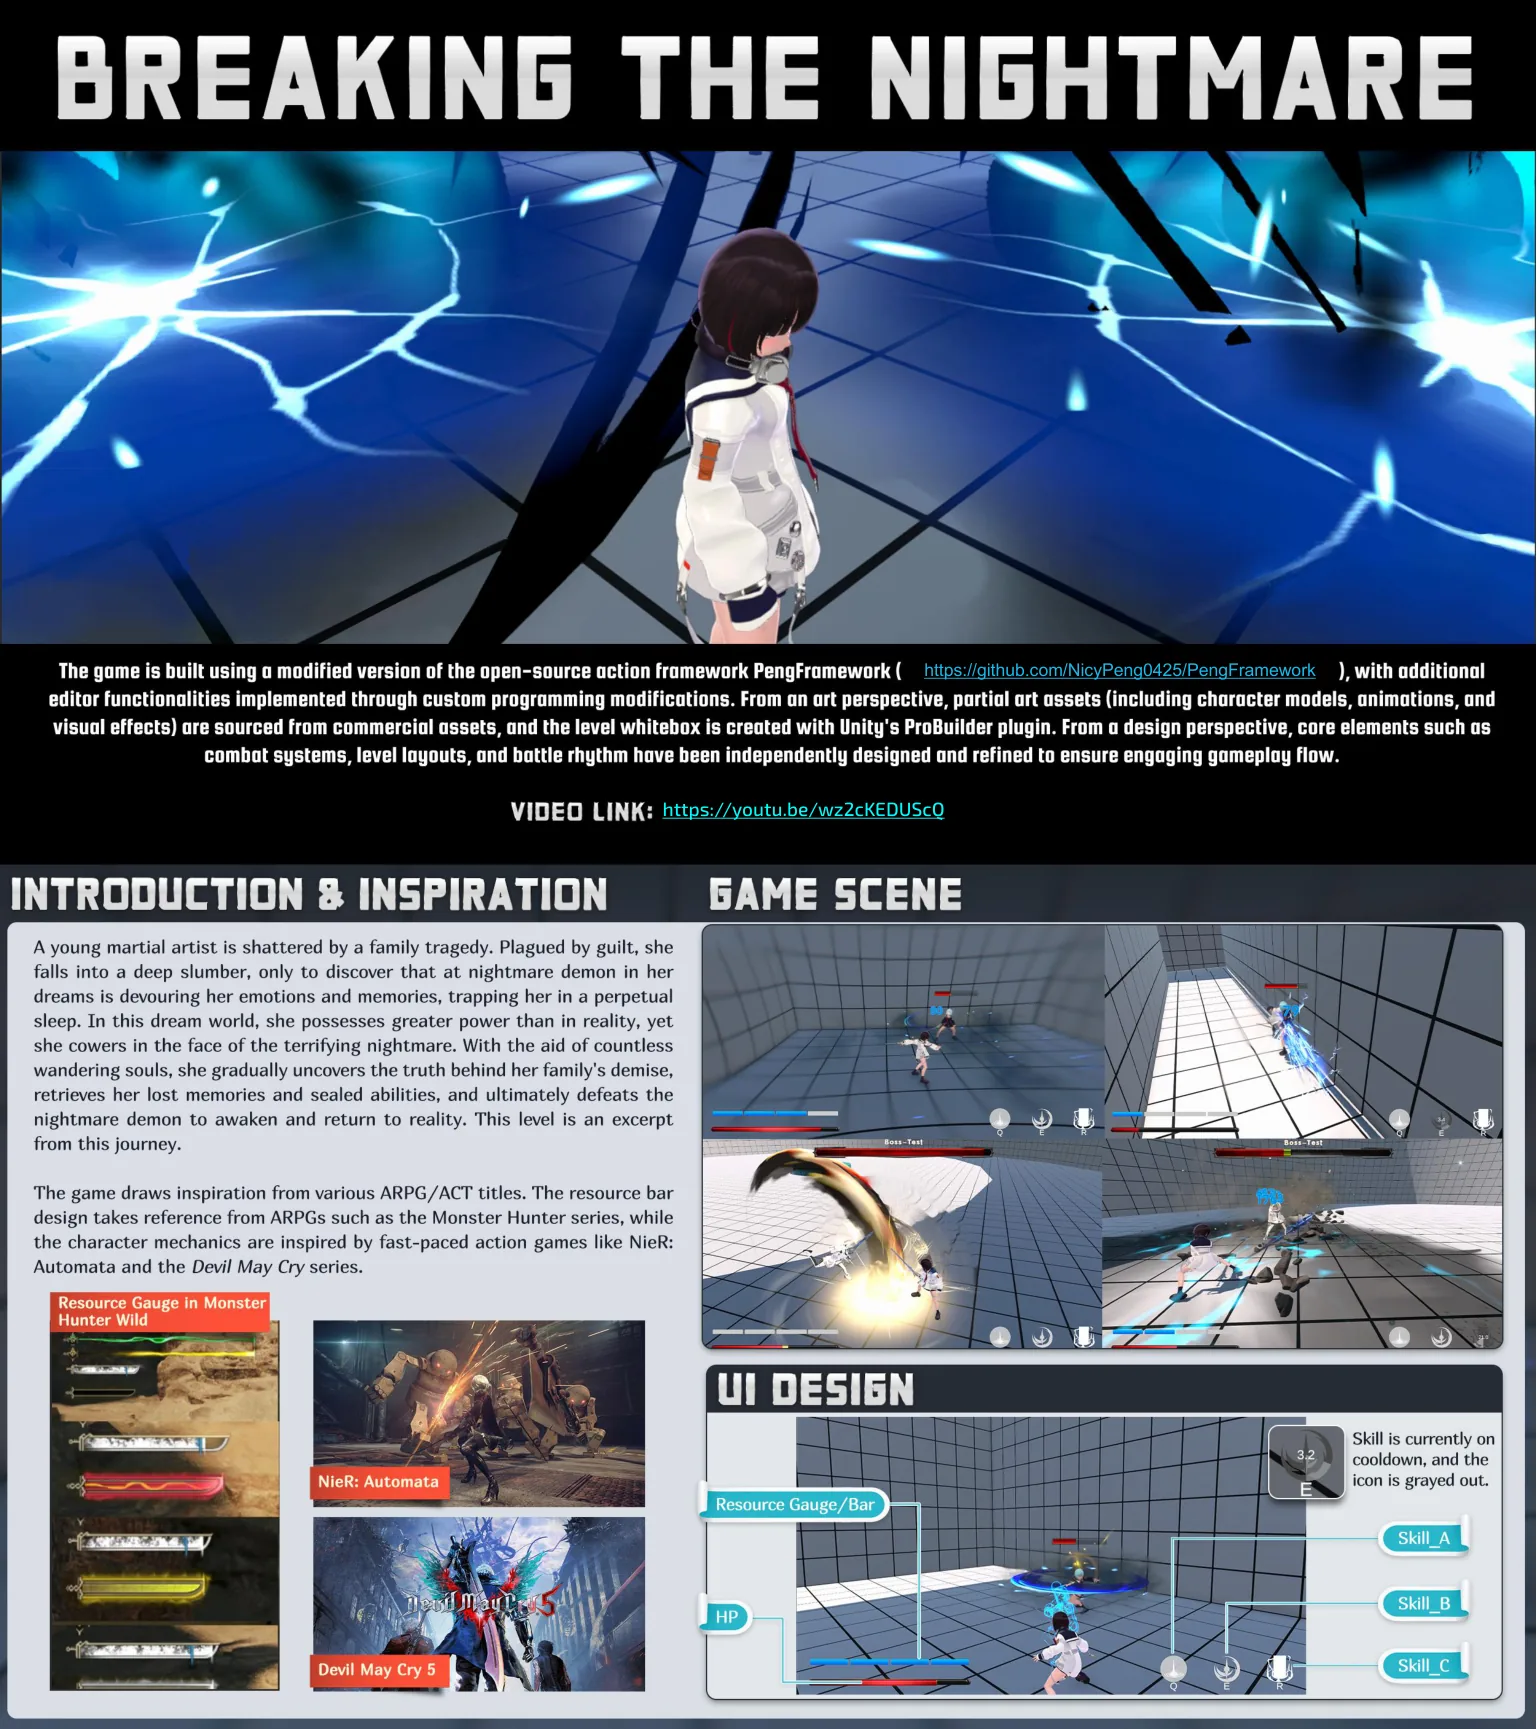
The game is built using a modified version of the open-source action framework PengFramework, with additional editor functionalities implemented through custom programming modifications. From an art perspective, partial art assets (including character models, animations, and visual effects) are sourced from commercial assets, and the level whitebox is created with Unity’s ProBuilder plugin. From a design perspective, core elements such as combat systems, level layouts, and battle rhythm have been independently designed and refined to ensure engaging gameplay flow.
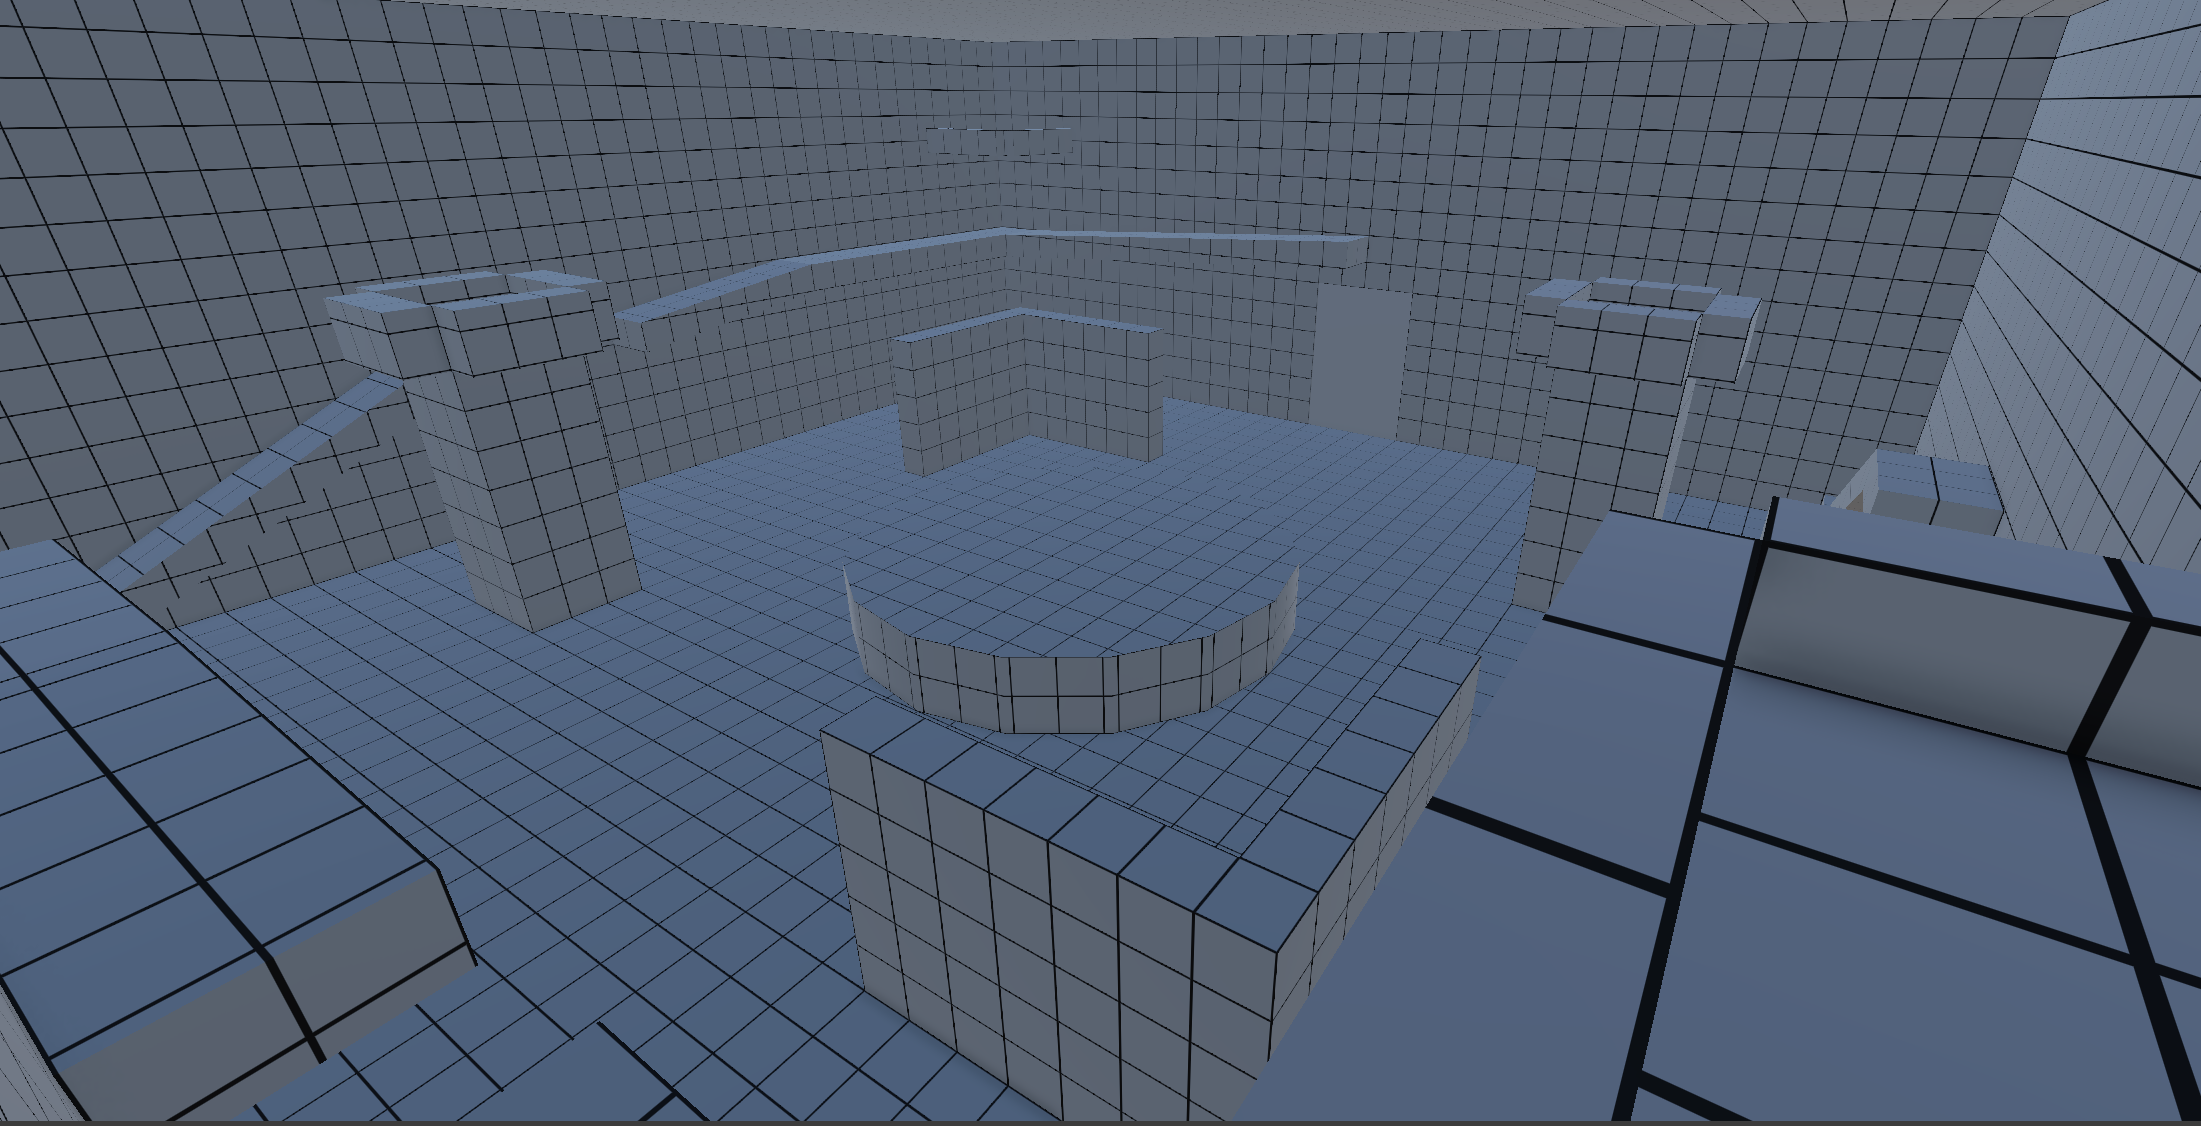
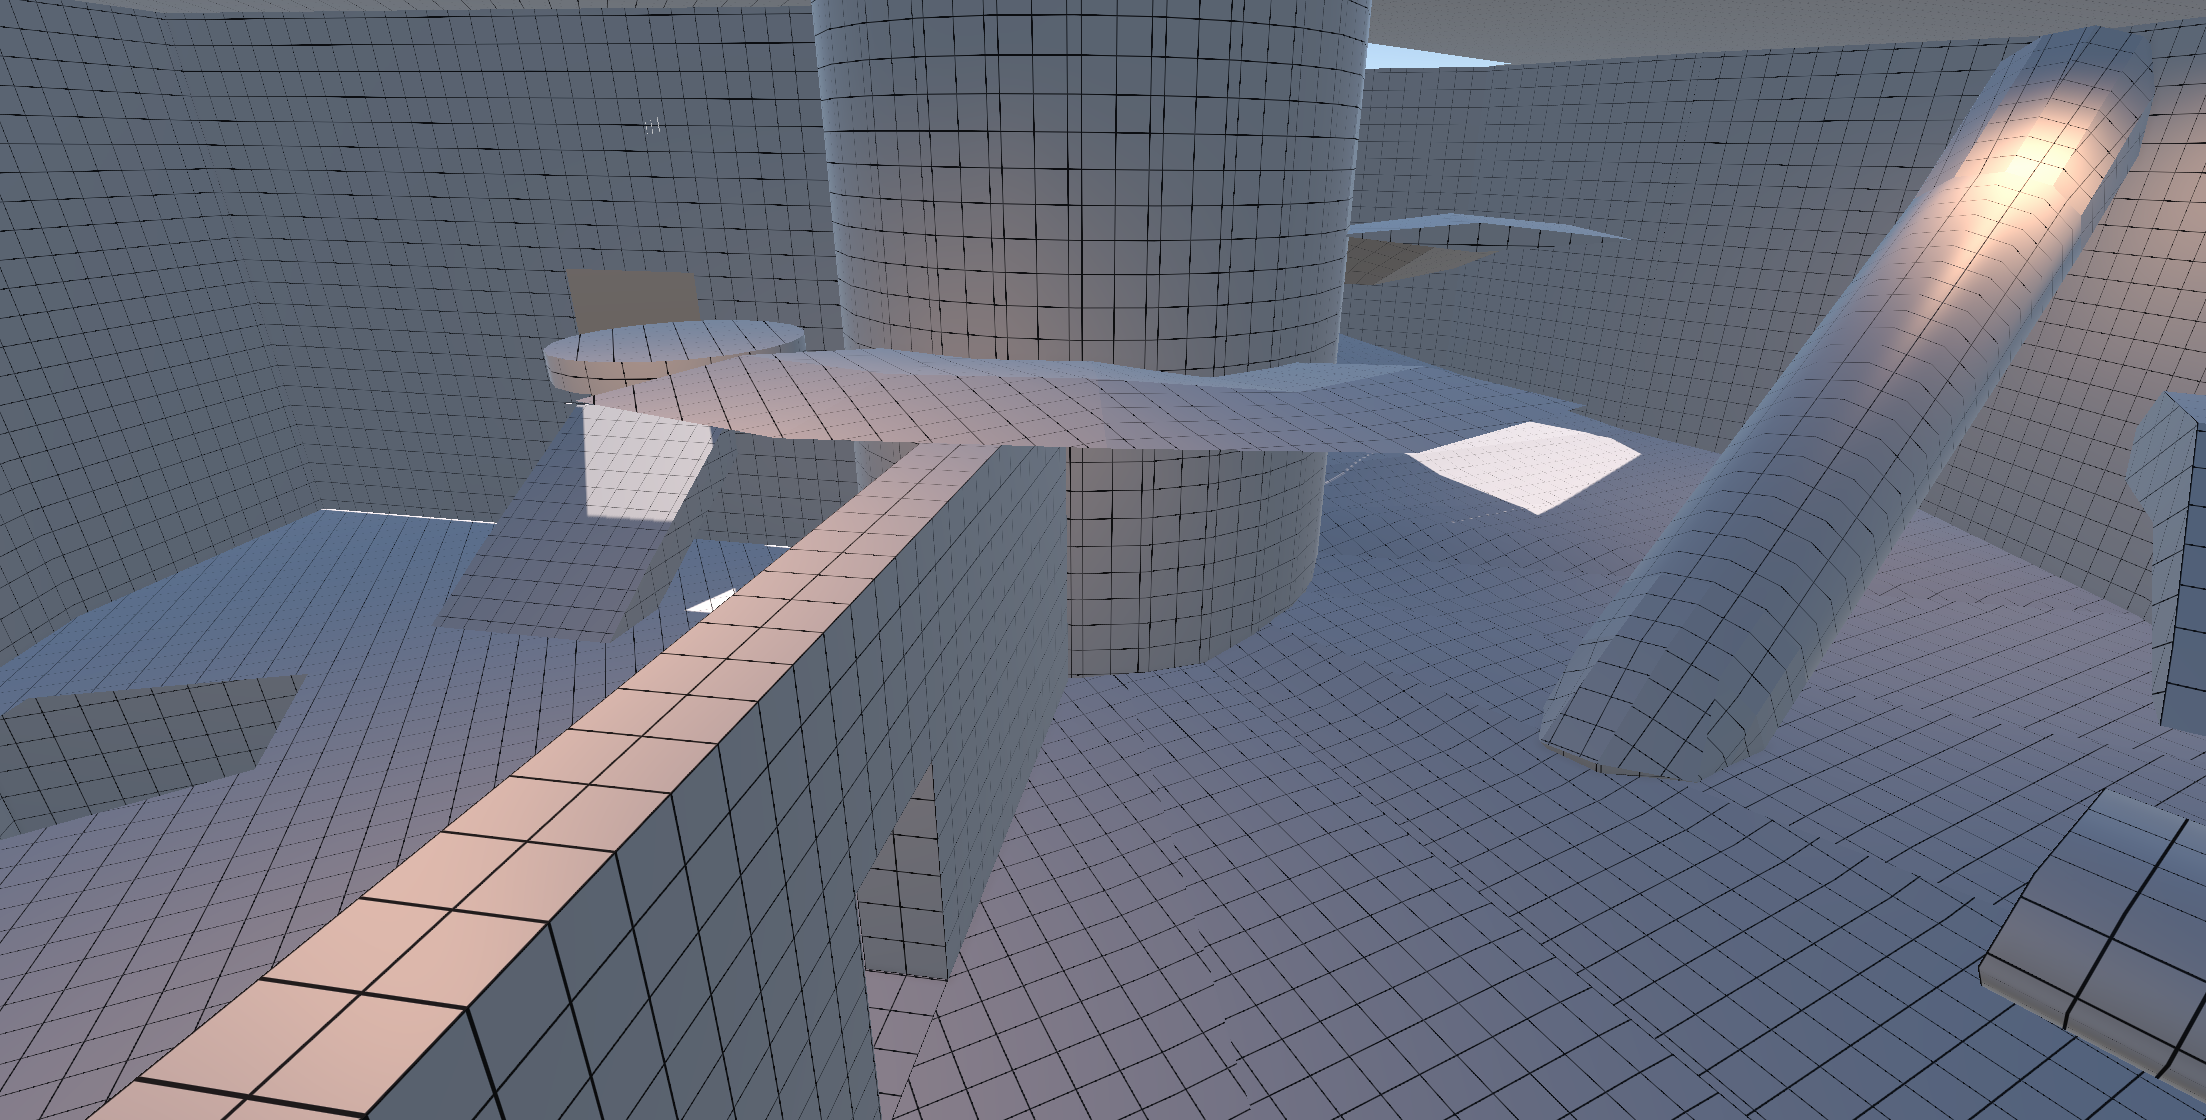
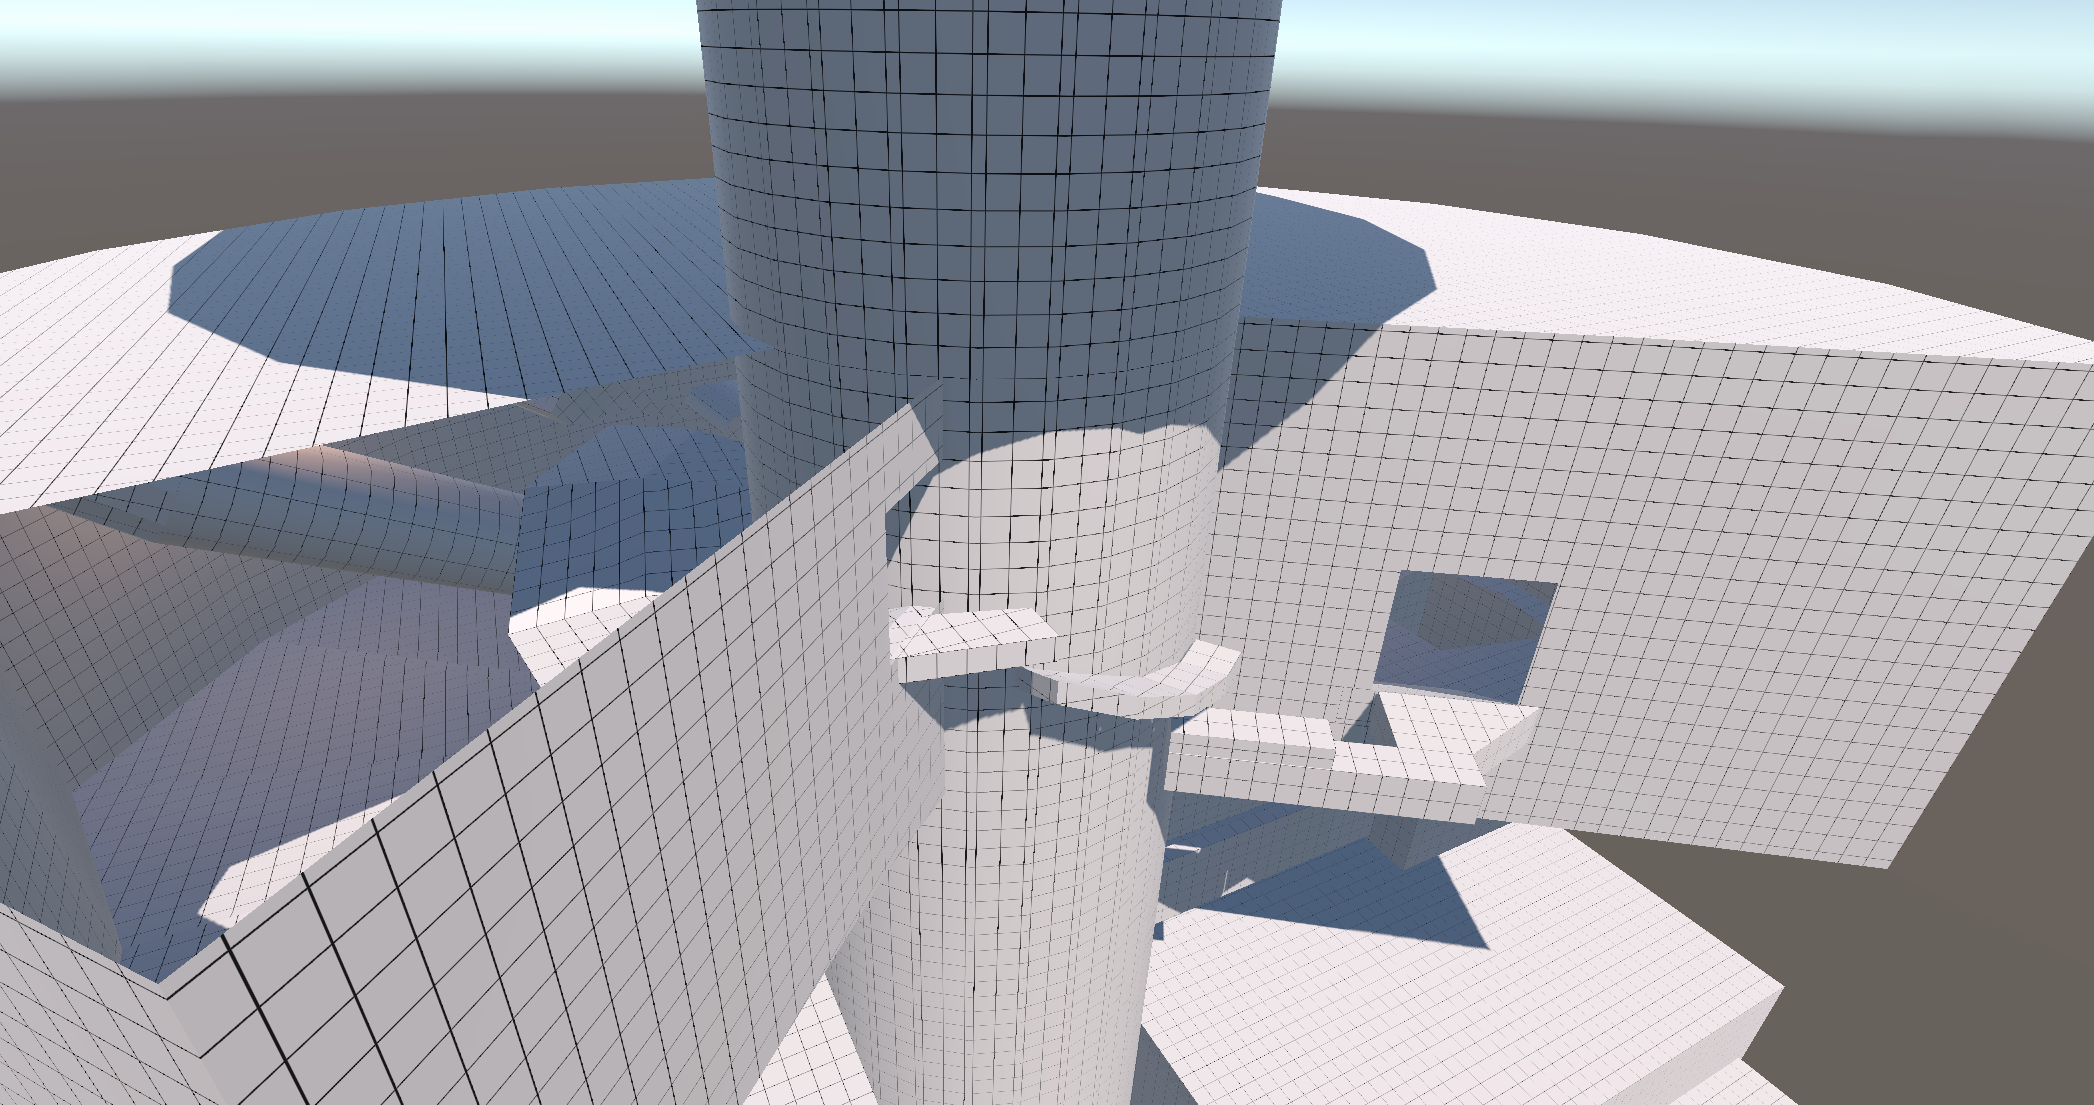
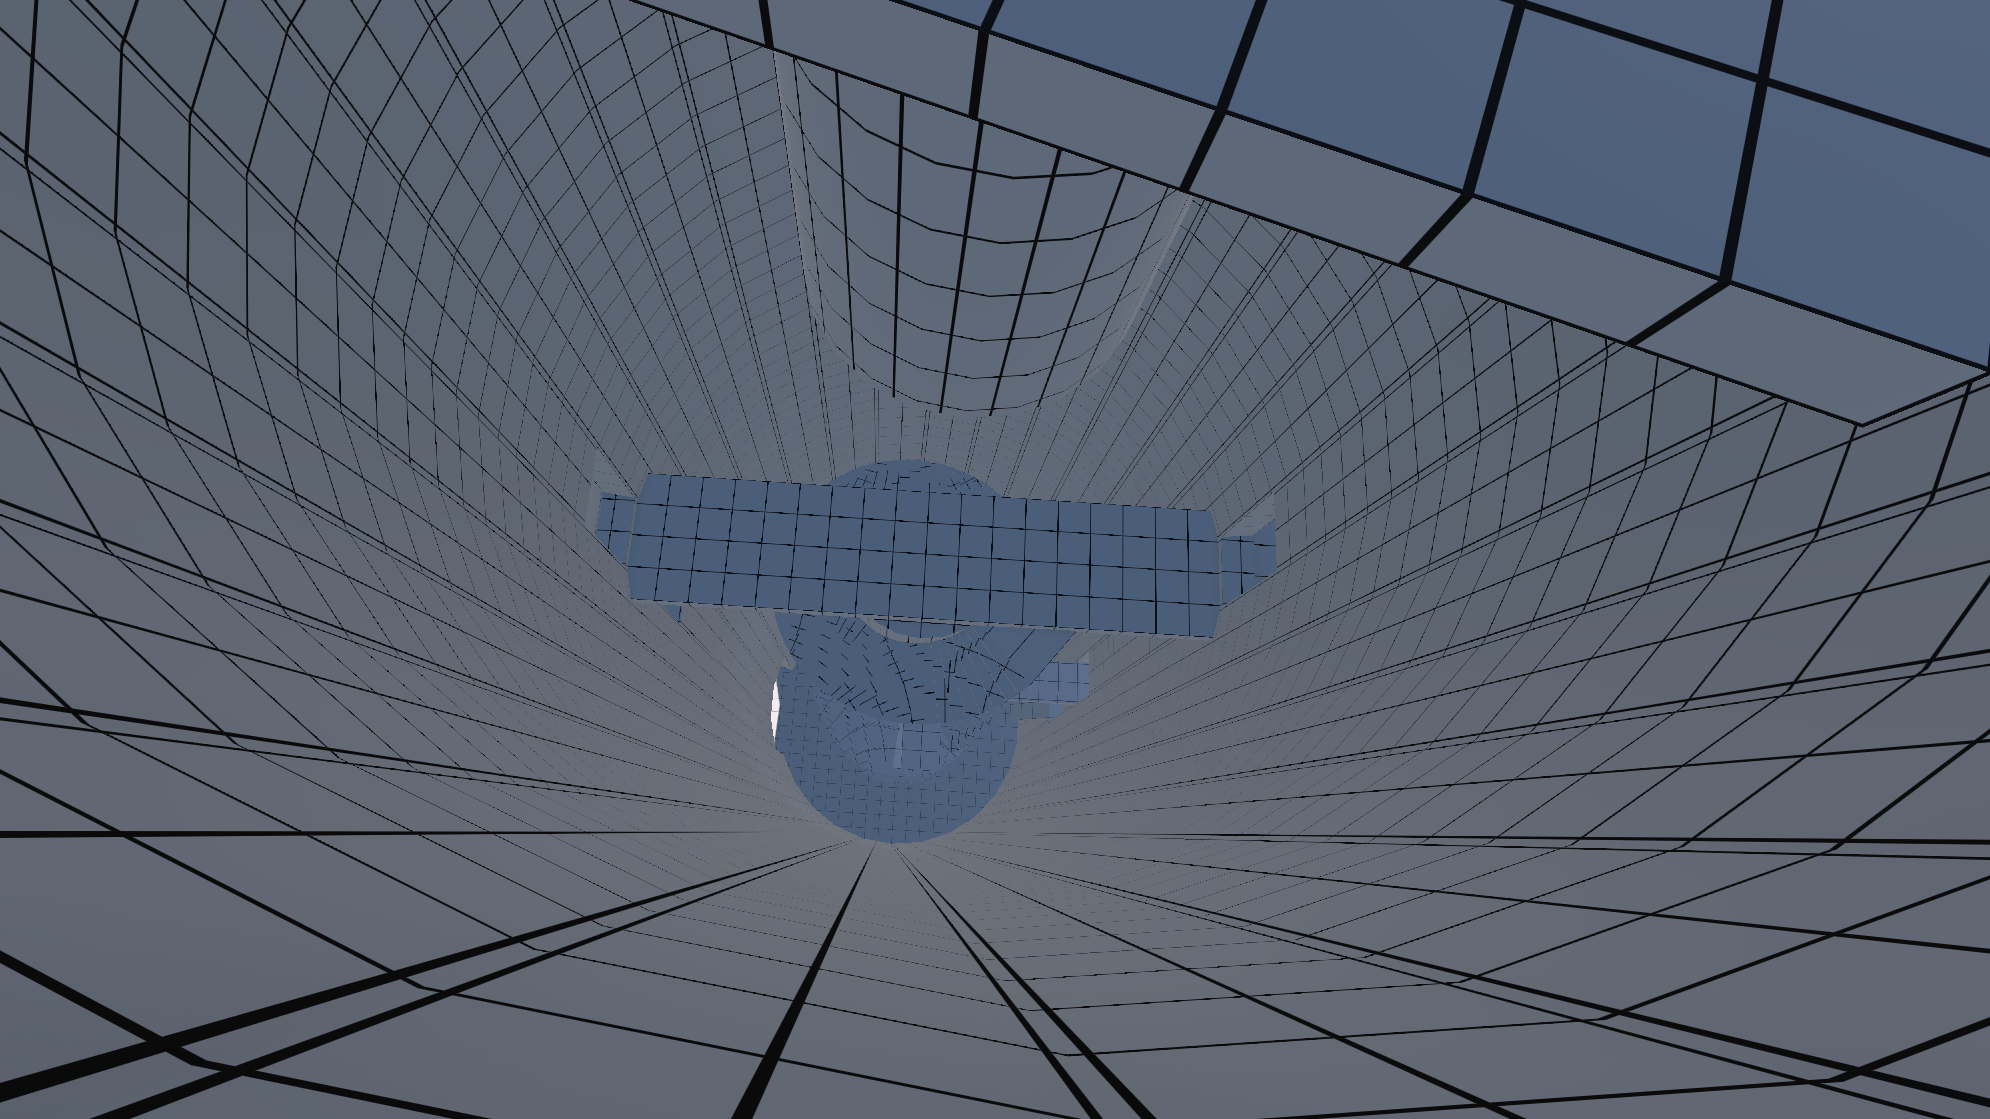
Game Scene
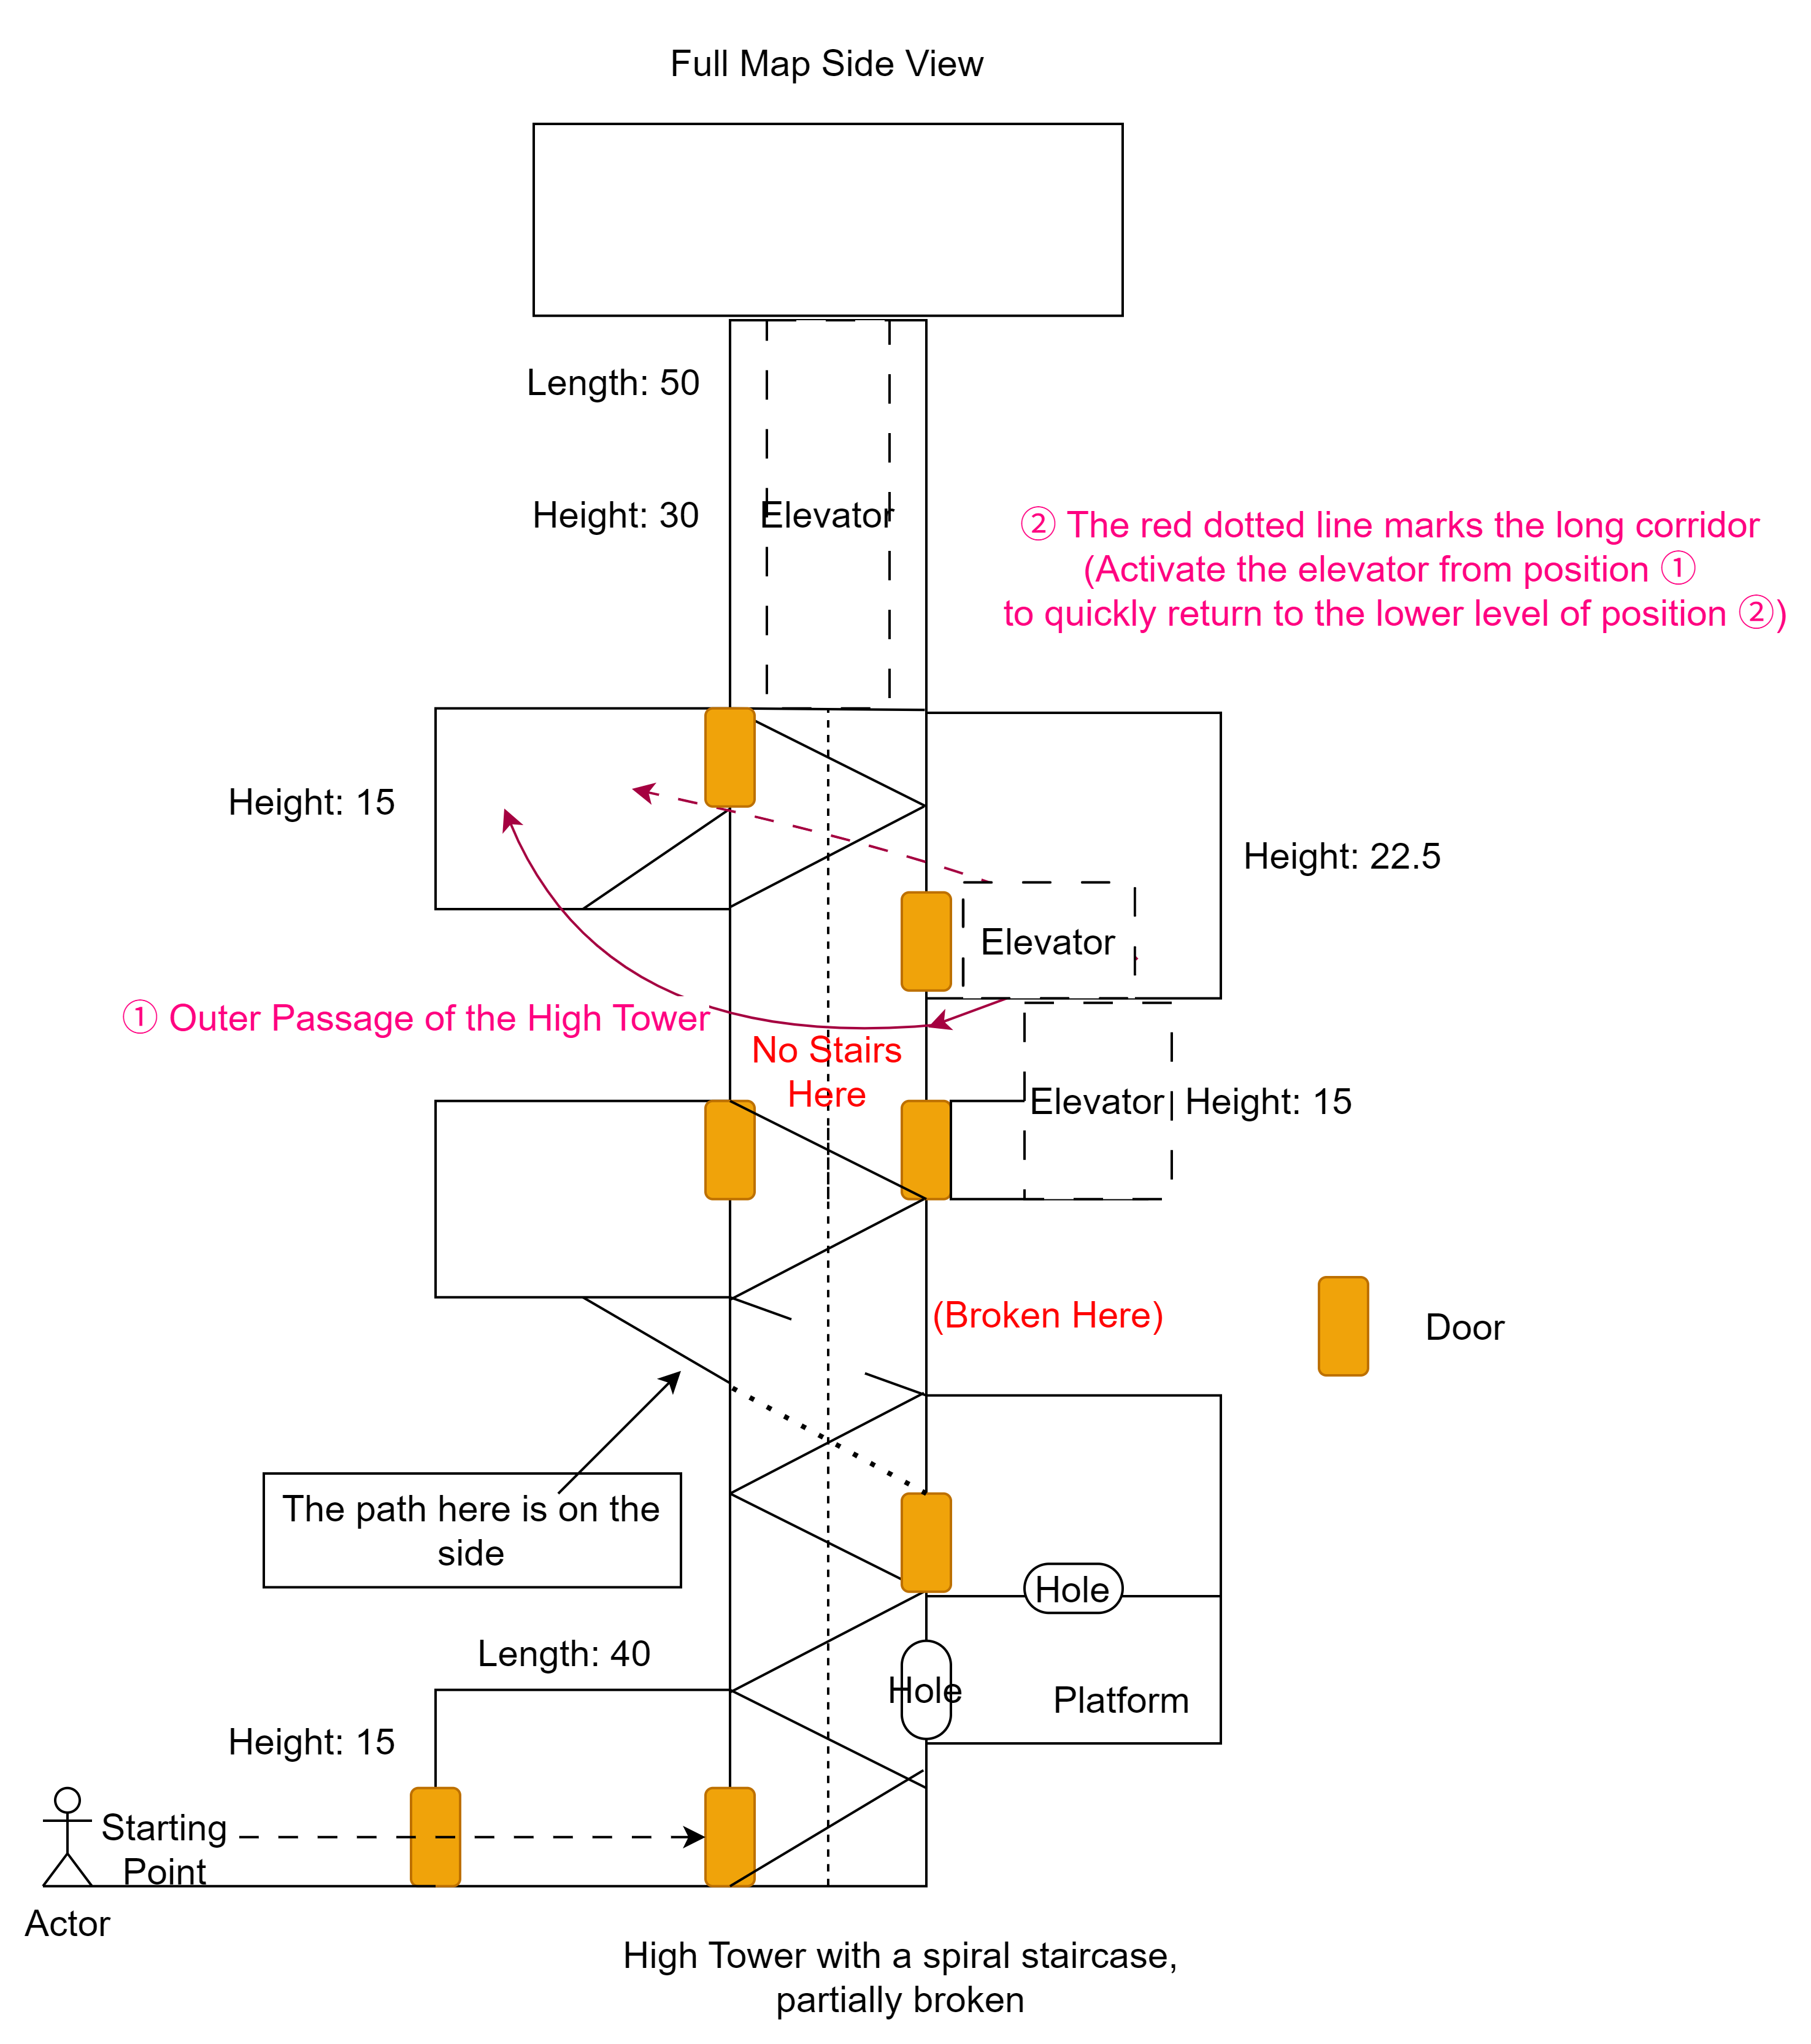
Vertical tower structure drives combat pacing
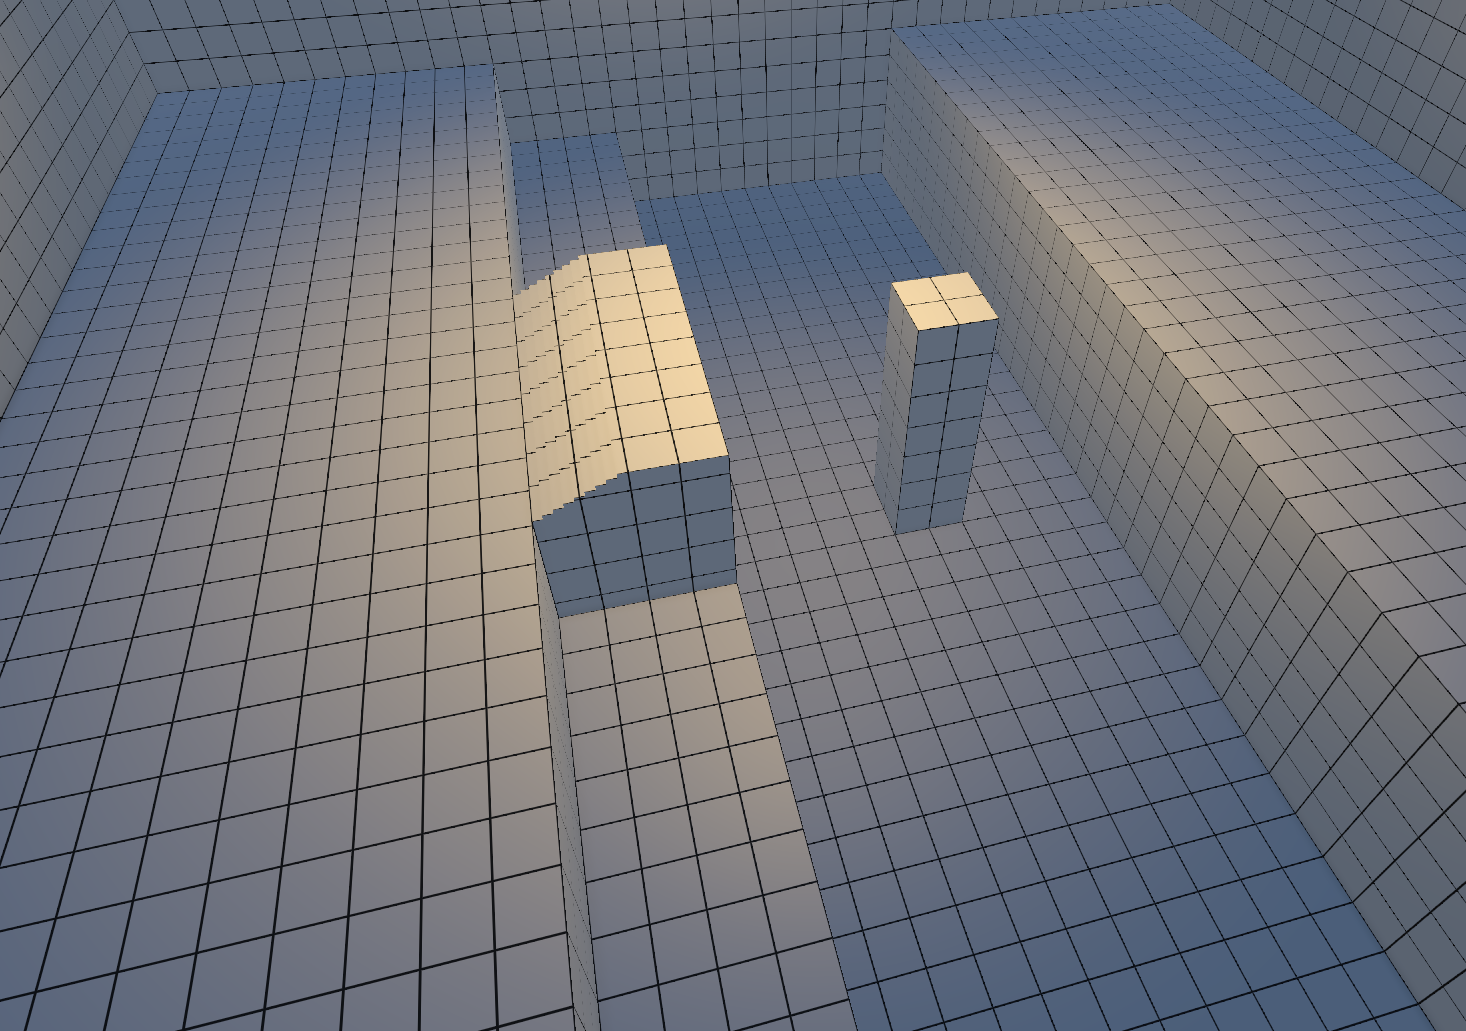
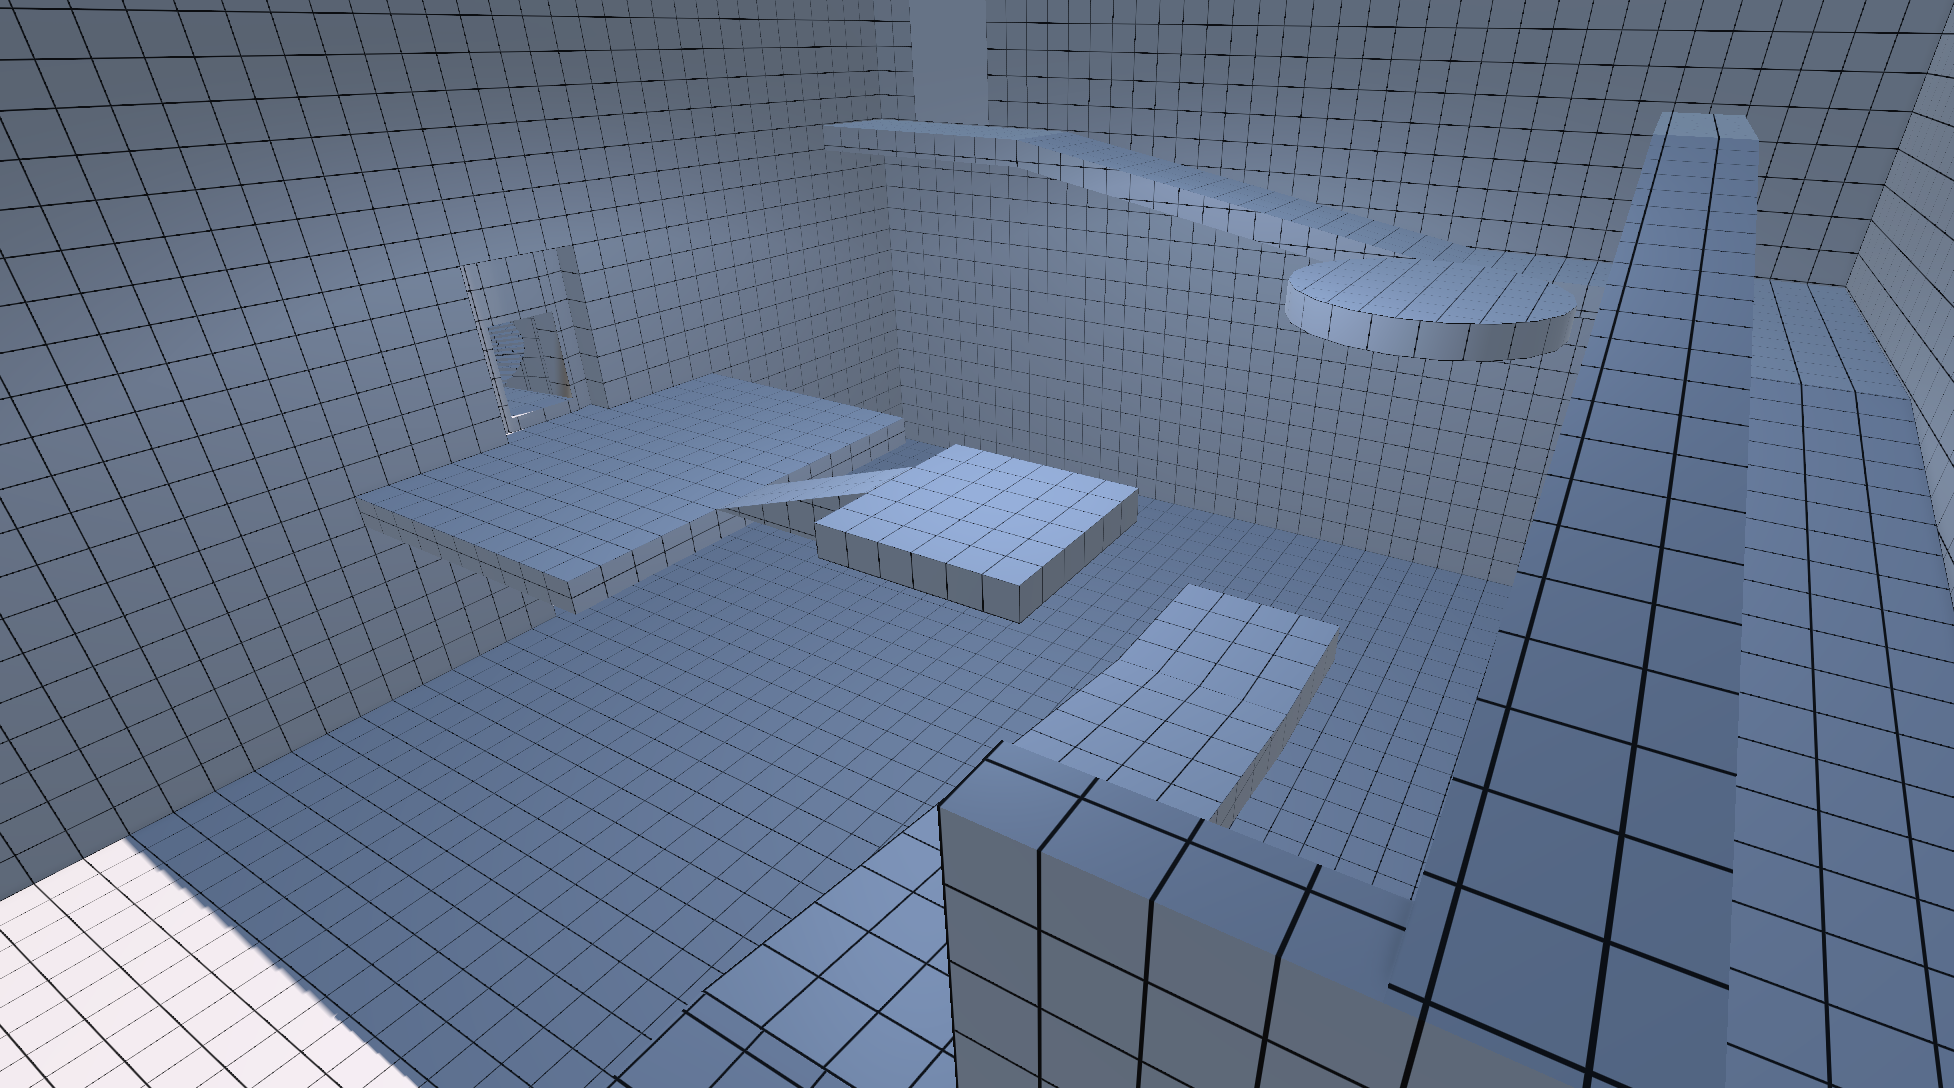
The scene revolves around an upward-progressing tower-climbing structure, using interior combat spaces, outer bypass routes, and elevation changes to prevent the whitebox level from having only a single path.
UI Design
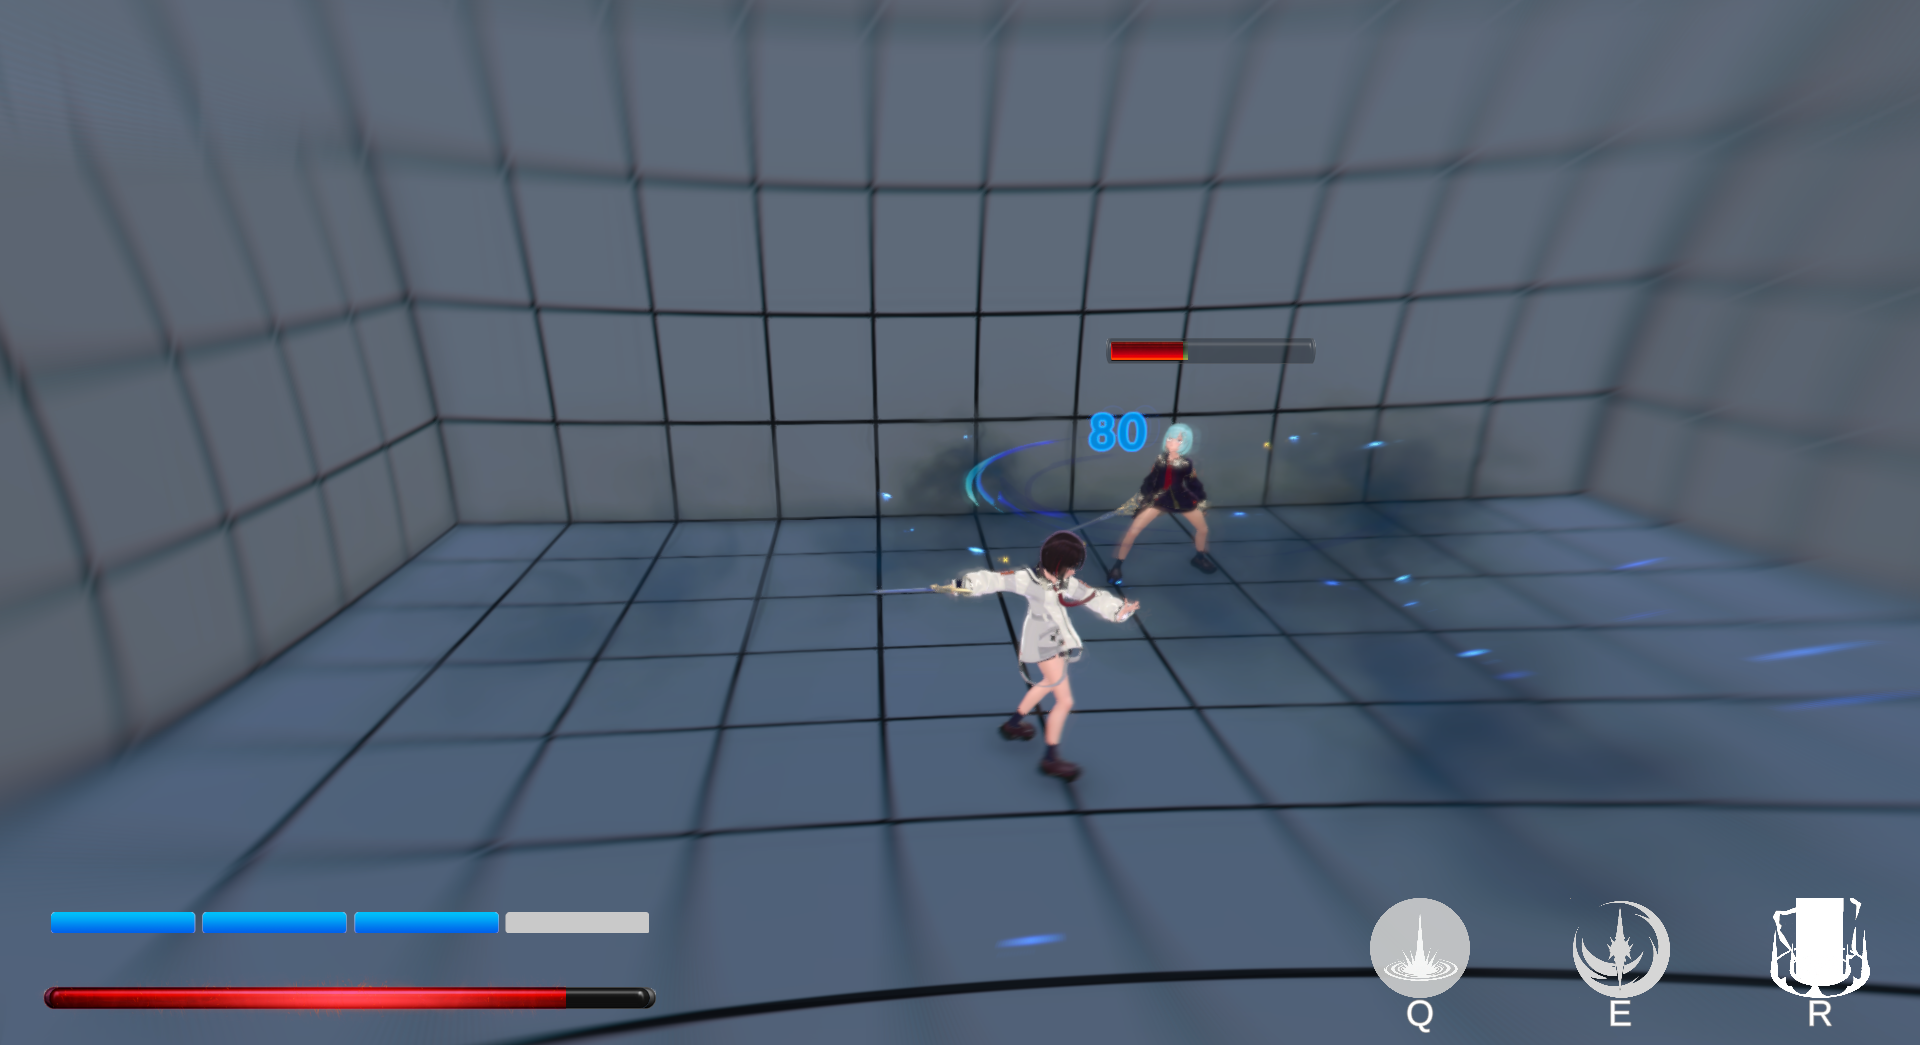
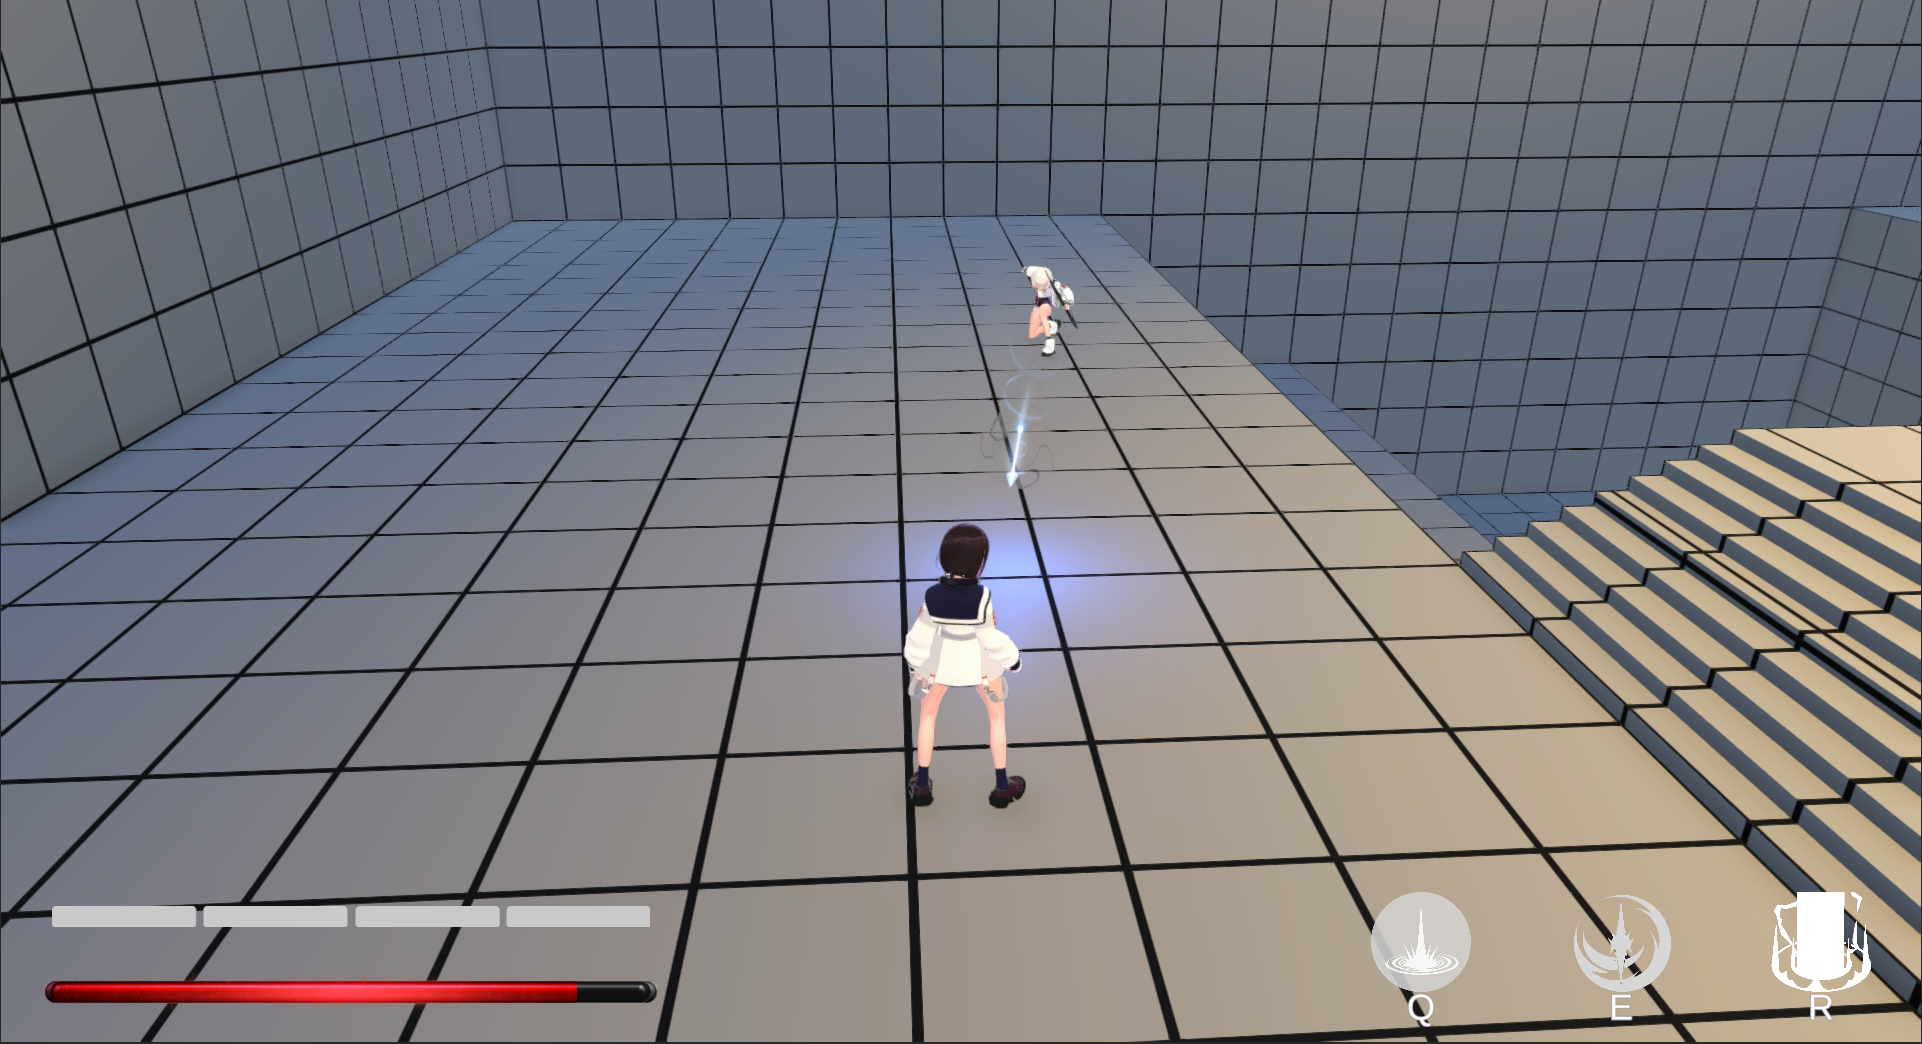
| Resource Gauge / Bar (HP) | 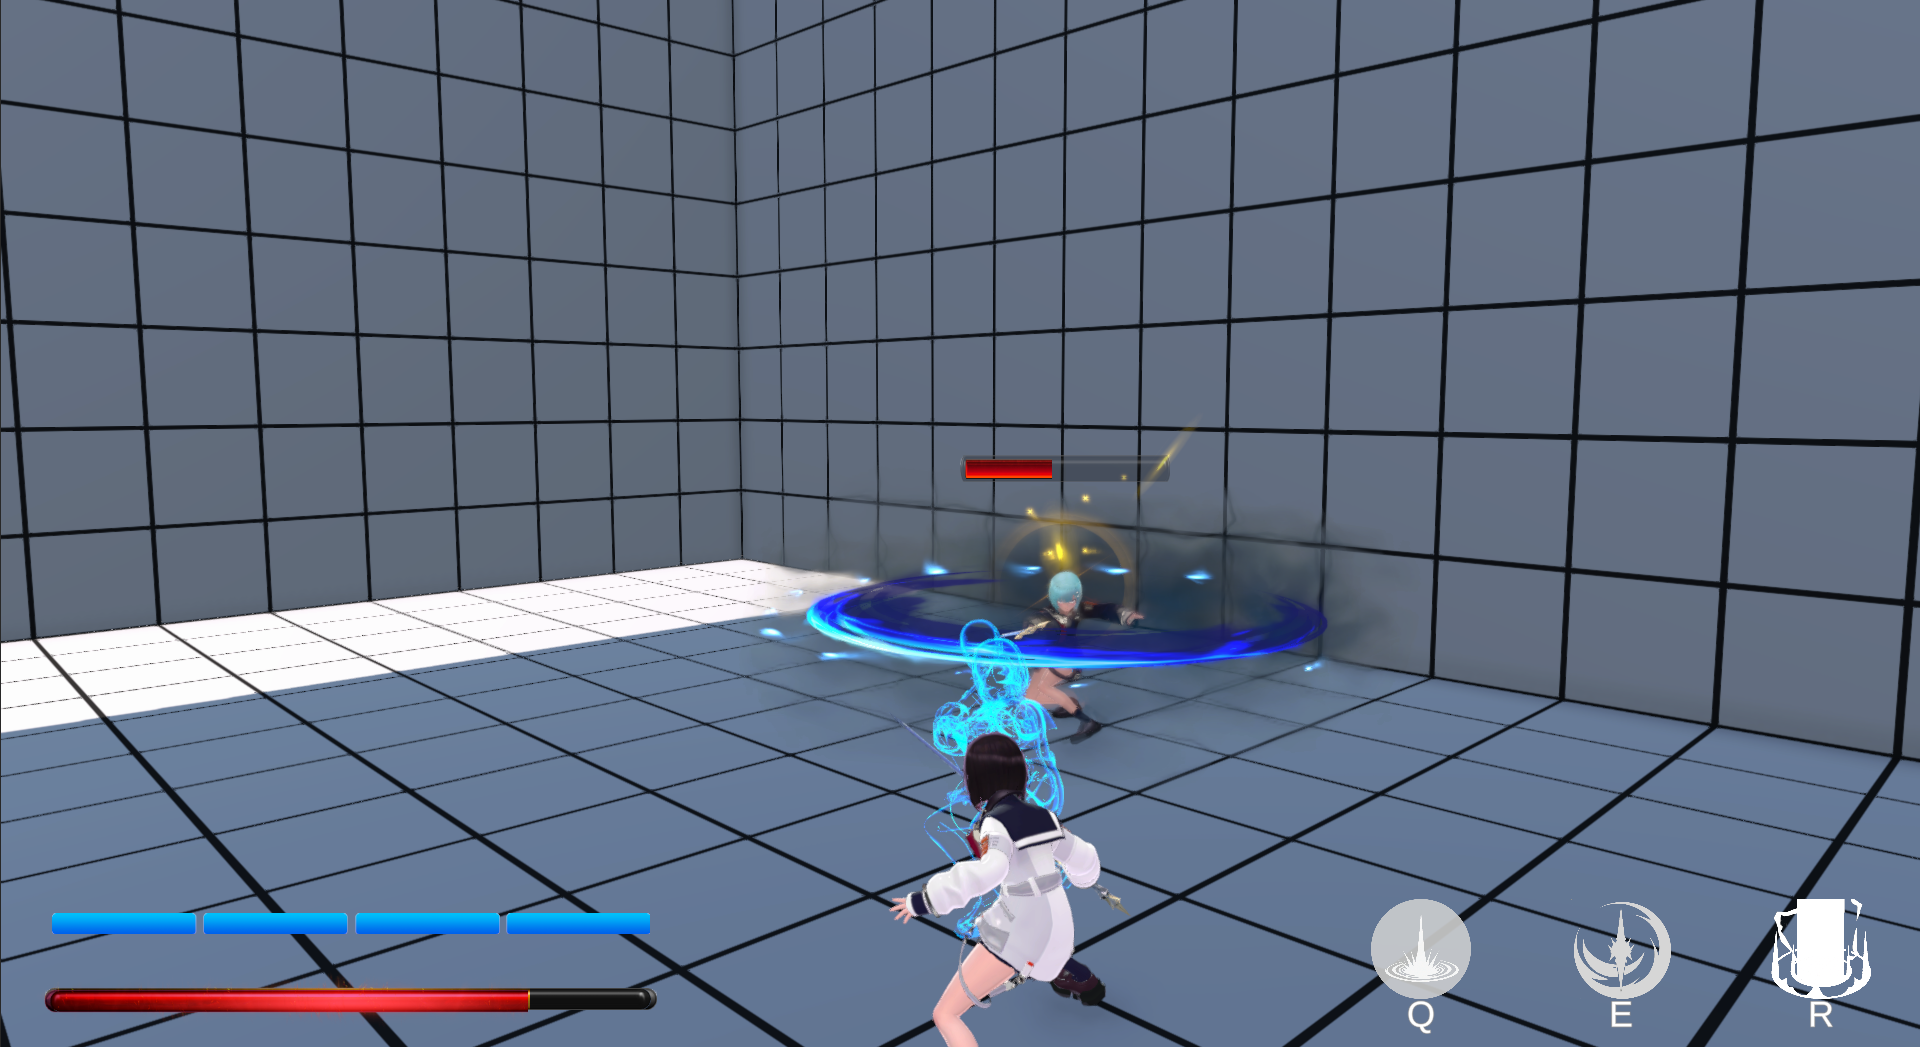 |
Three skill icons (Q / E / R) in the UI:
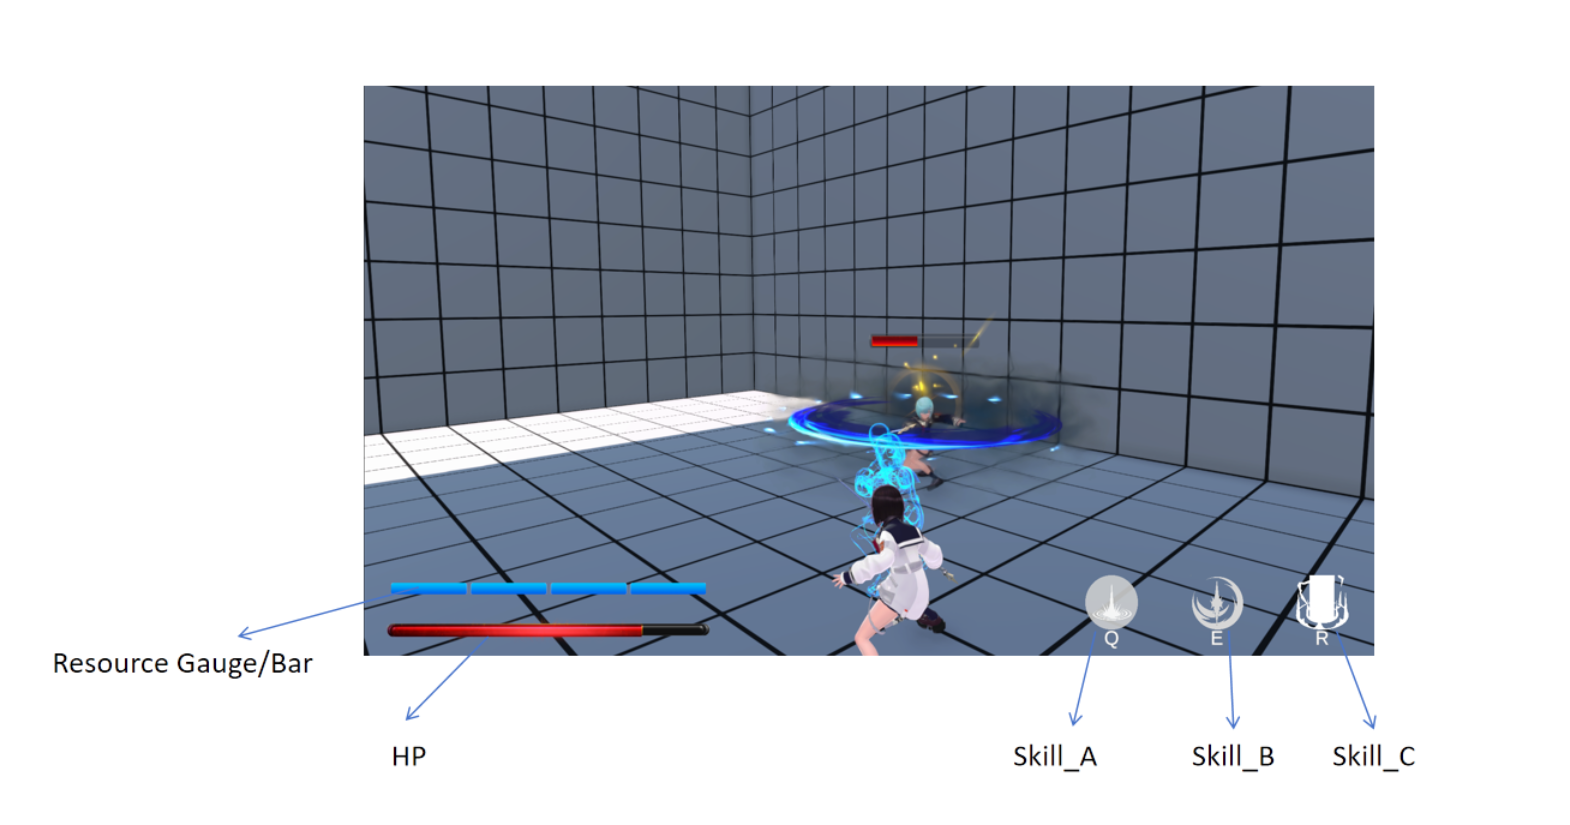
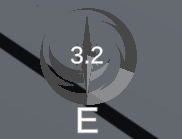
Skill is currently on cooldown, and the icon is grayed out.
Interactions
- Movement: Controlled via W/A/S/D keys
- Jump: Press the Spacebar
- Normal Attack: Click the Left Mouse Button
- Dodge: Right Mouse Button or Shift Key
- Skills: Q, E, and R keys correspond to three distinct skills respectively
Gameplay
Game Objective
Defeat all enemies in each area, explore the surroundings, and press forward toward the final destination.
Game Flow
Explore the area → Engage in combat with enemies → Proceed to the next area → Repeat exploration and combat → Confront and defeat the area boss
Mechanics
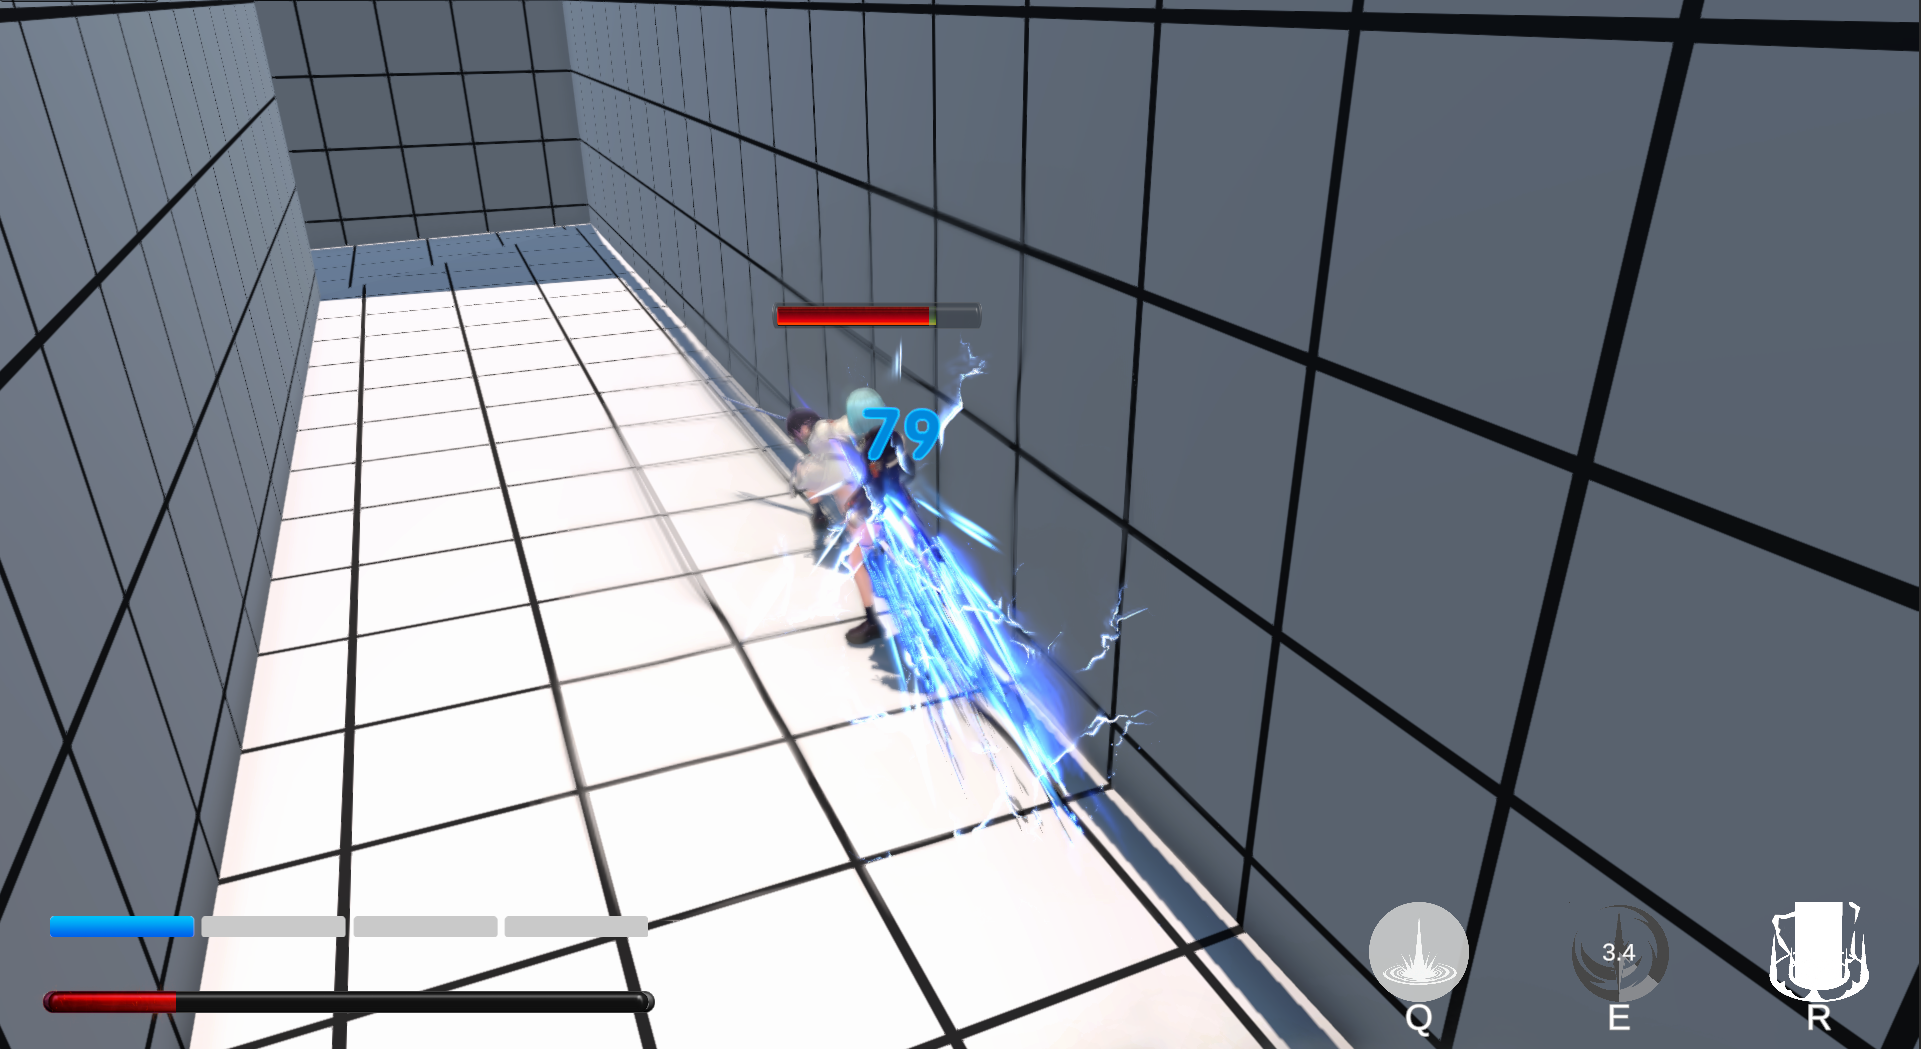
Perfect Dodge
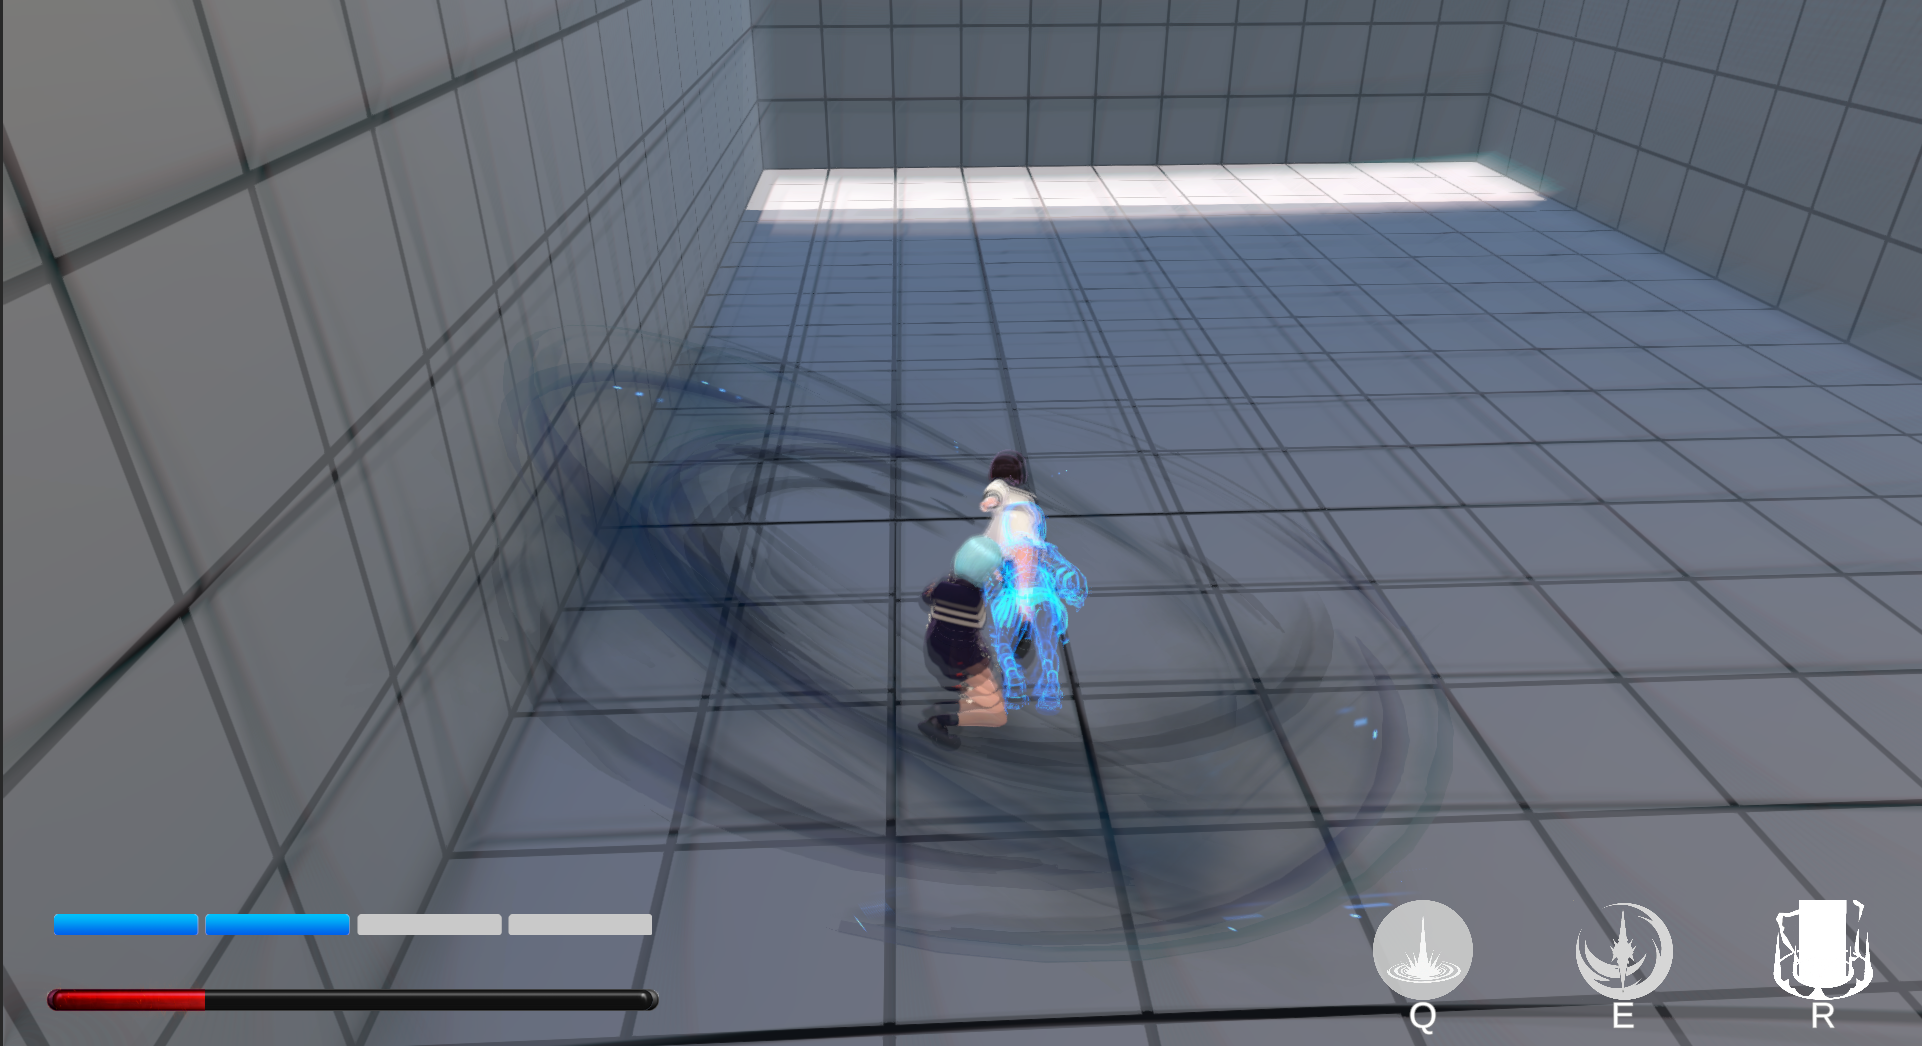
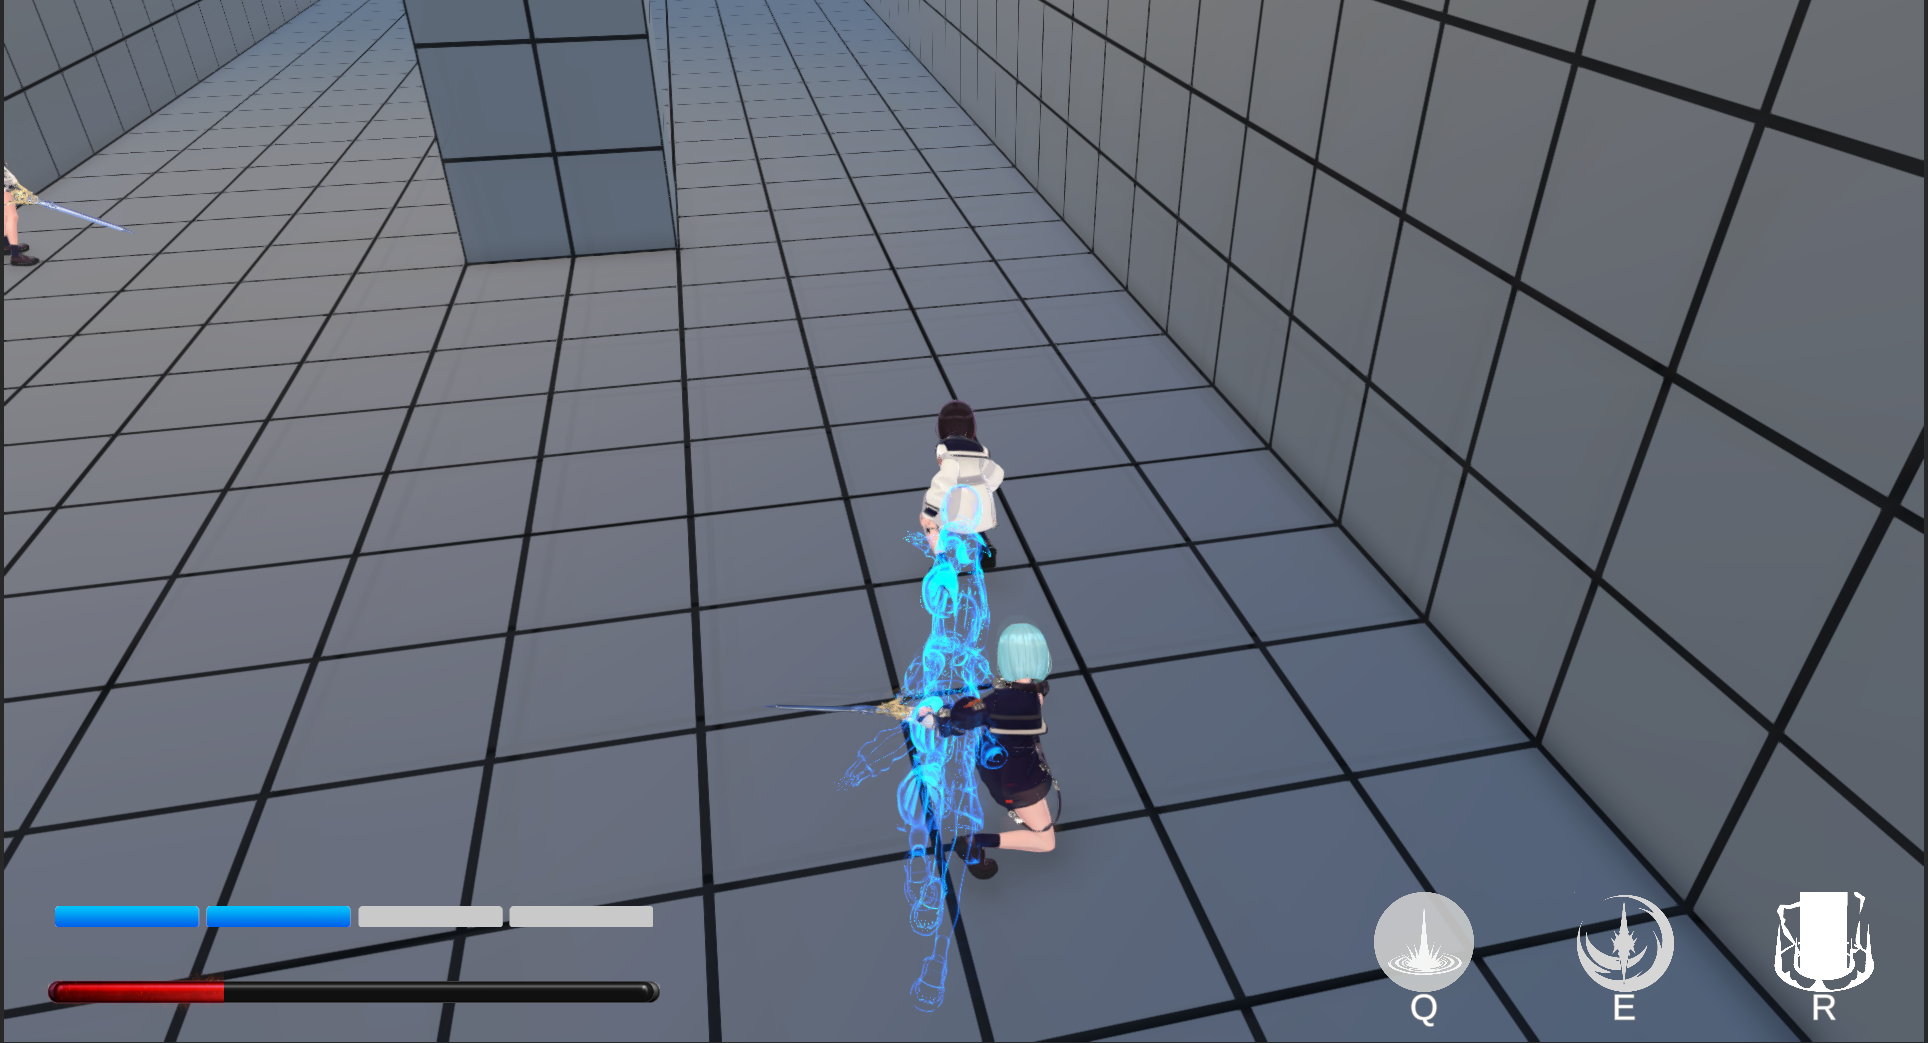
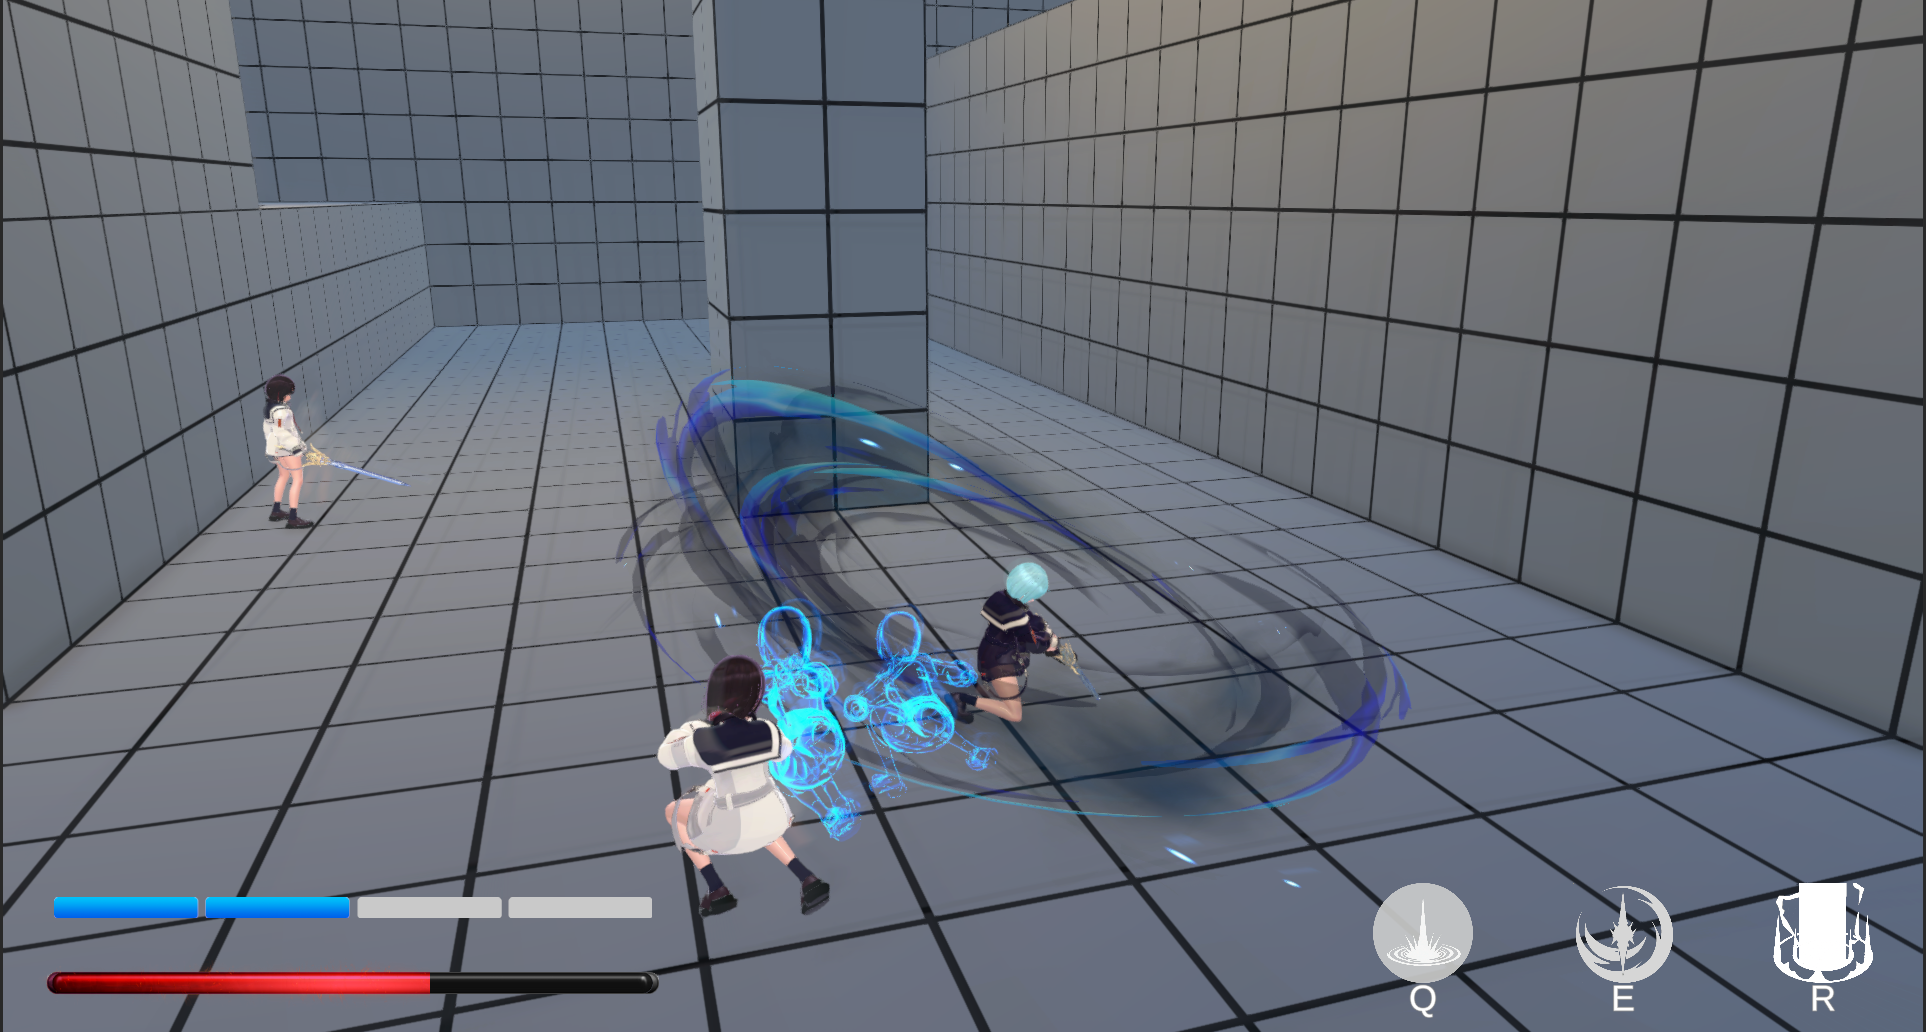
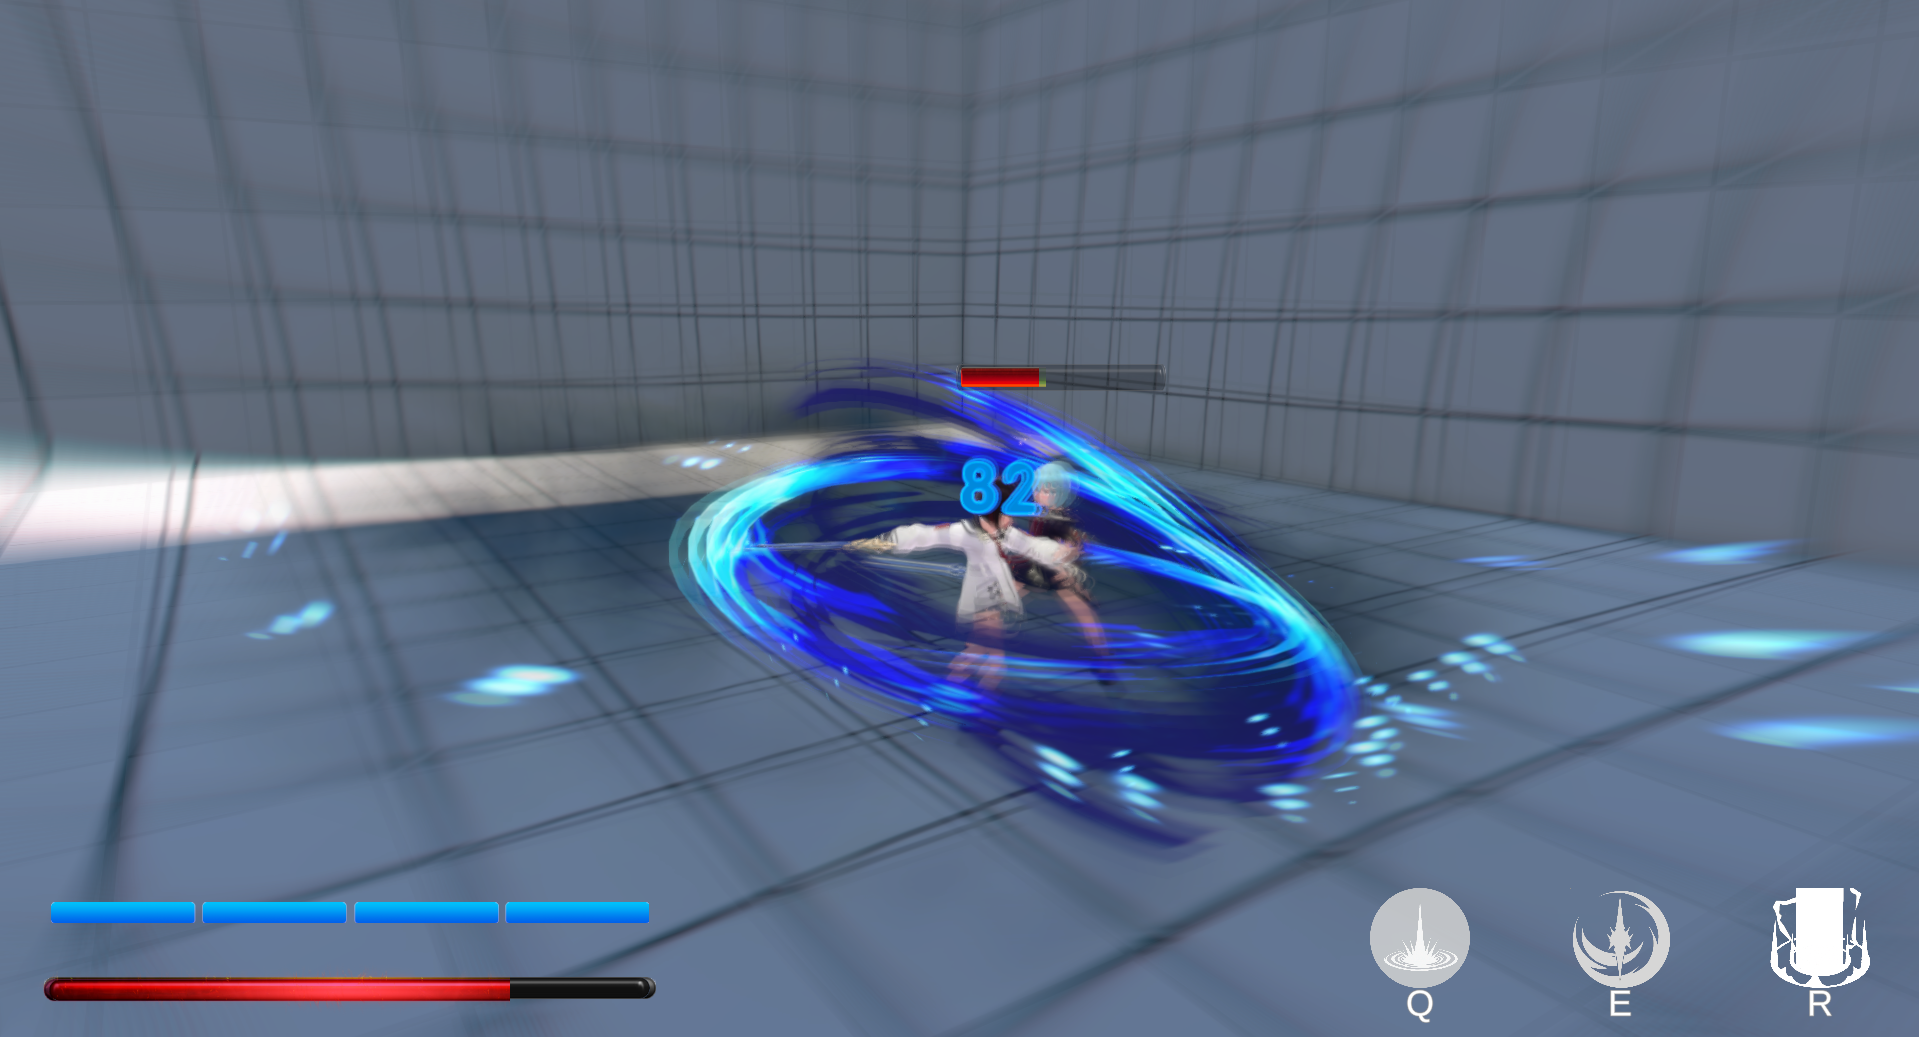
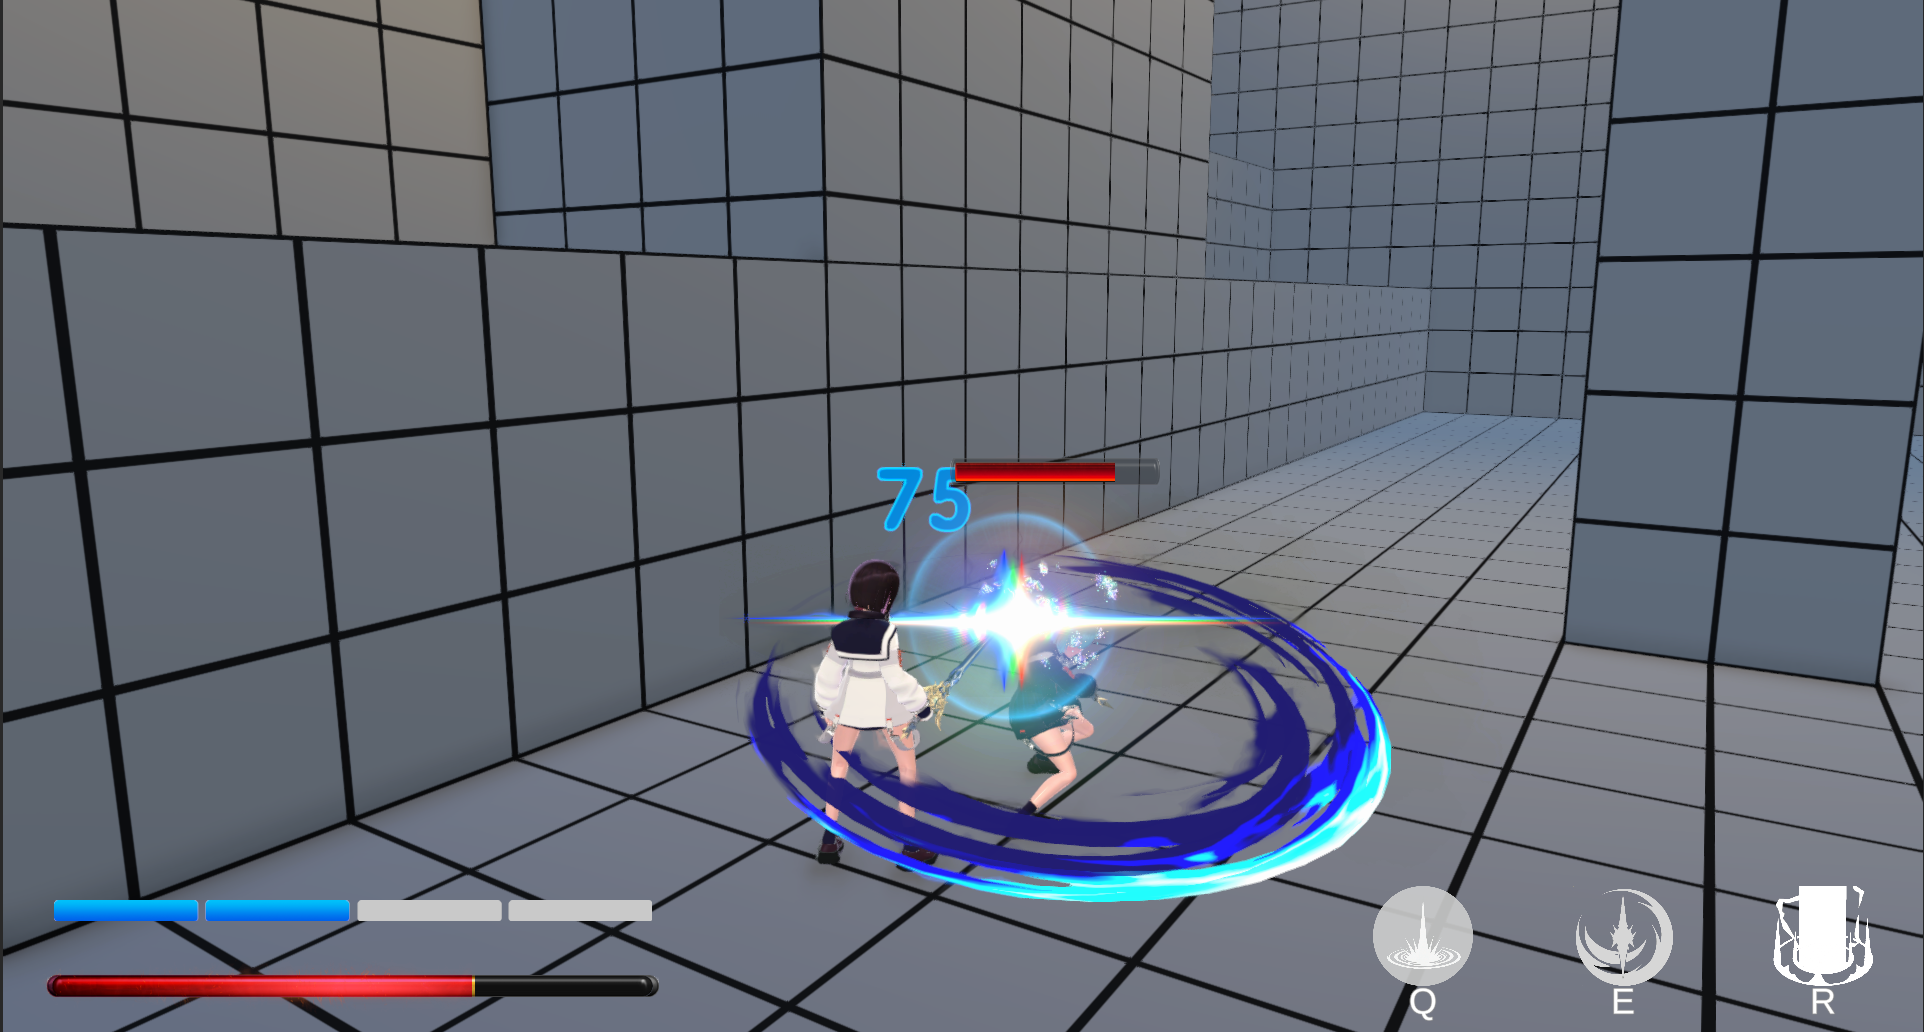
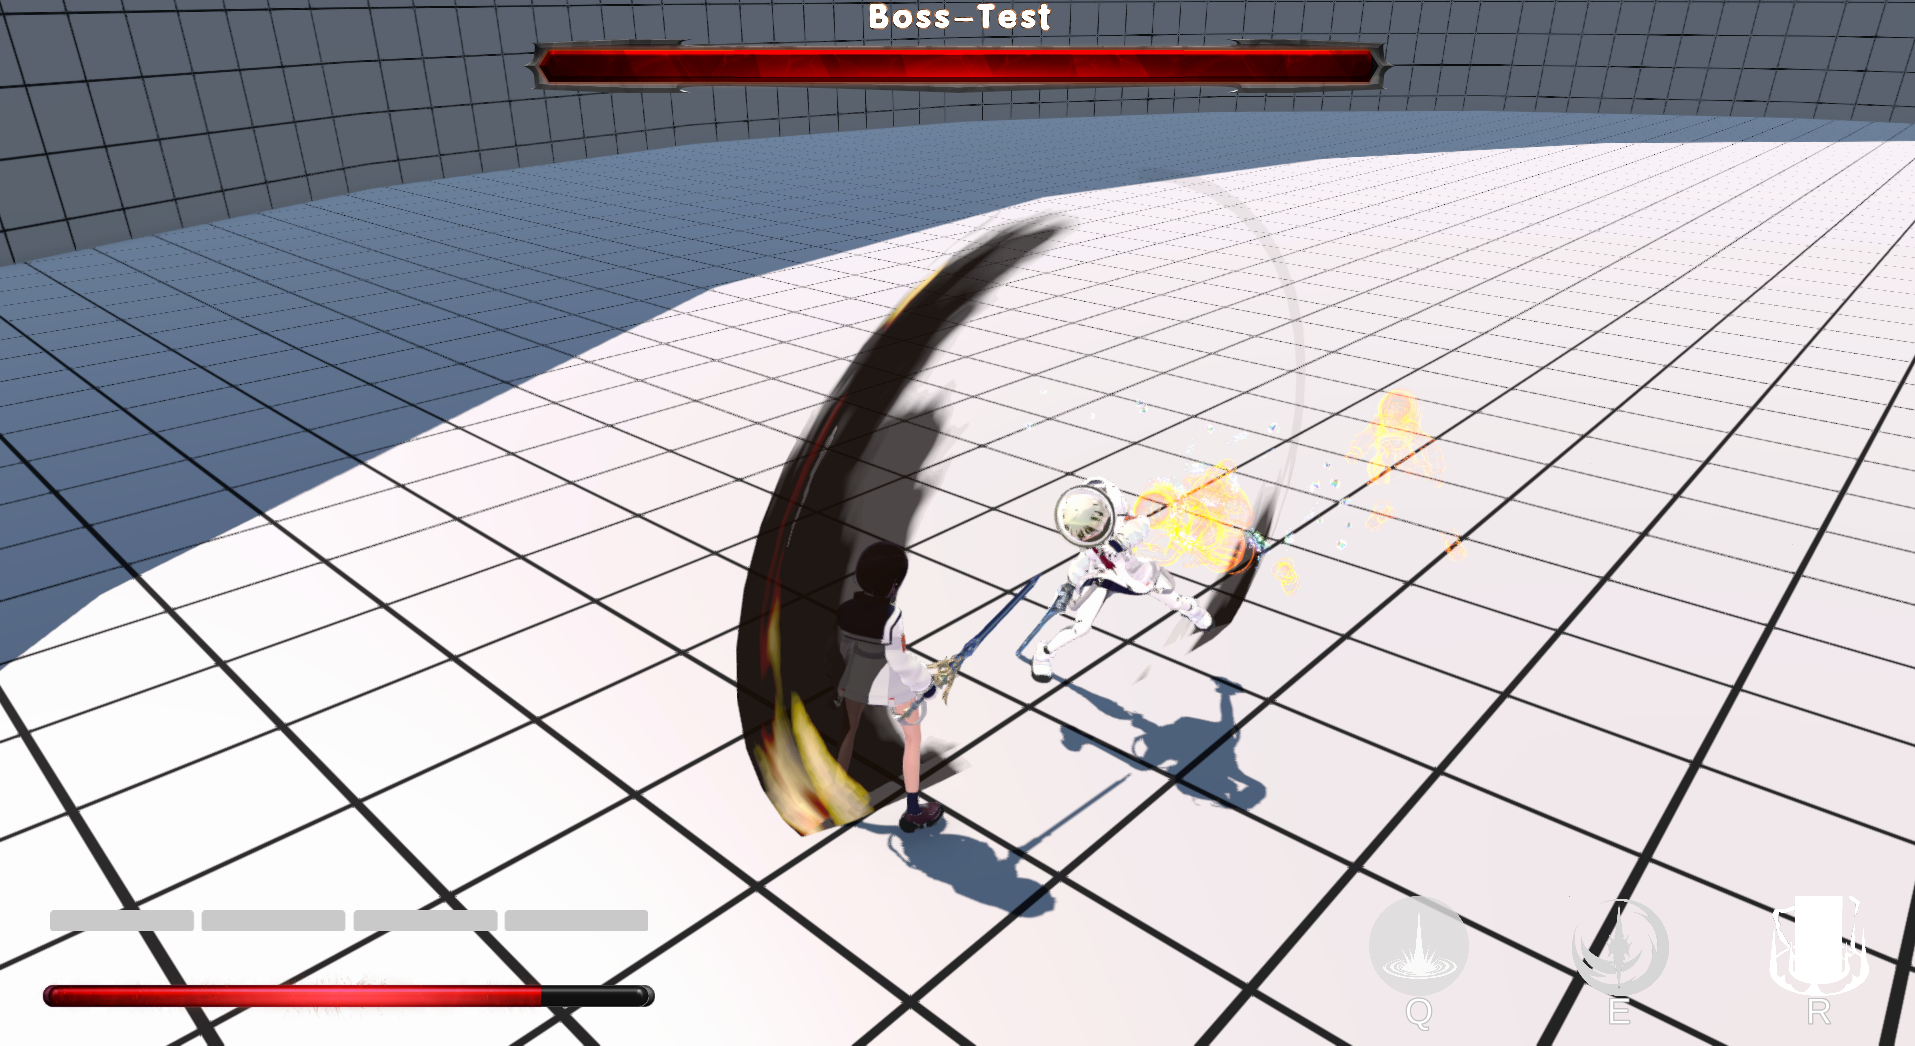
Dodging is subject to a usage limit: players can dodge only twice within a given timeframe, after which a cooldown period activates where dodging is temporarily unavailable. Most enemy attacks can be dodged, and evading at a precise moment triggers a Perfect Dodge. This maneuver activates time slowdown, refreshes the dodge count, and visual cues such as afterimage effects and radial blur will appear on screen. These design choices encourage players to execute precise dodges rather than spamming the dodge button recklessly.
 |  |
|---|
Attack Parry
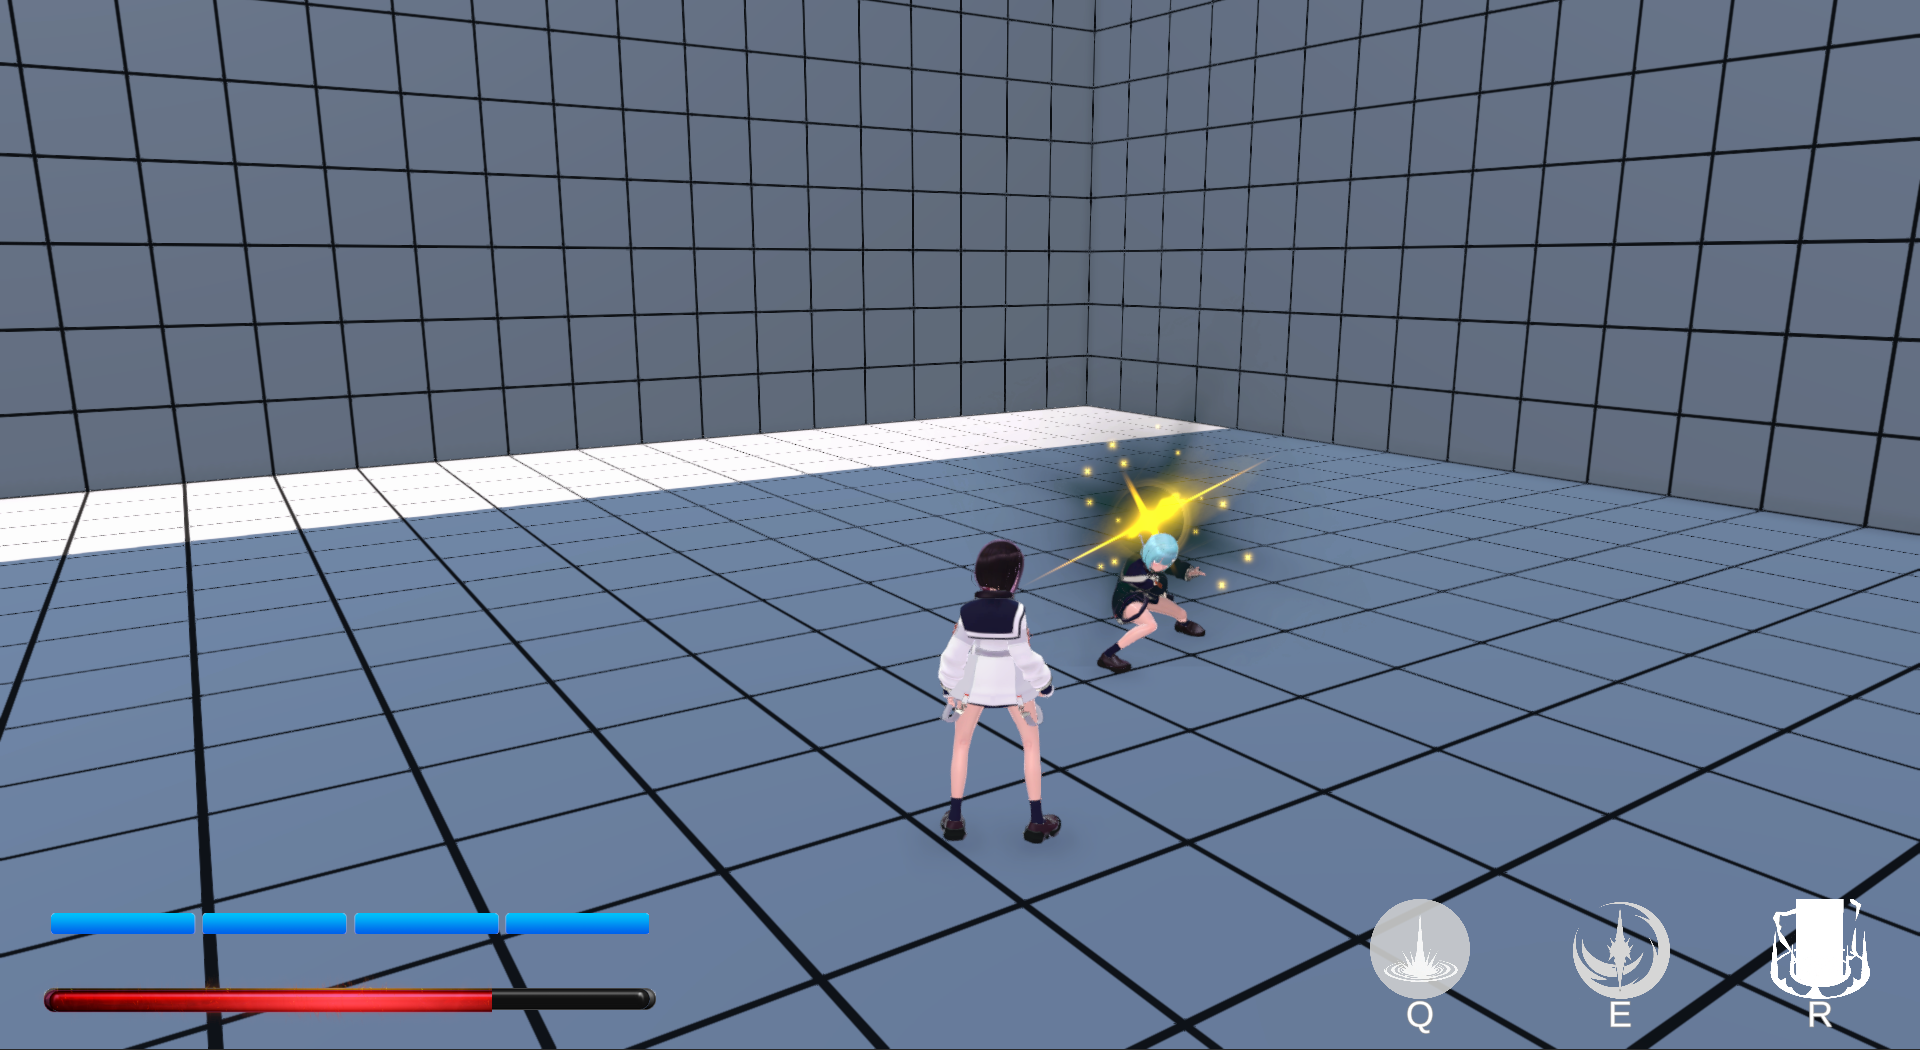
When an enemy flashes yellow right before launching an attack, this specific strike can be parried or blocked with a well-timed counterattack. A successful parry interrupts the enemy’s attack and staggers them. Against enemies with high attack frequency, skillful use of this mechanic can effectively reduce their offensive pressure, allowing players to gain the upper hand in battle.
 |
|---|
State Machine & Combo System
State Machine
The character’s state machine is roughly as follows:
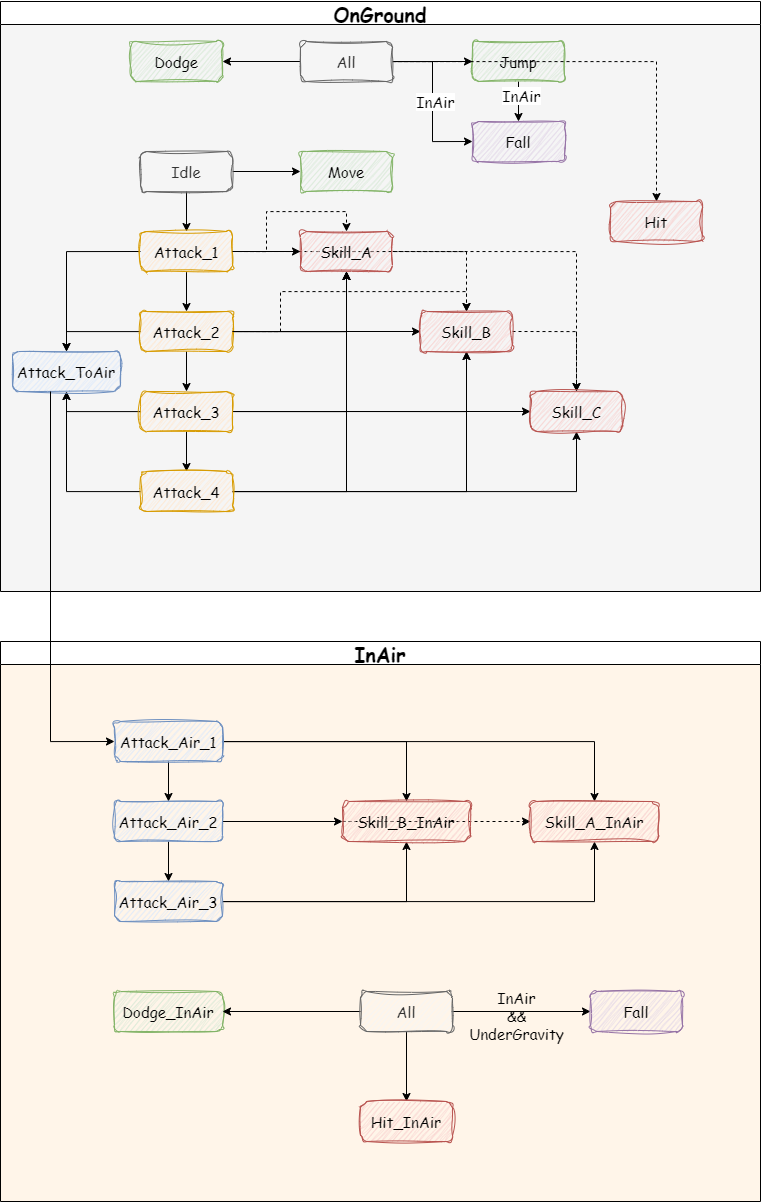
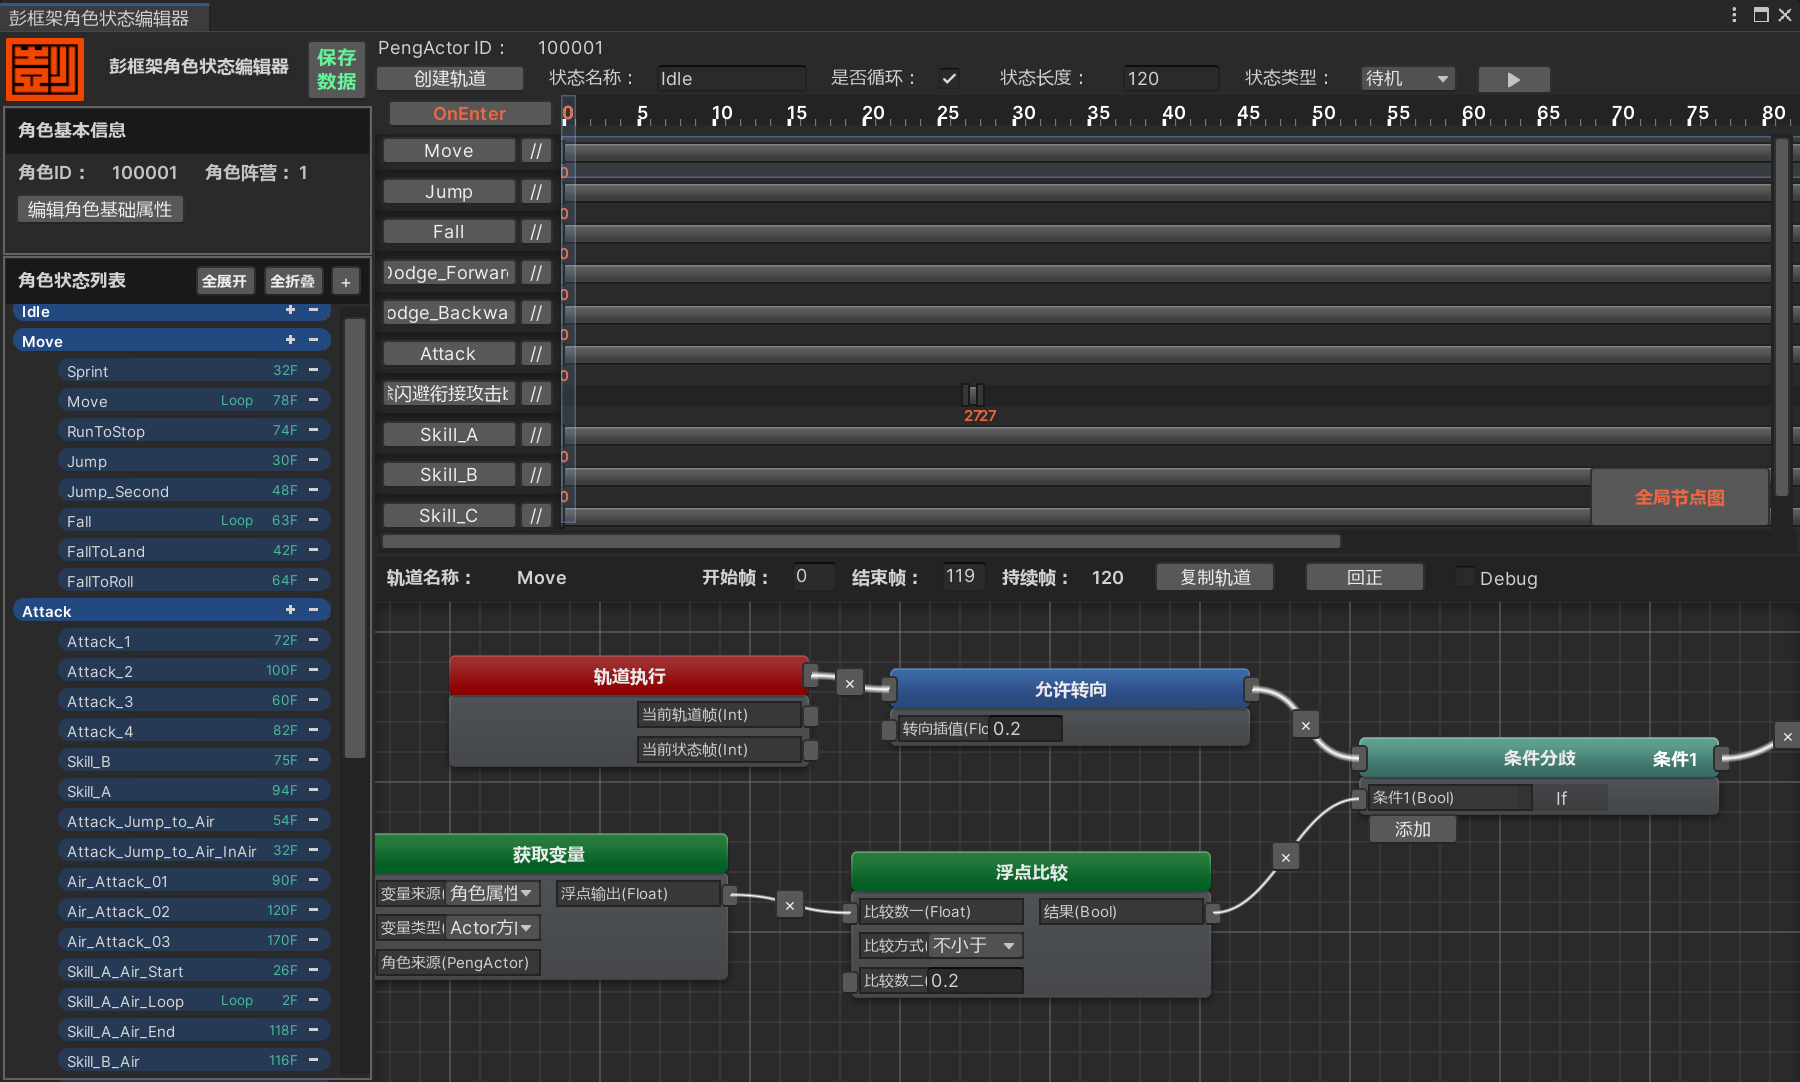 | |
|---|---|
| Outline of the State Machine | State Editor |
Combos
Ground State
- Left Mouse Button → Left Mouse Button → Left Mouse Button → Left Mouse Button → Hold Left Mouse Button (launches the character into the air, switching to Airborne State)
- Hold Left Mouse Button can be interjected at any point during the 4-hit combo
- E → Left Mouse Button → Left Mouse Button → Hold Left Mouse Button (launches into Airborne State)
- Q can be interjected mid-combo
- R can be interjected mid-combo
Airborne State
- Left Mouse Button → Left Mouse Button → Left Mouse Button → Hold Left Mouse Button (lands on the ground, switching to Ground State)
- E → Left Mouse Button → Left Mouse Button → Hold Left Mouse Button
- Q can be interjected mid-combo, followed by a grounded landing
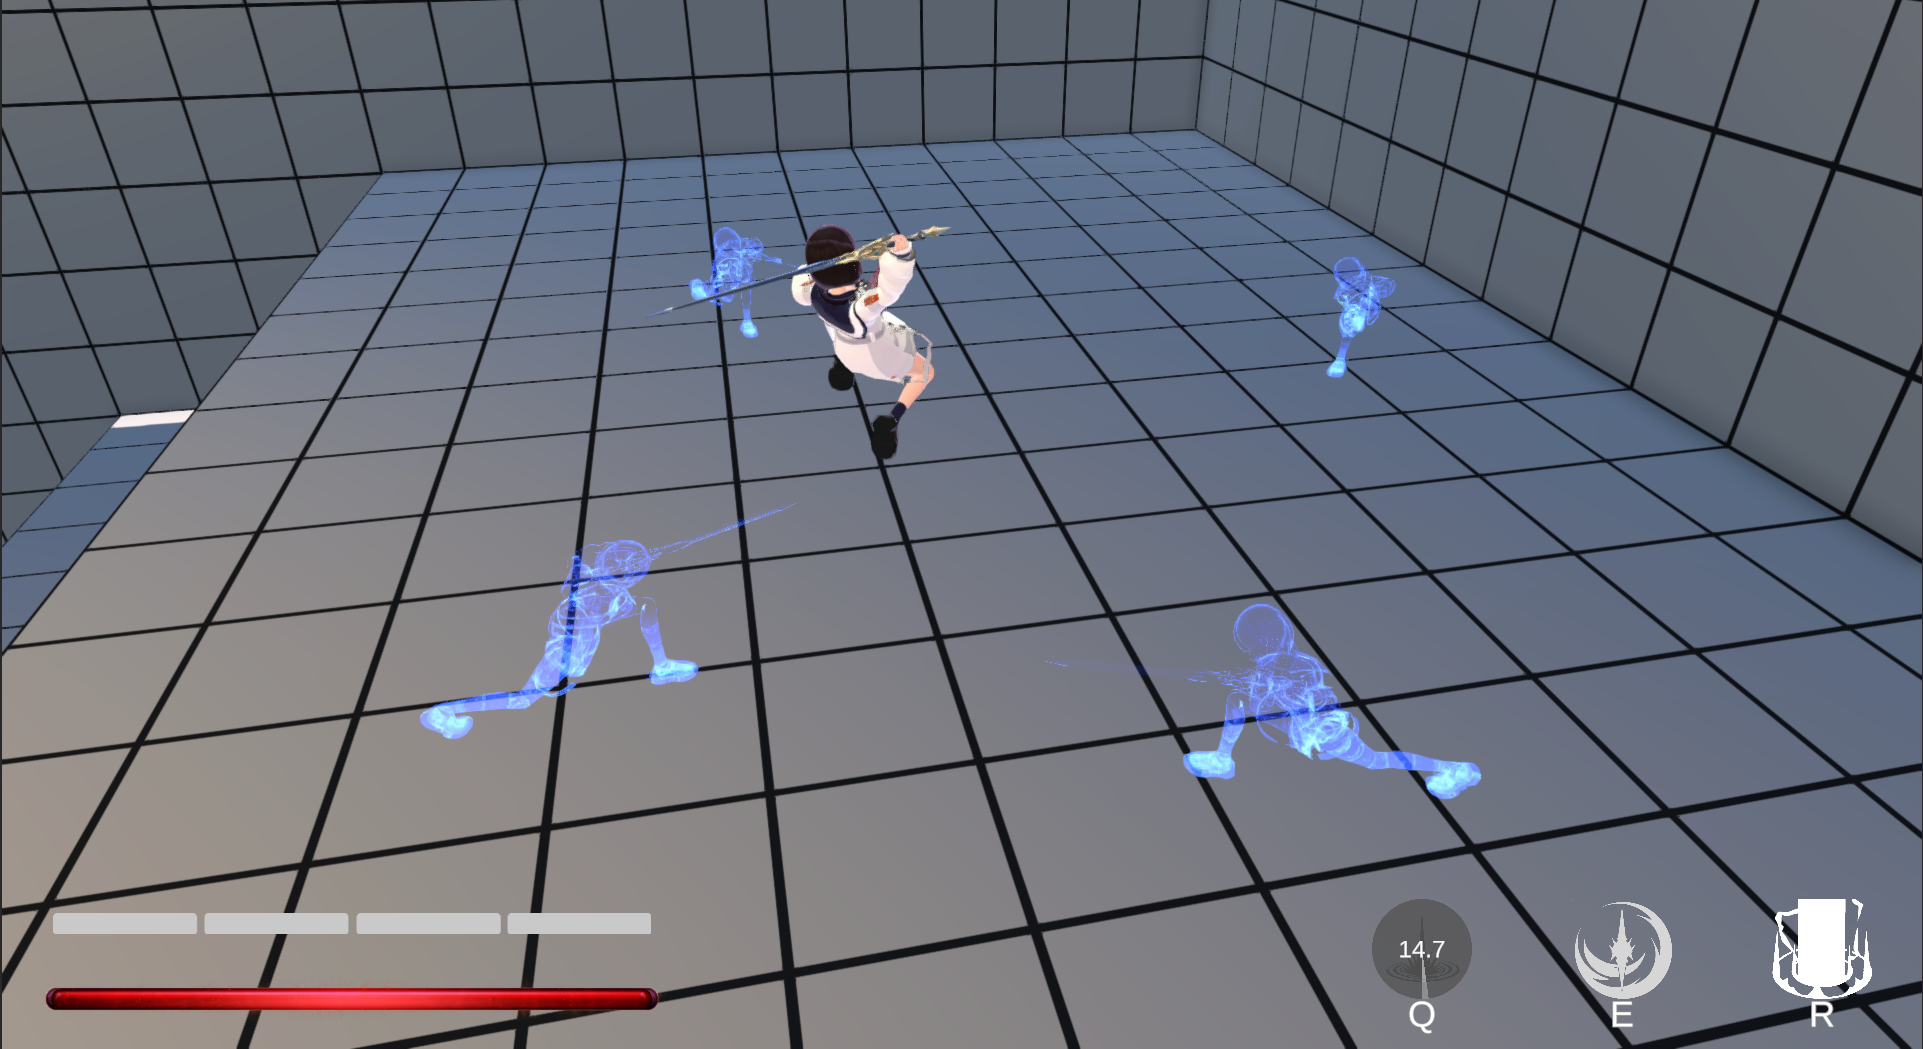
Skill Icons


Resource Bar / Gauge
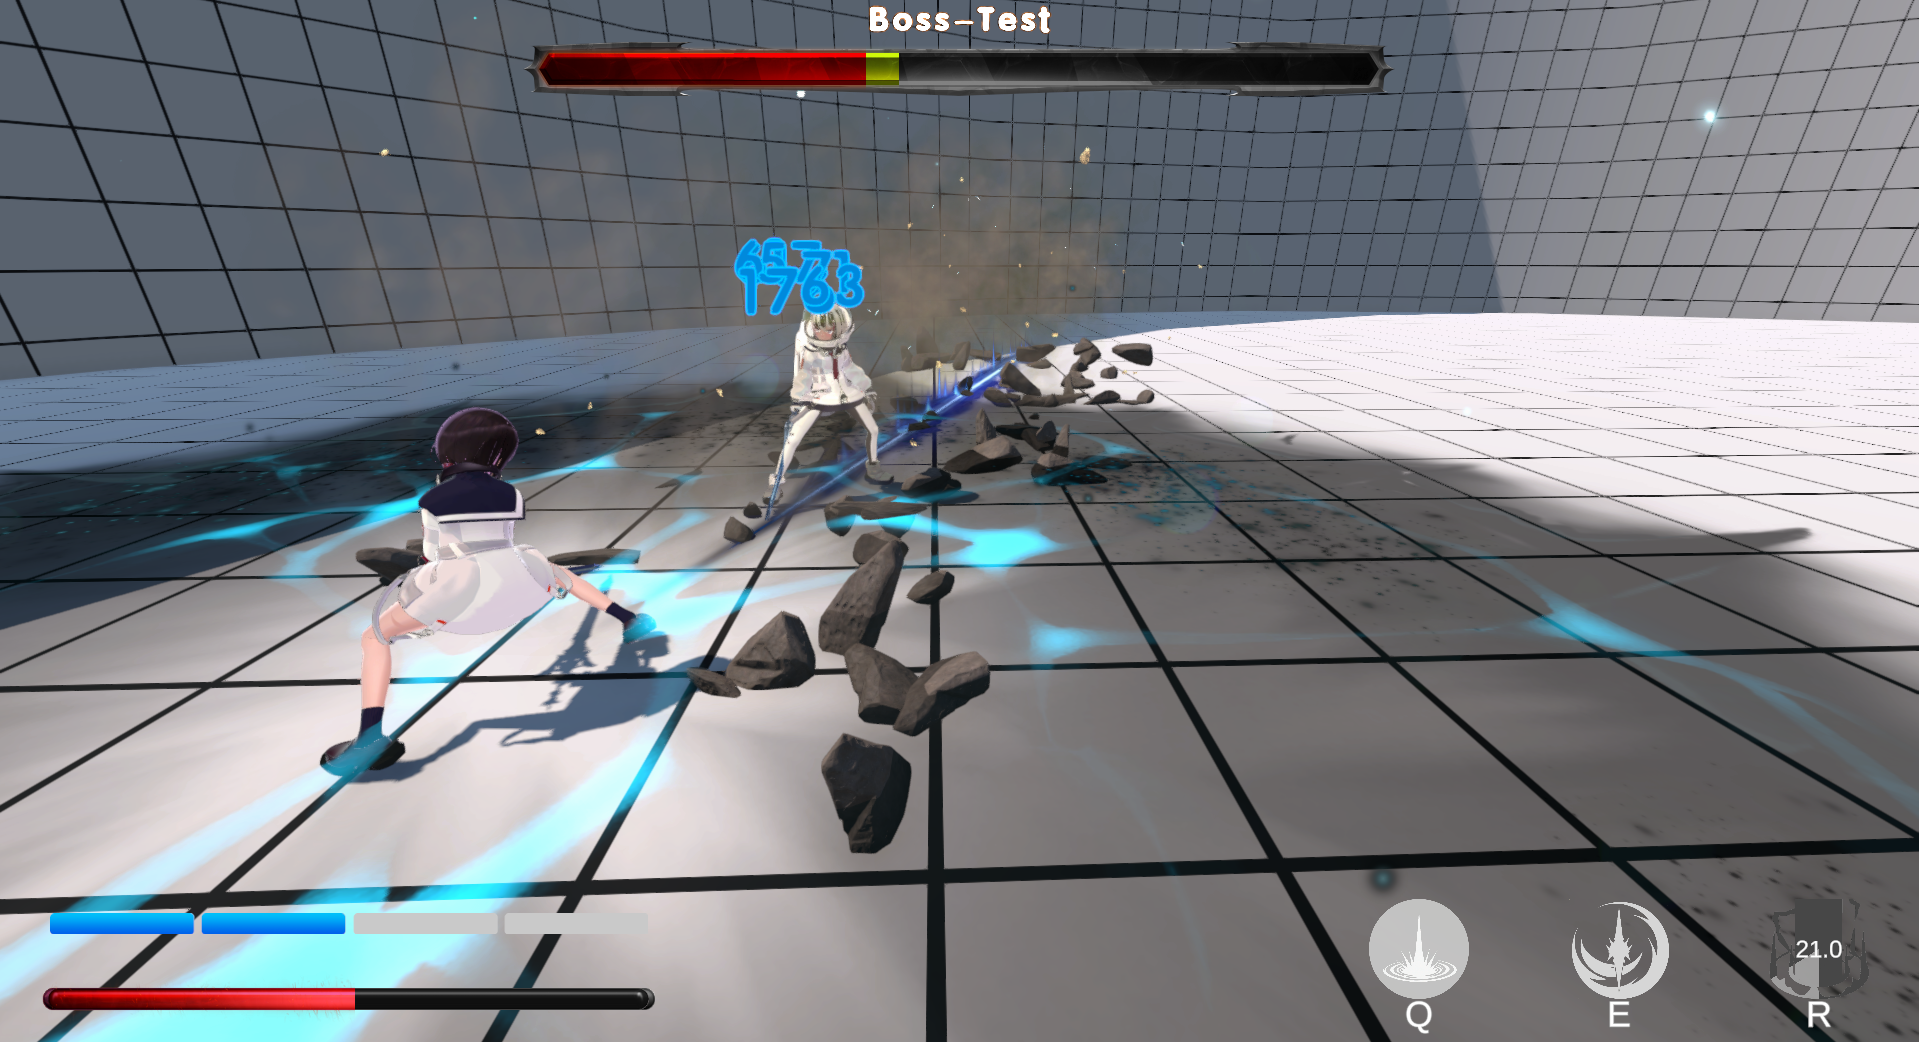
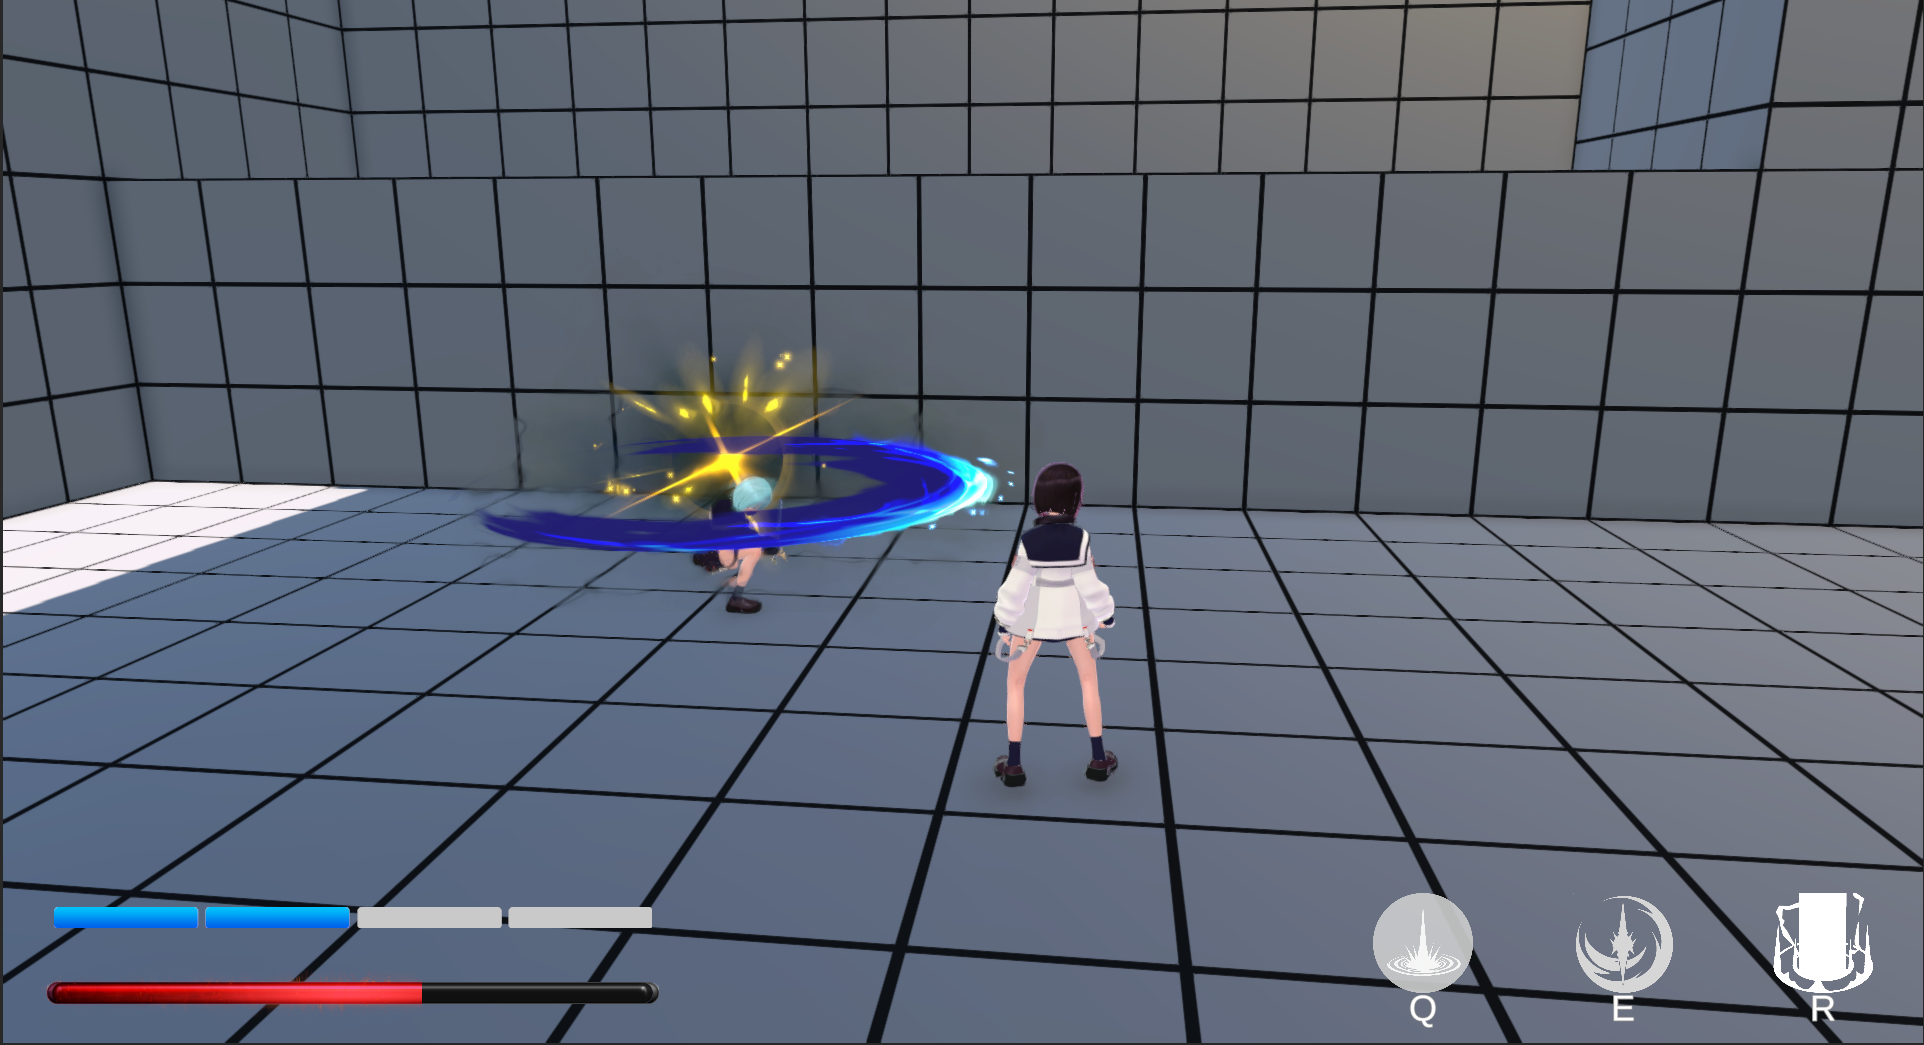
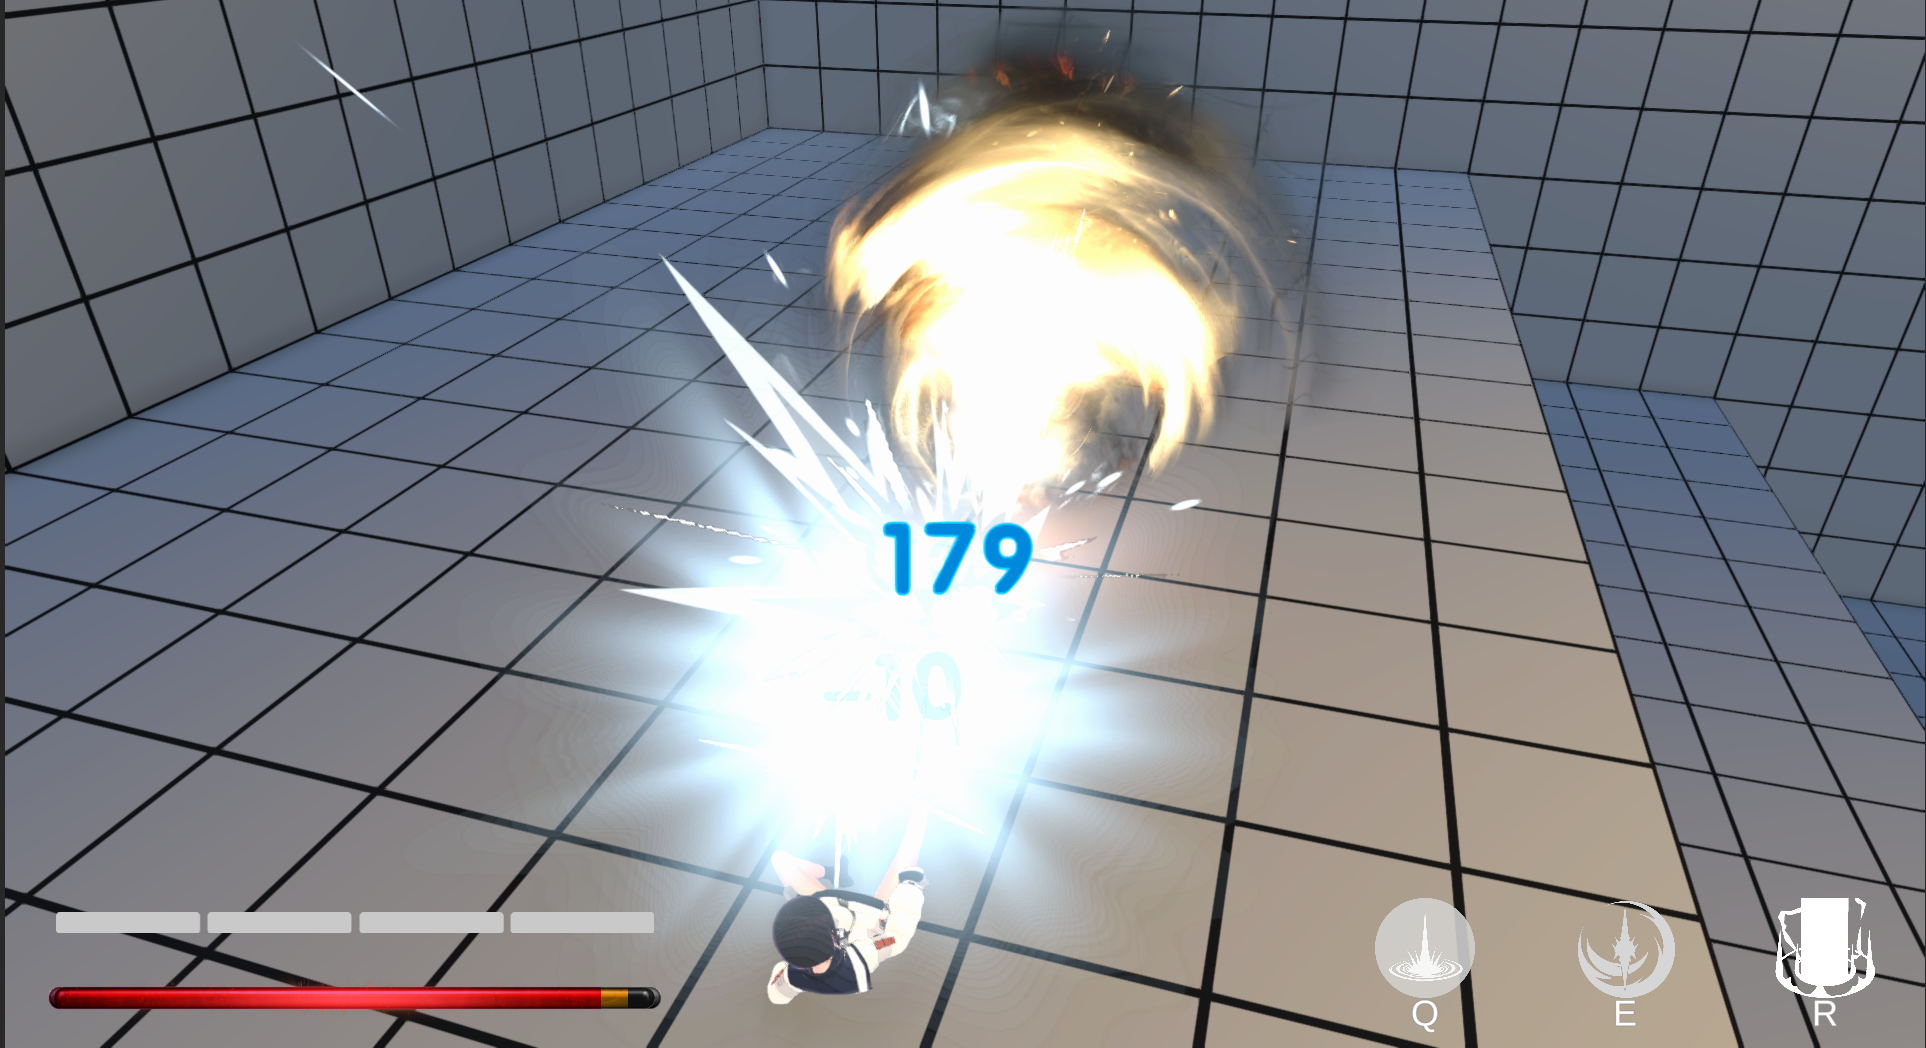
The protagonist possesses an Energy Bar with a maximum capacity of 100 energy points, visually represented by four blue energy segments on the UI. Landing the 4th hit of the ground combo or the 3rd hit of the airborne combo on enemies restores 25 energy points.
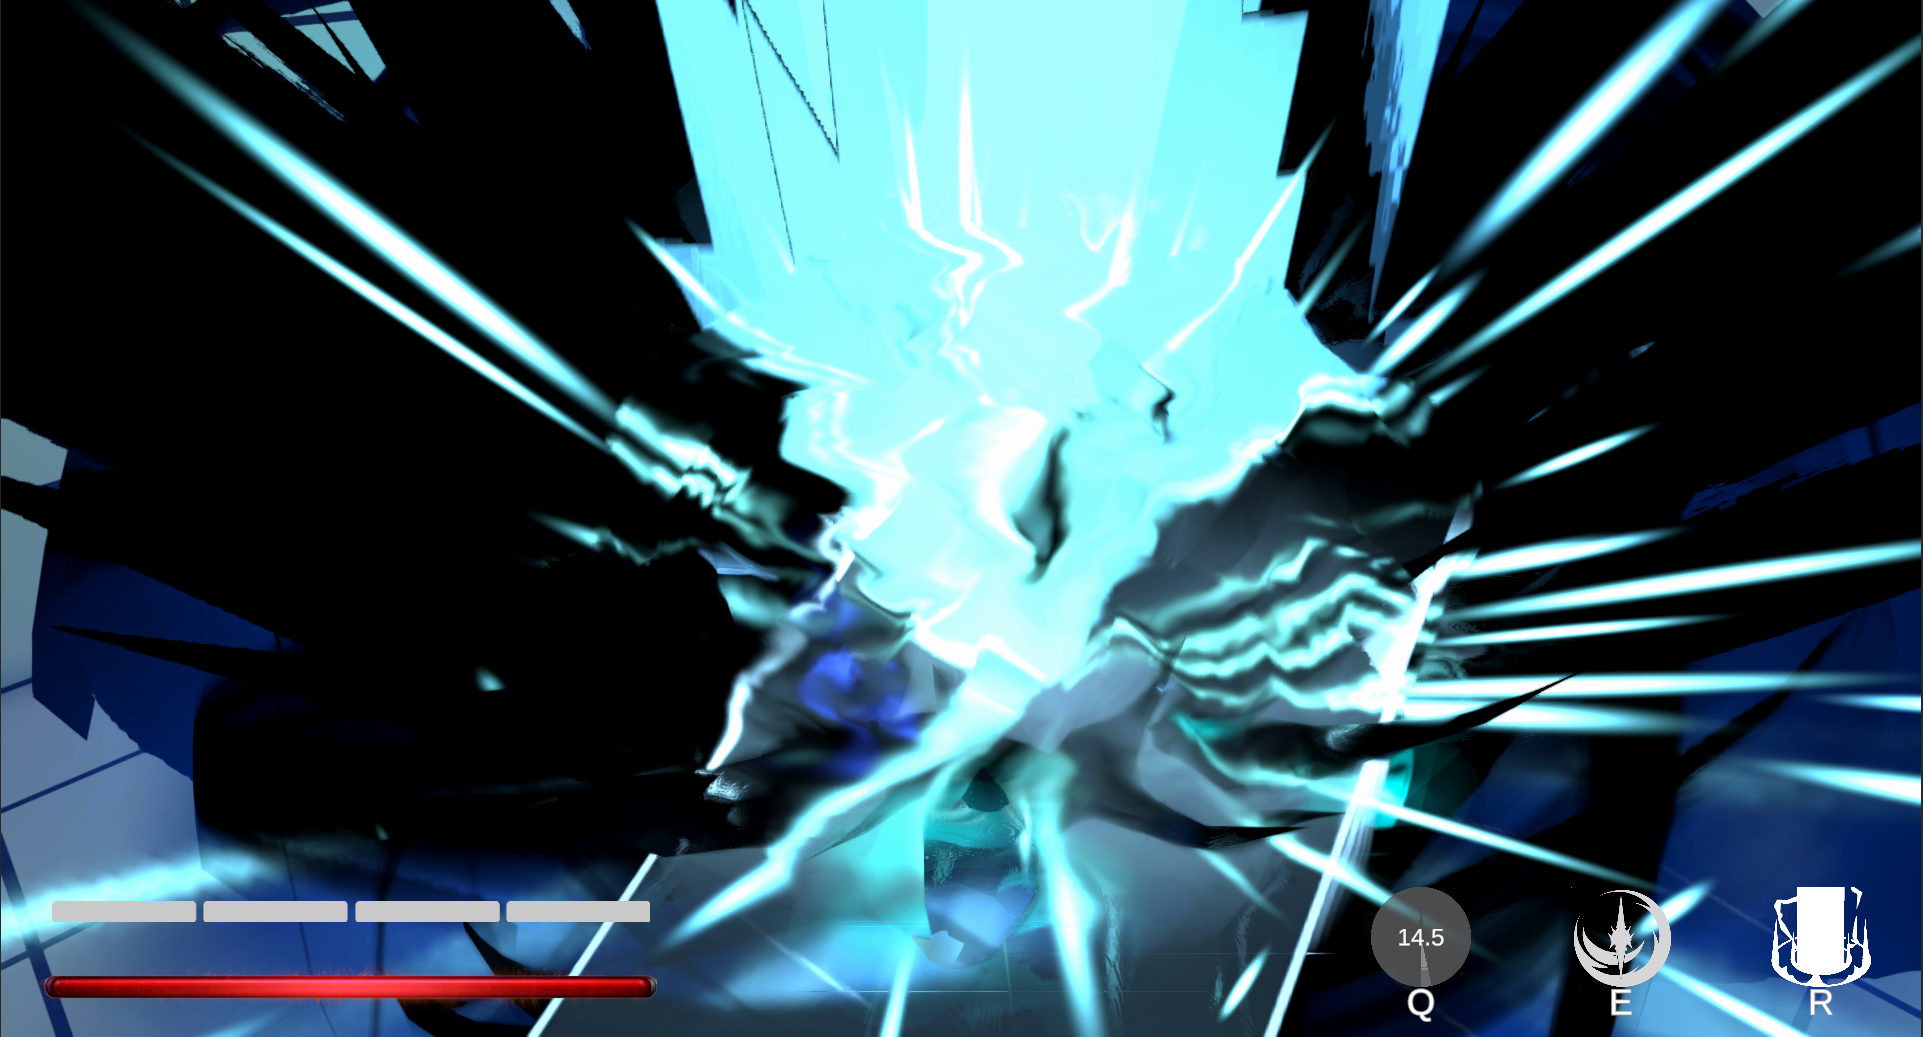
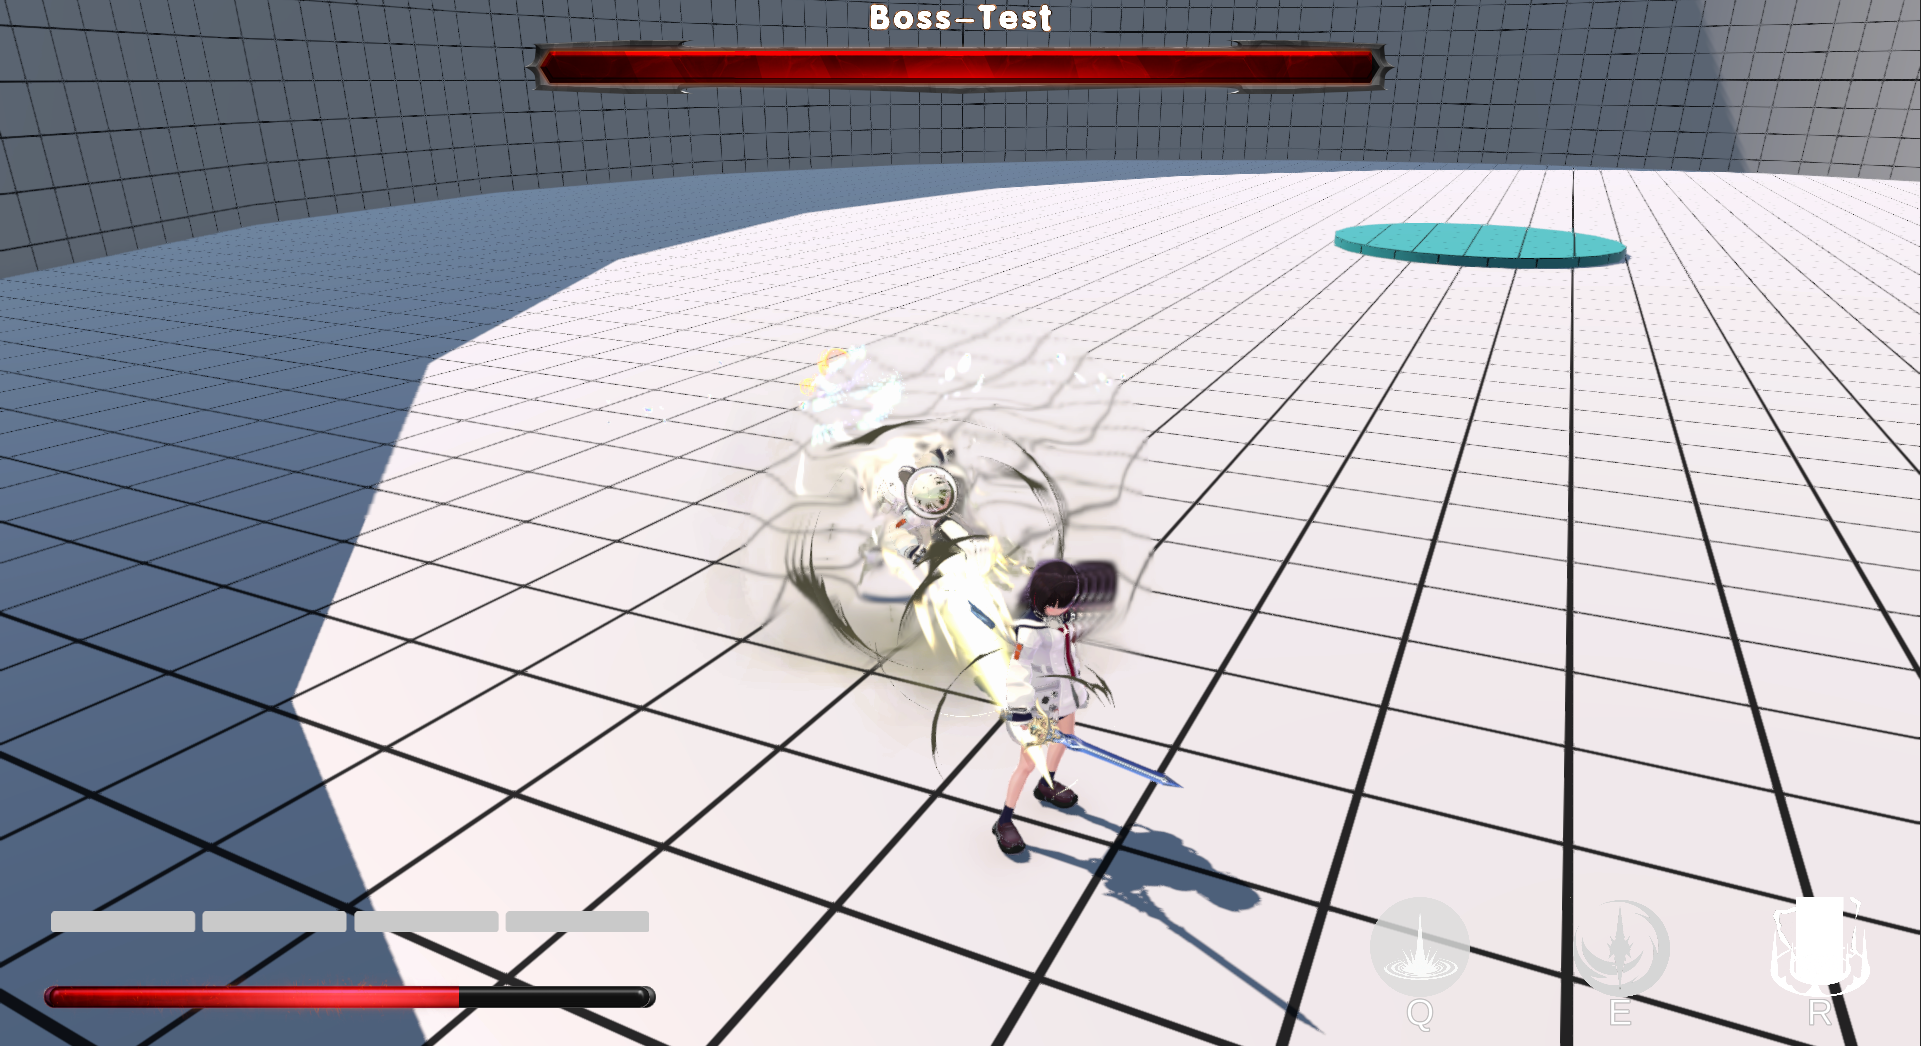
- When the energy bar is full, pressing the E key activates Skill_B (Ground) or Skill_B_InAir (Airborne), summoning four energy orbs that damage enemies in their path.


- Pressing Q to activate Skill_A on the ground can recall all summoned energy orbs; while airborne, energy orbs can also be recalled by holding the attack button, pressing R for Skill_C or pressing Q for Skill_A / Skill_A_InAir. The orbs explode when approaching the protagonist and deal area damage to surrounding enemies.
 |
|---|
- If the energy orbs are not actively recalled and detonated by skill activation, they will explode automatically after a certain time and deal damage to nearby enemies.
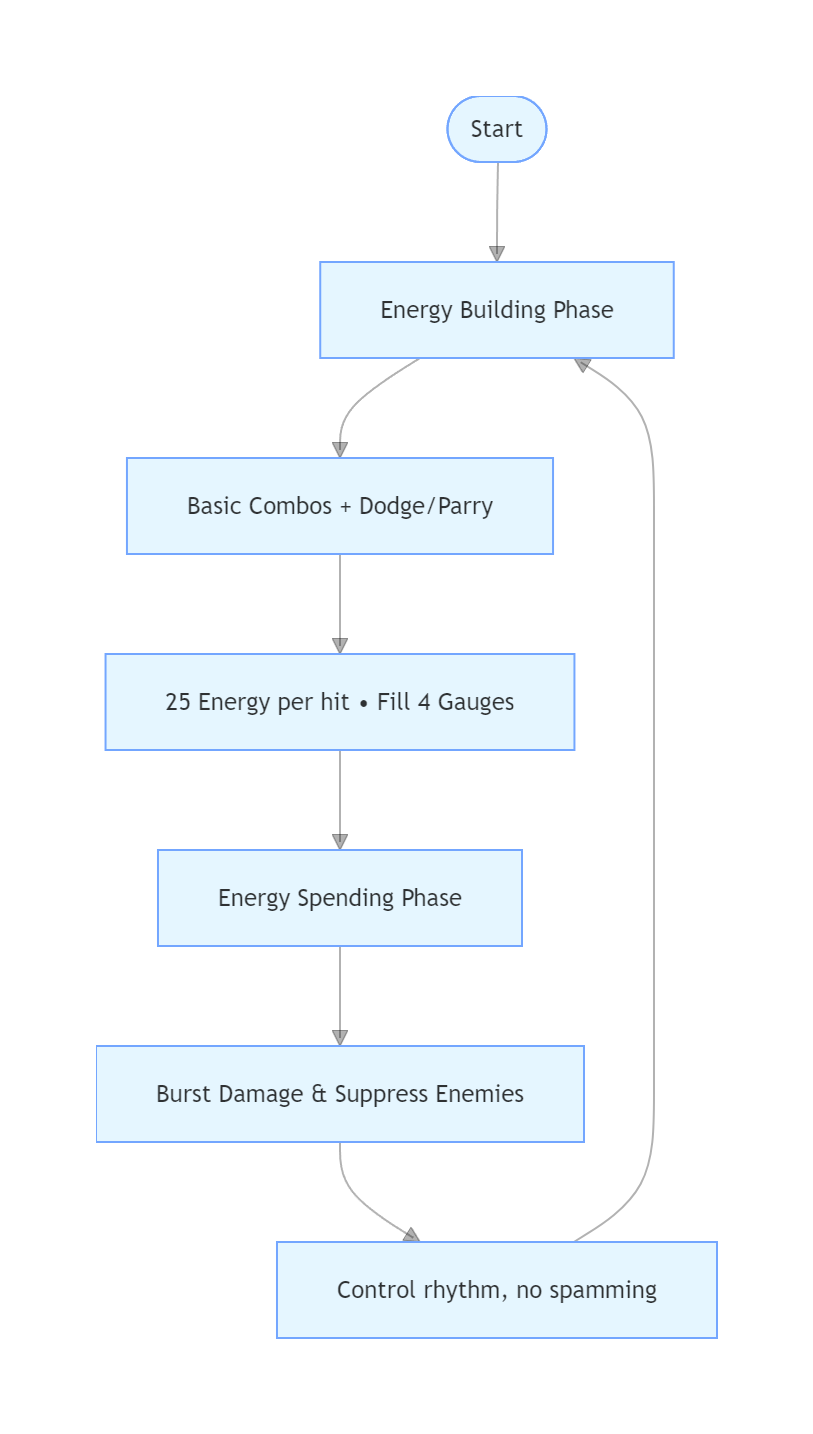
The design of the Resource Bar further divides the combat loop into two phases: the Energy Building Phase and the Energy Spending Phase.
In the Energy Building Phase: Players use basic combos (1-3 hits on the ground, 1-2 hits in the air) to attack enemies, aiming to “land hits on enemies to accumulate 25 energy points per segment”. Meanwhile, they combine Perfect Dodge to evade enemy attacks and Attack Parry to interrupt enemy combos, gradually filling the four-segment energy gauge under the premise of “not being hit”.
The Energy Spending Phase serves as a reward for players’ precise operations. After filling the energy gauge, players can unleash burst damage, suppress the enemy’s attack rhythm, and even interrupt the boss’s combos. This encourages players to actively take control of the combat rhythm instead of spamming skills.
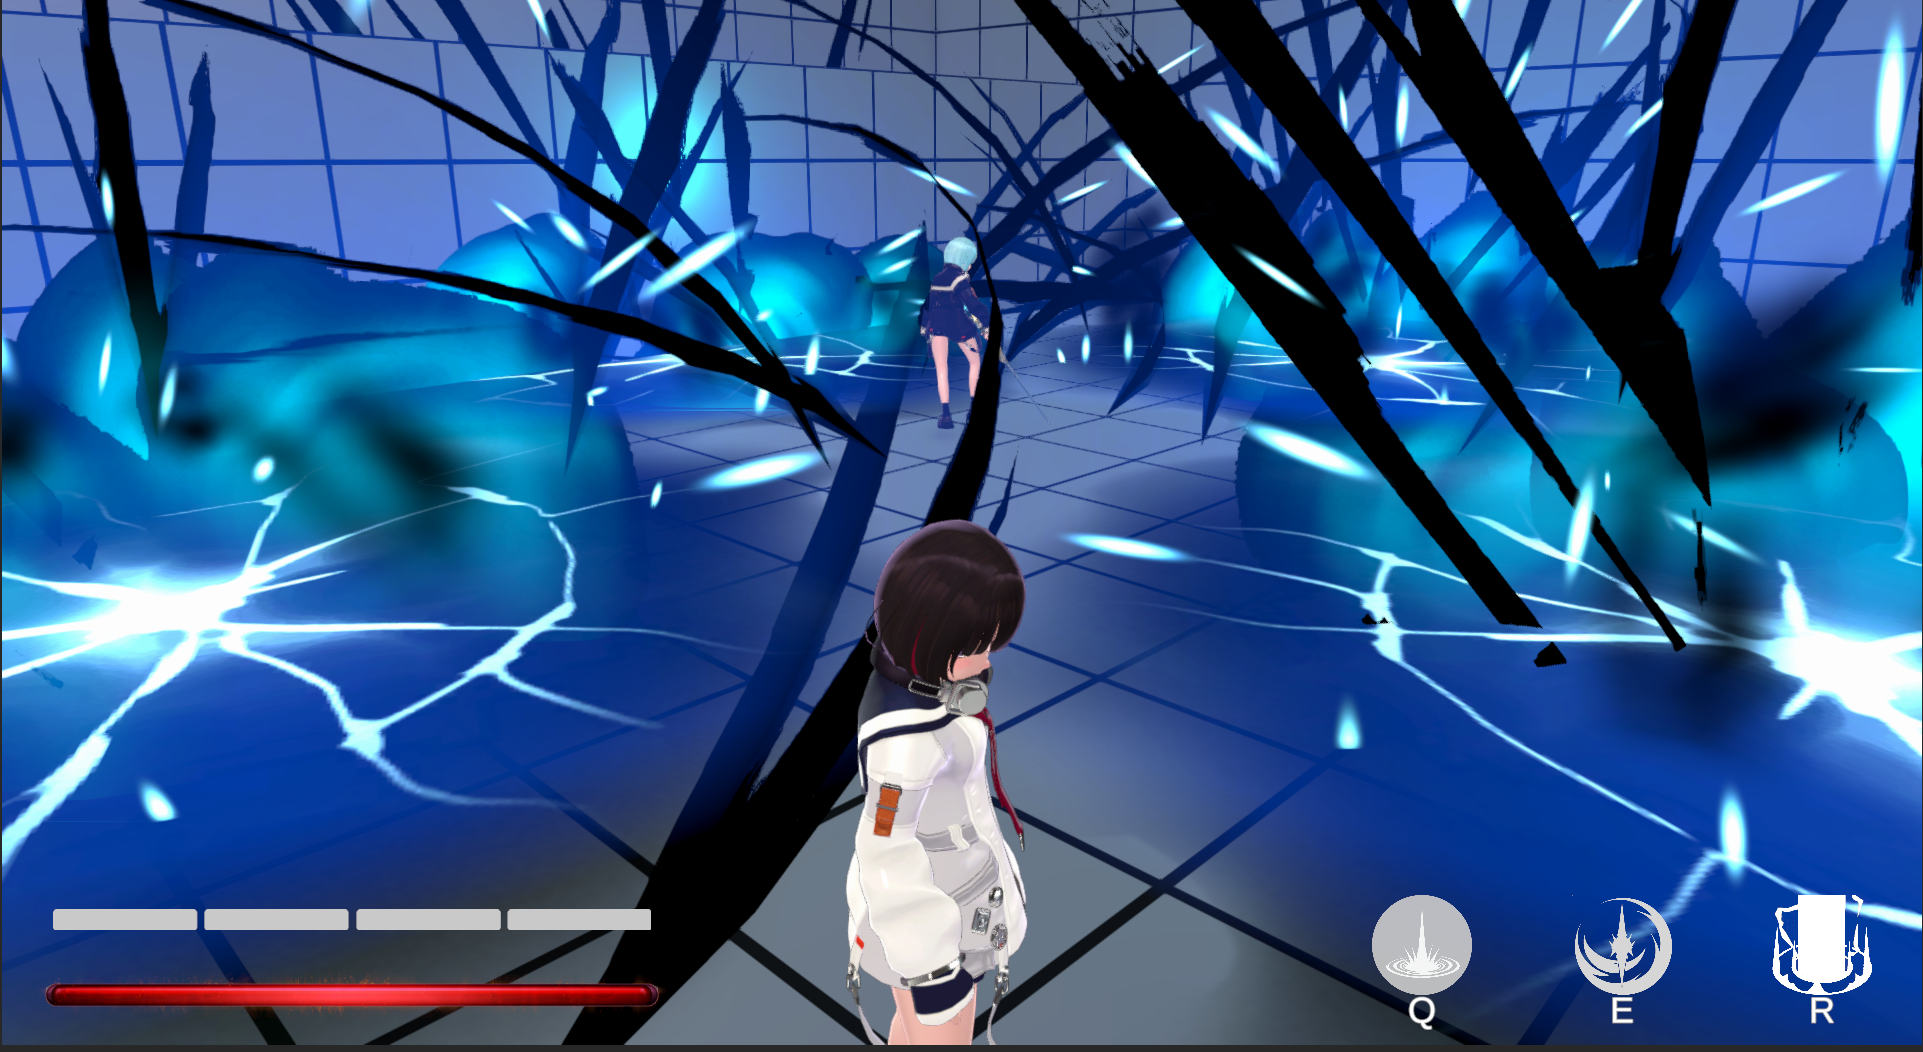
Level Design
The level adopts a linear tower-climbing core framework, guiding players to progress step-by-step from the tower's base to its summit. To avoid the monotony of linear ascent, the design emphasizes rhythmic variations between vertical and horizontal spaces:
- Vertical Dimension: Broken staircases are strategically placed to break the "straight upward" progression path, forcing players to detour, explore hidden rooms, and use elevators to reach upper floors, adding a sense of discovery to pathfinding.
- Horizontal Dimension: Each floor is built around distinct combat spaces as the core. The alternating design of "vertical path exploration" and "horizontal area expansion" effectively enriches spatial depth and prevents player fatigue from repetitive climbing.
Design Decision: The vertical dimension creates route variation and exploration motivation, while the horizontal dimension carries combat encounters. Alternating between the two keeps players switching between pathfinding, combat, and spatial recognition.
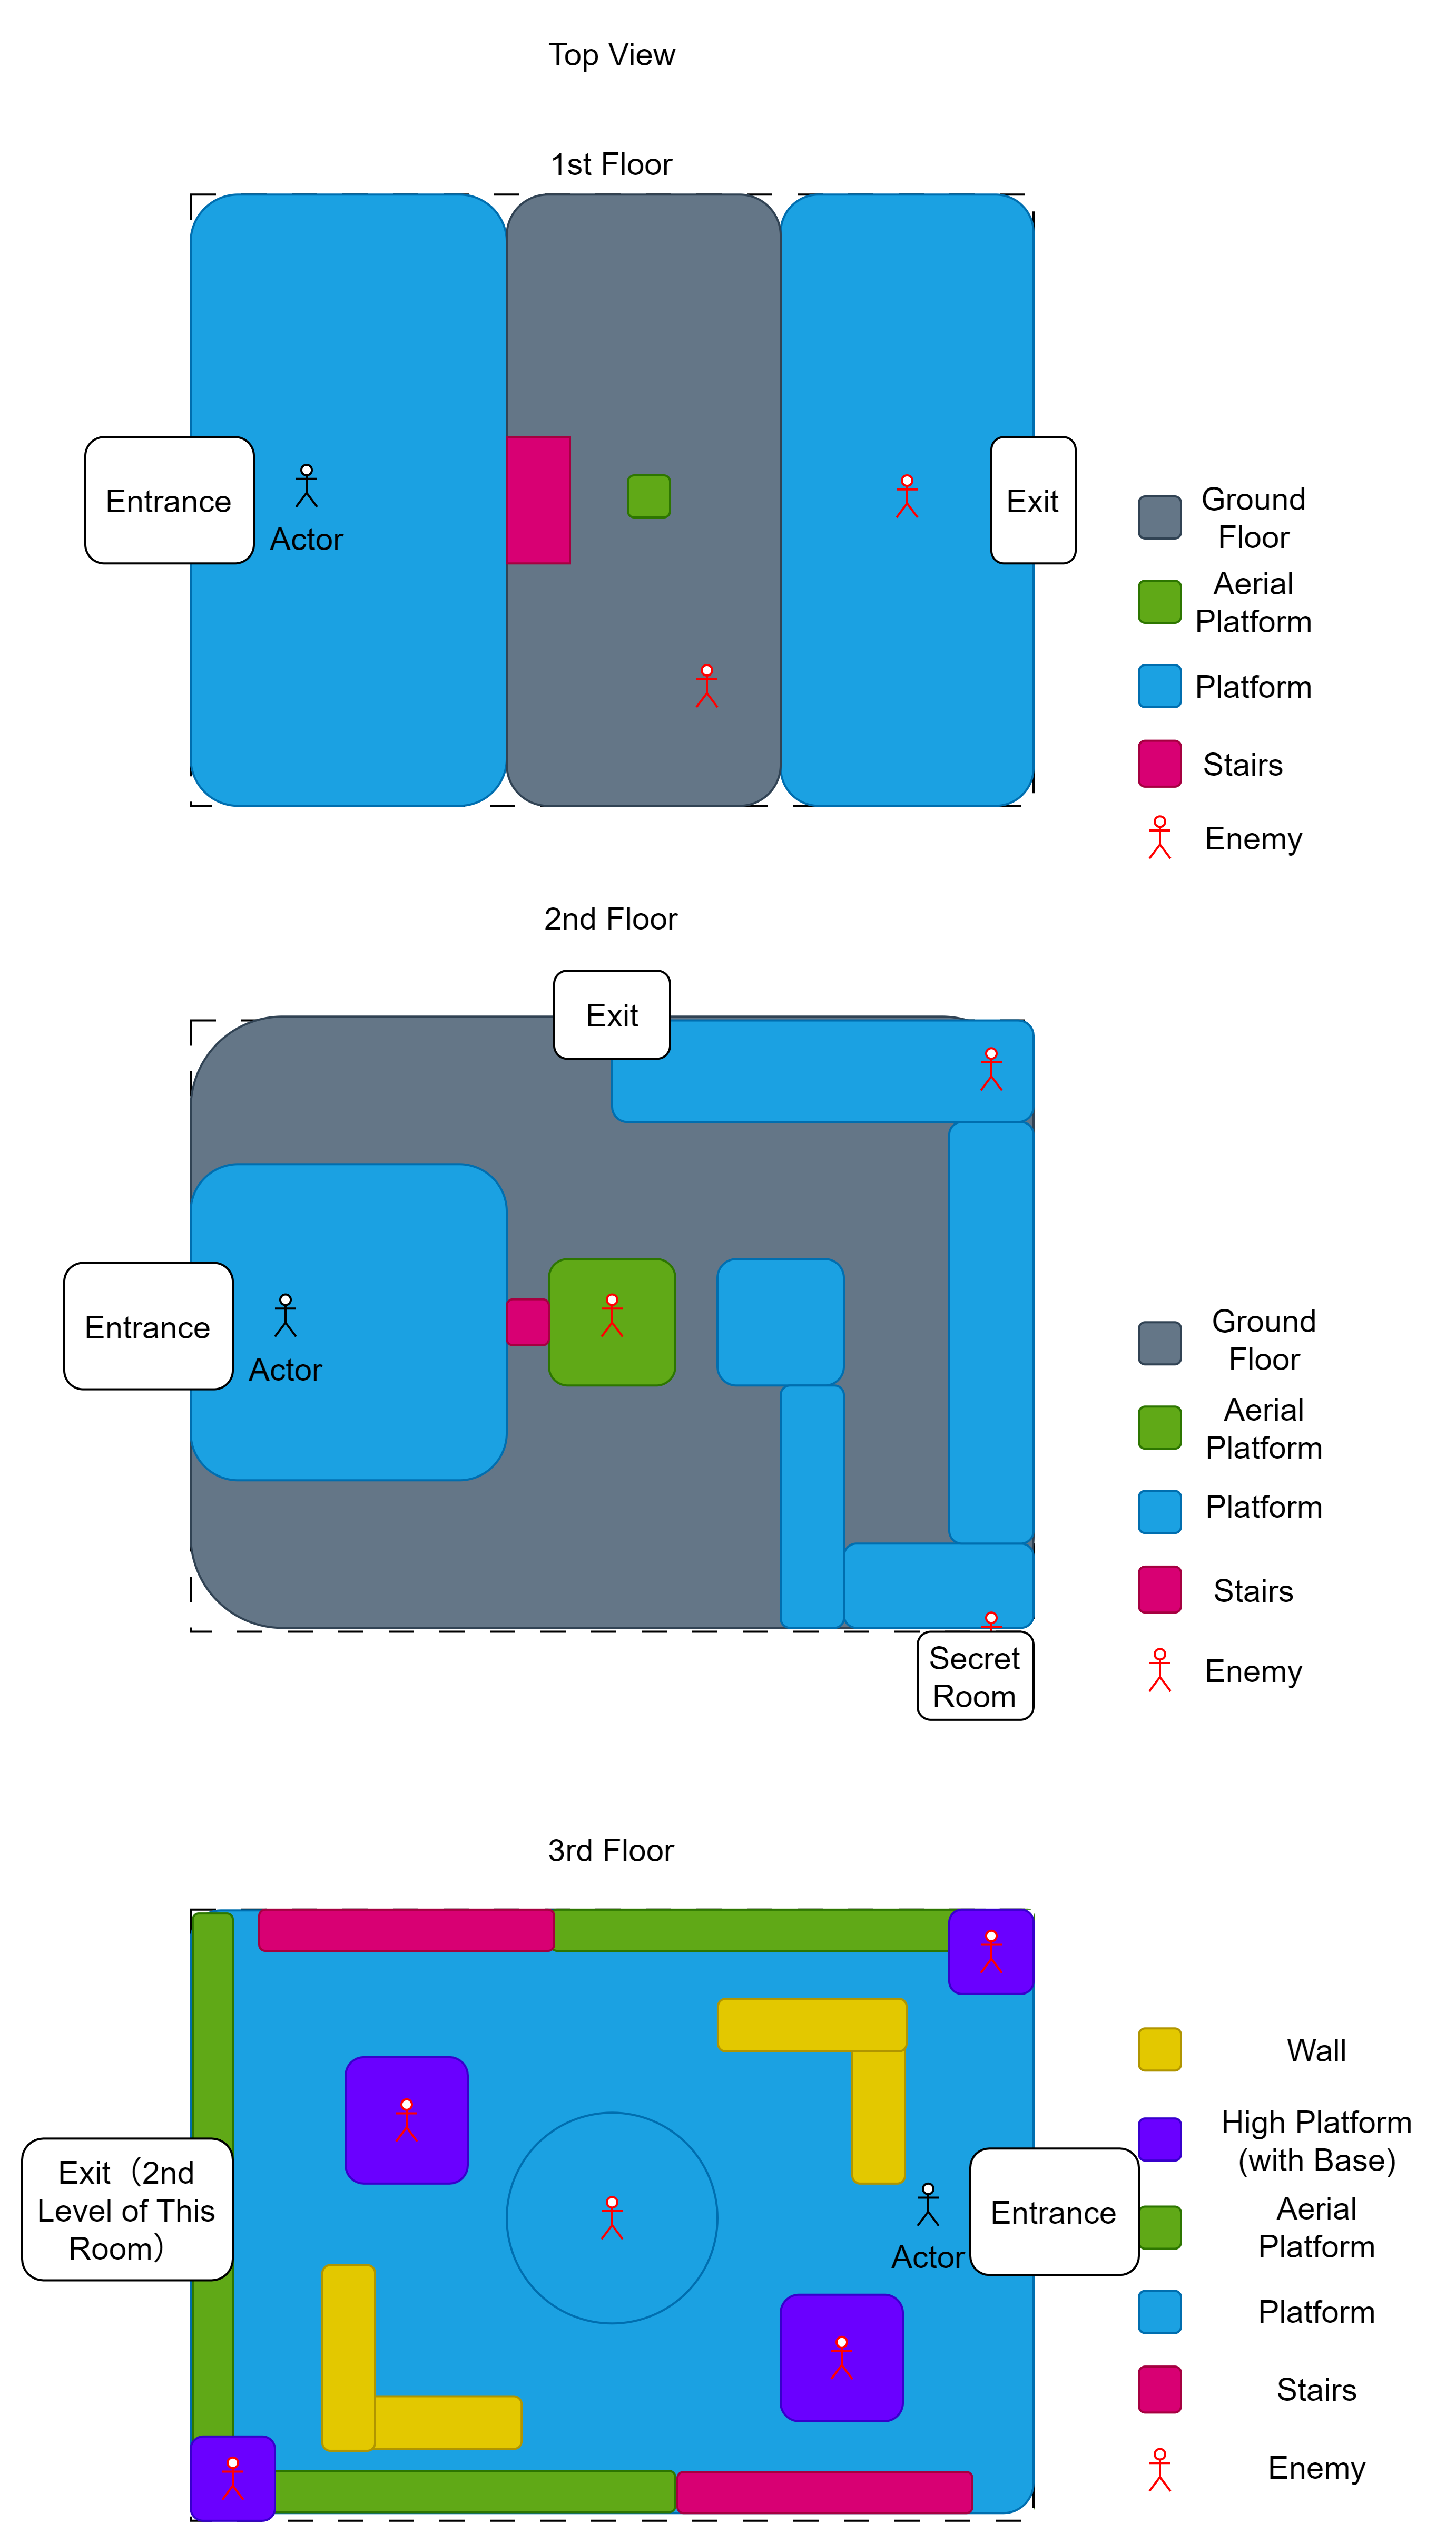
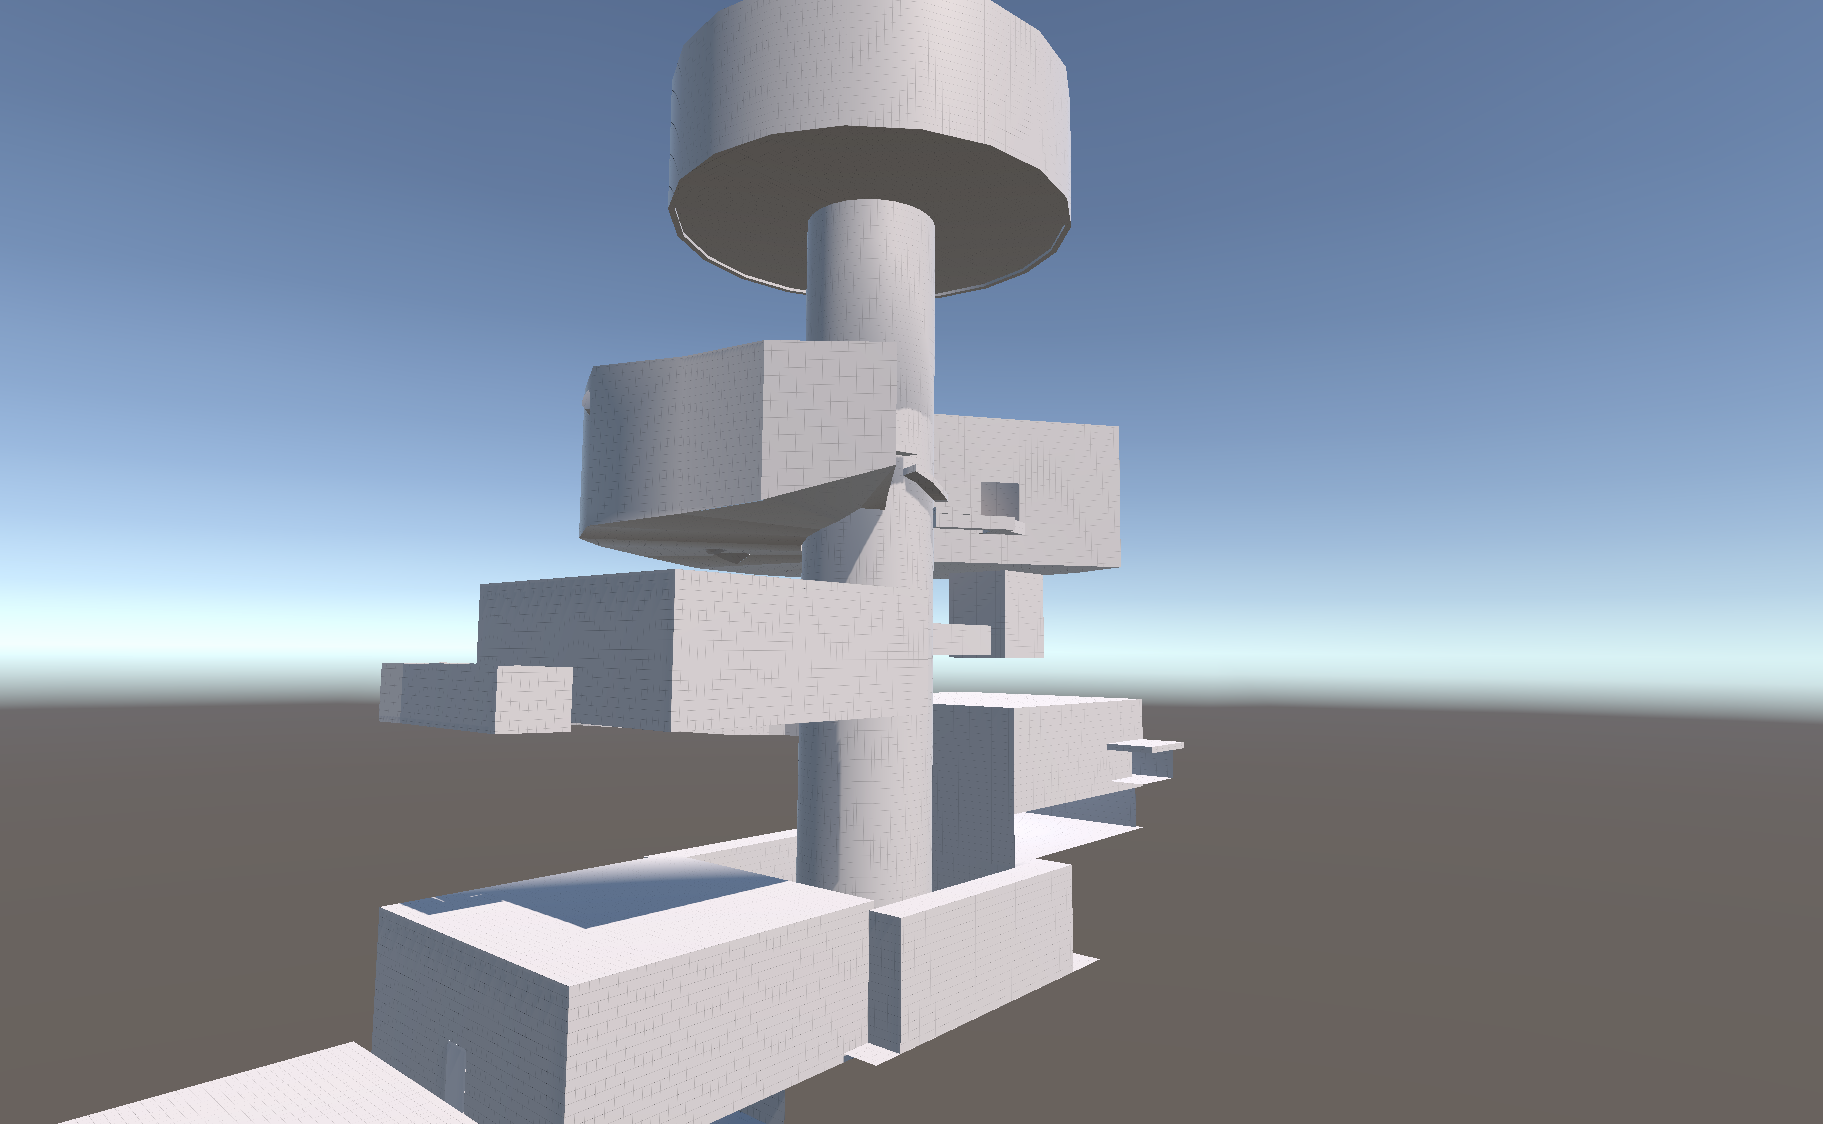
Level Overall Overview
Battle Design
Combat is designed to teach and validate player skills, requiring players to carefully observe enemy attack patterns and visual cues before making tactical decisions to defeat foes.
Enemy Design
-
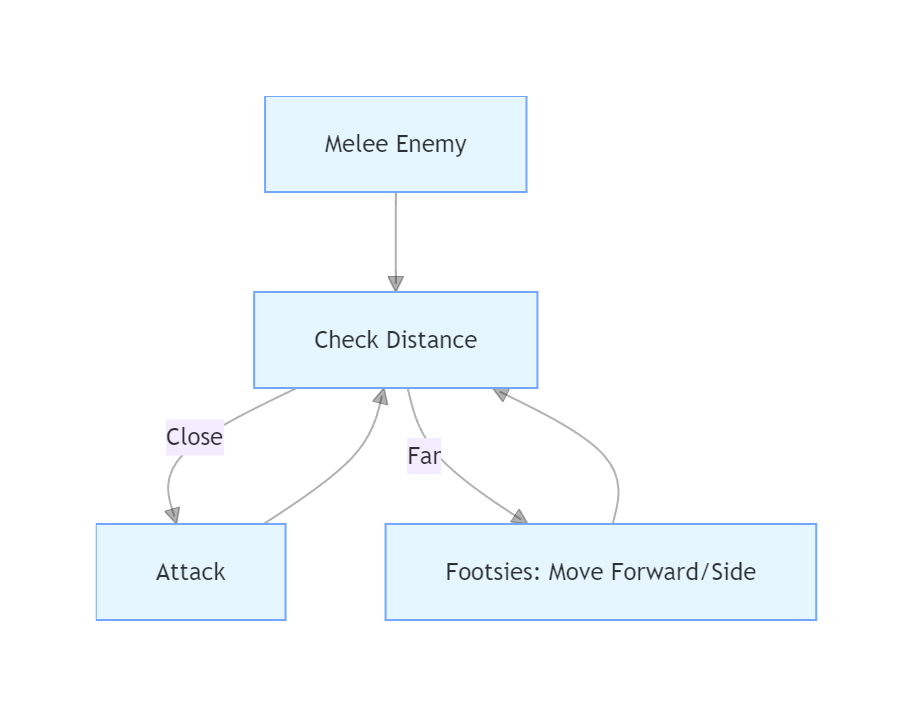
Melee Enemies: Feature simple attack patterns, guiding players to master basic dodging and parrying mechanics.
- Behaviour Logic: If the horizontal distance to the target is short, the enemy will launch an attack immediately. If the distance is long, it will perform footsies (adjusting position by moving forward or sidestepping left/right) to close in or find an opening.
 |
|---|
 |
|---|
-
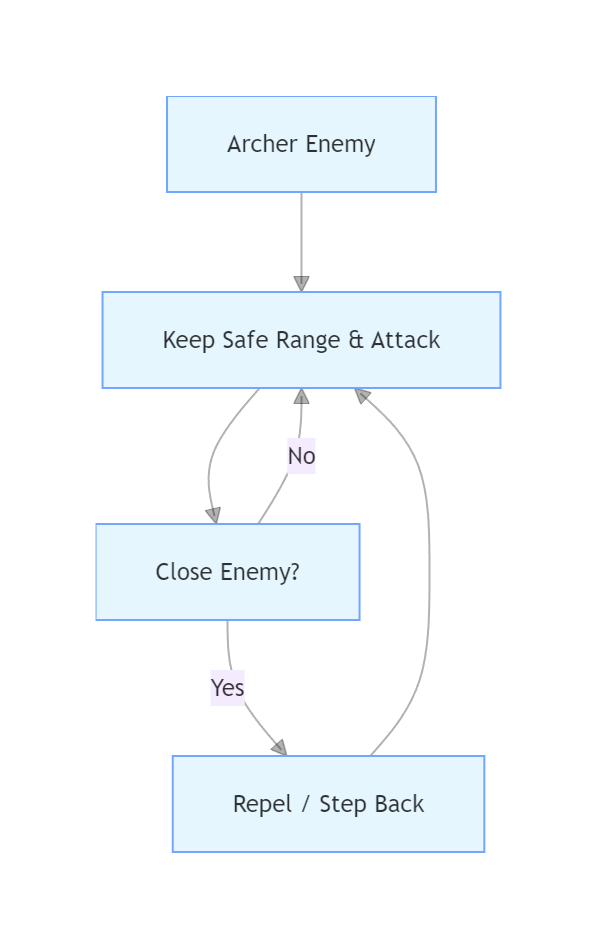
Ranged Enemies: Capable of both single-target and area-of-effect ranged attacks, further honing players’ dodging reflexes.
- Behaviour Logic: Maintain a safe ranged position relative to the target and prioritize ranged attacks. When targets close in to short range, it will repel the attacker or step back to re-establish footsies distance.
 |
|---|
 |  |
|---|
-
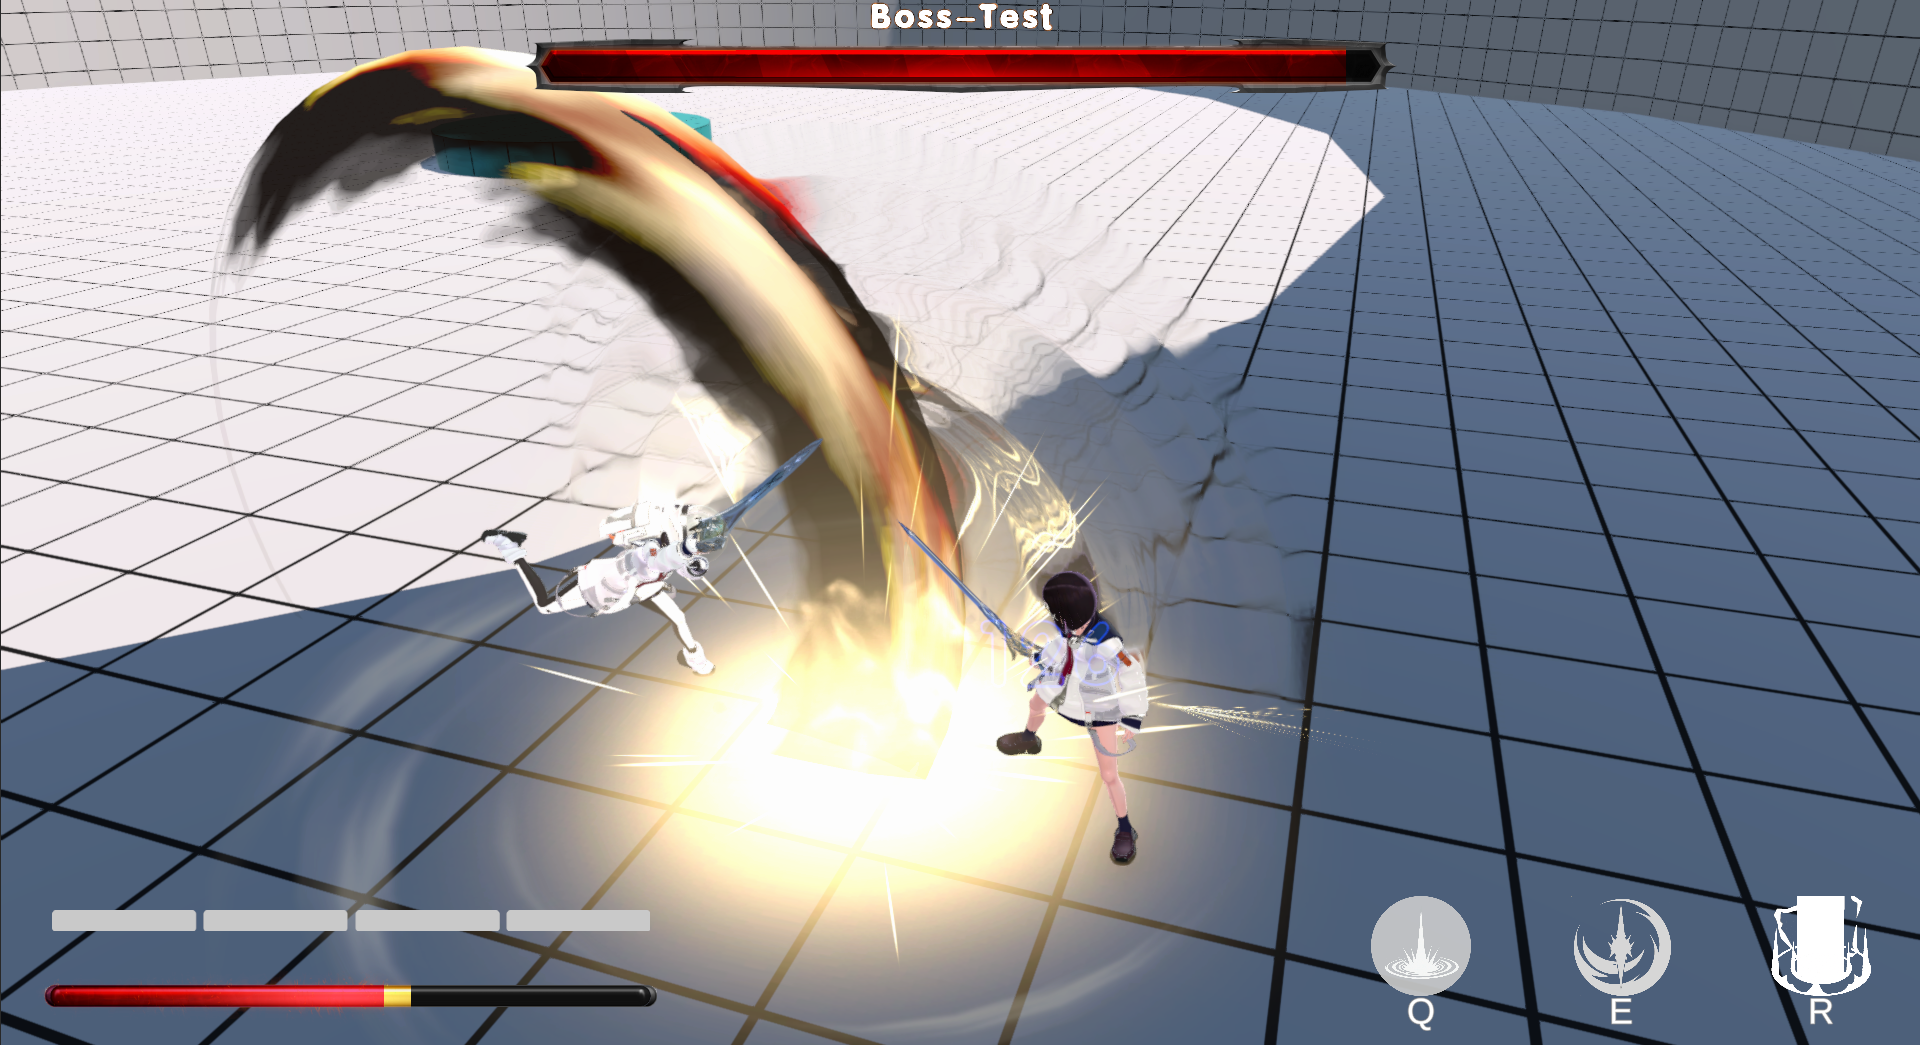
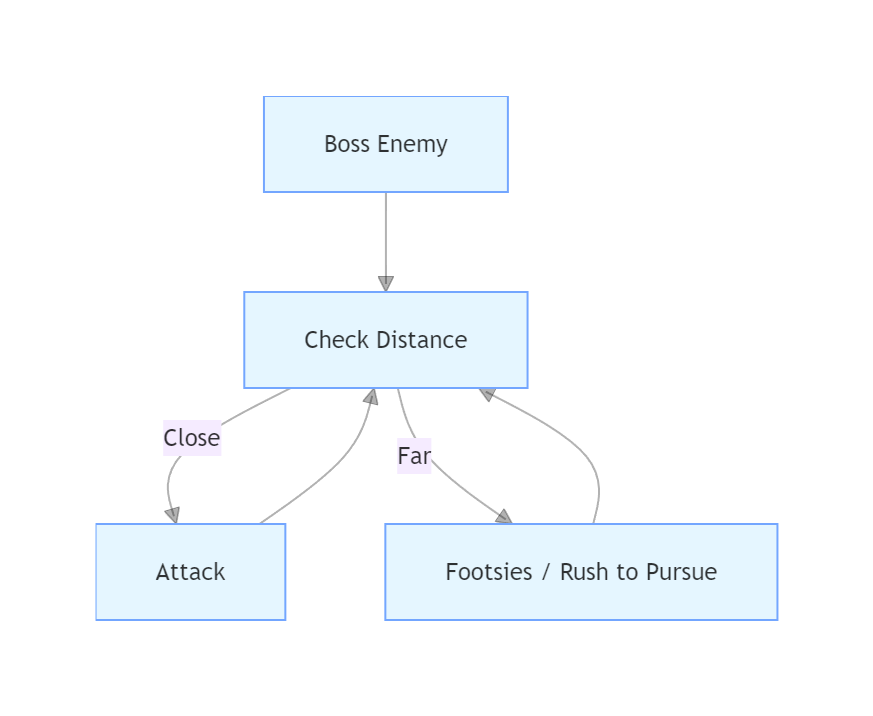
Boss Battles: Bosses exhibit high attack aggression and will close in on players rapidly. Parrying serves as the core countermeasure (a successful parry interrupts the boss’s attack and reduces combat pressure), testing players’ mastery of the parry mechanic.
- Behaviour Logic: If the horizontal distance to the target is short, the enemy will launch an attack immediately. If the distance is long, it will either use footsies to adjust position, or activate rush/dash skills to pursue the target rapidly.
 |
|---|
 |
|---|
Process
Coding
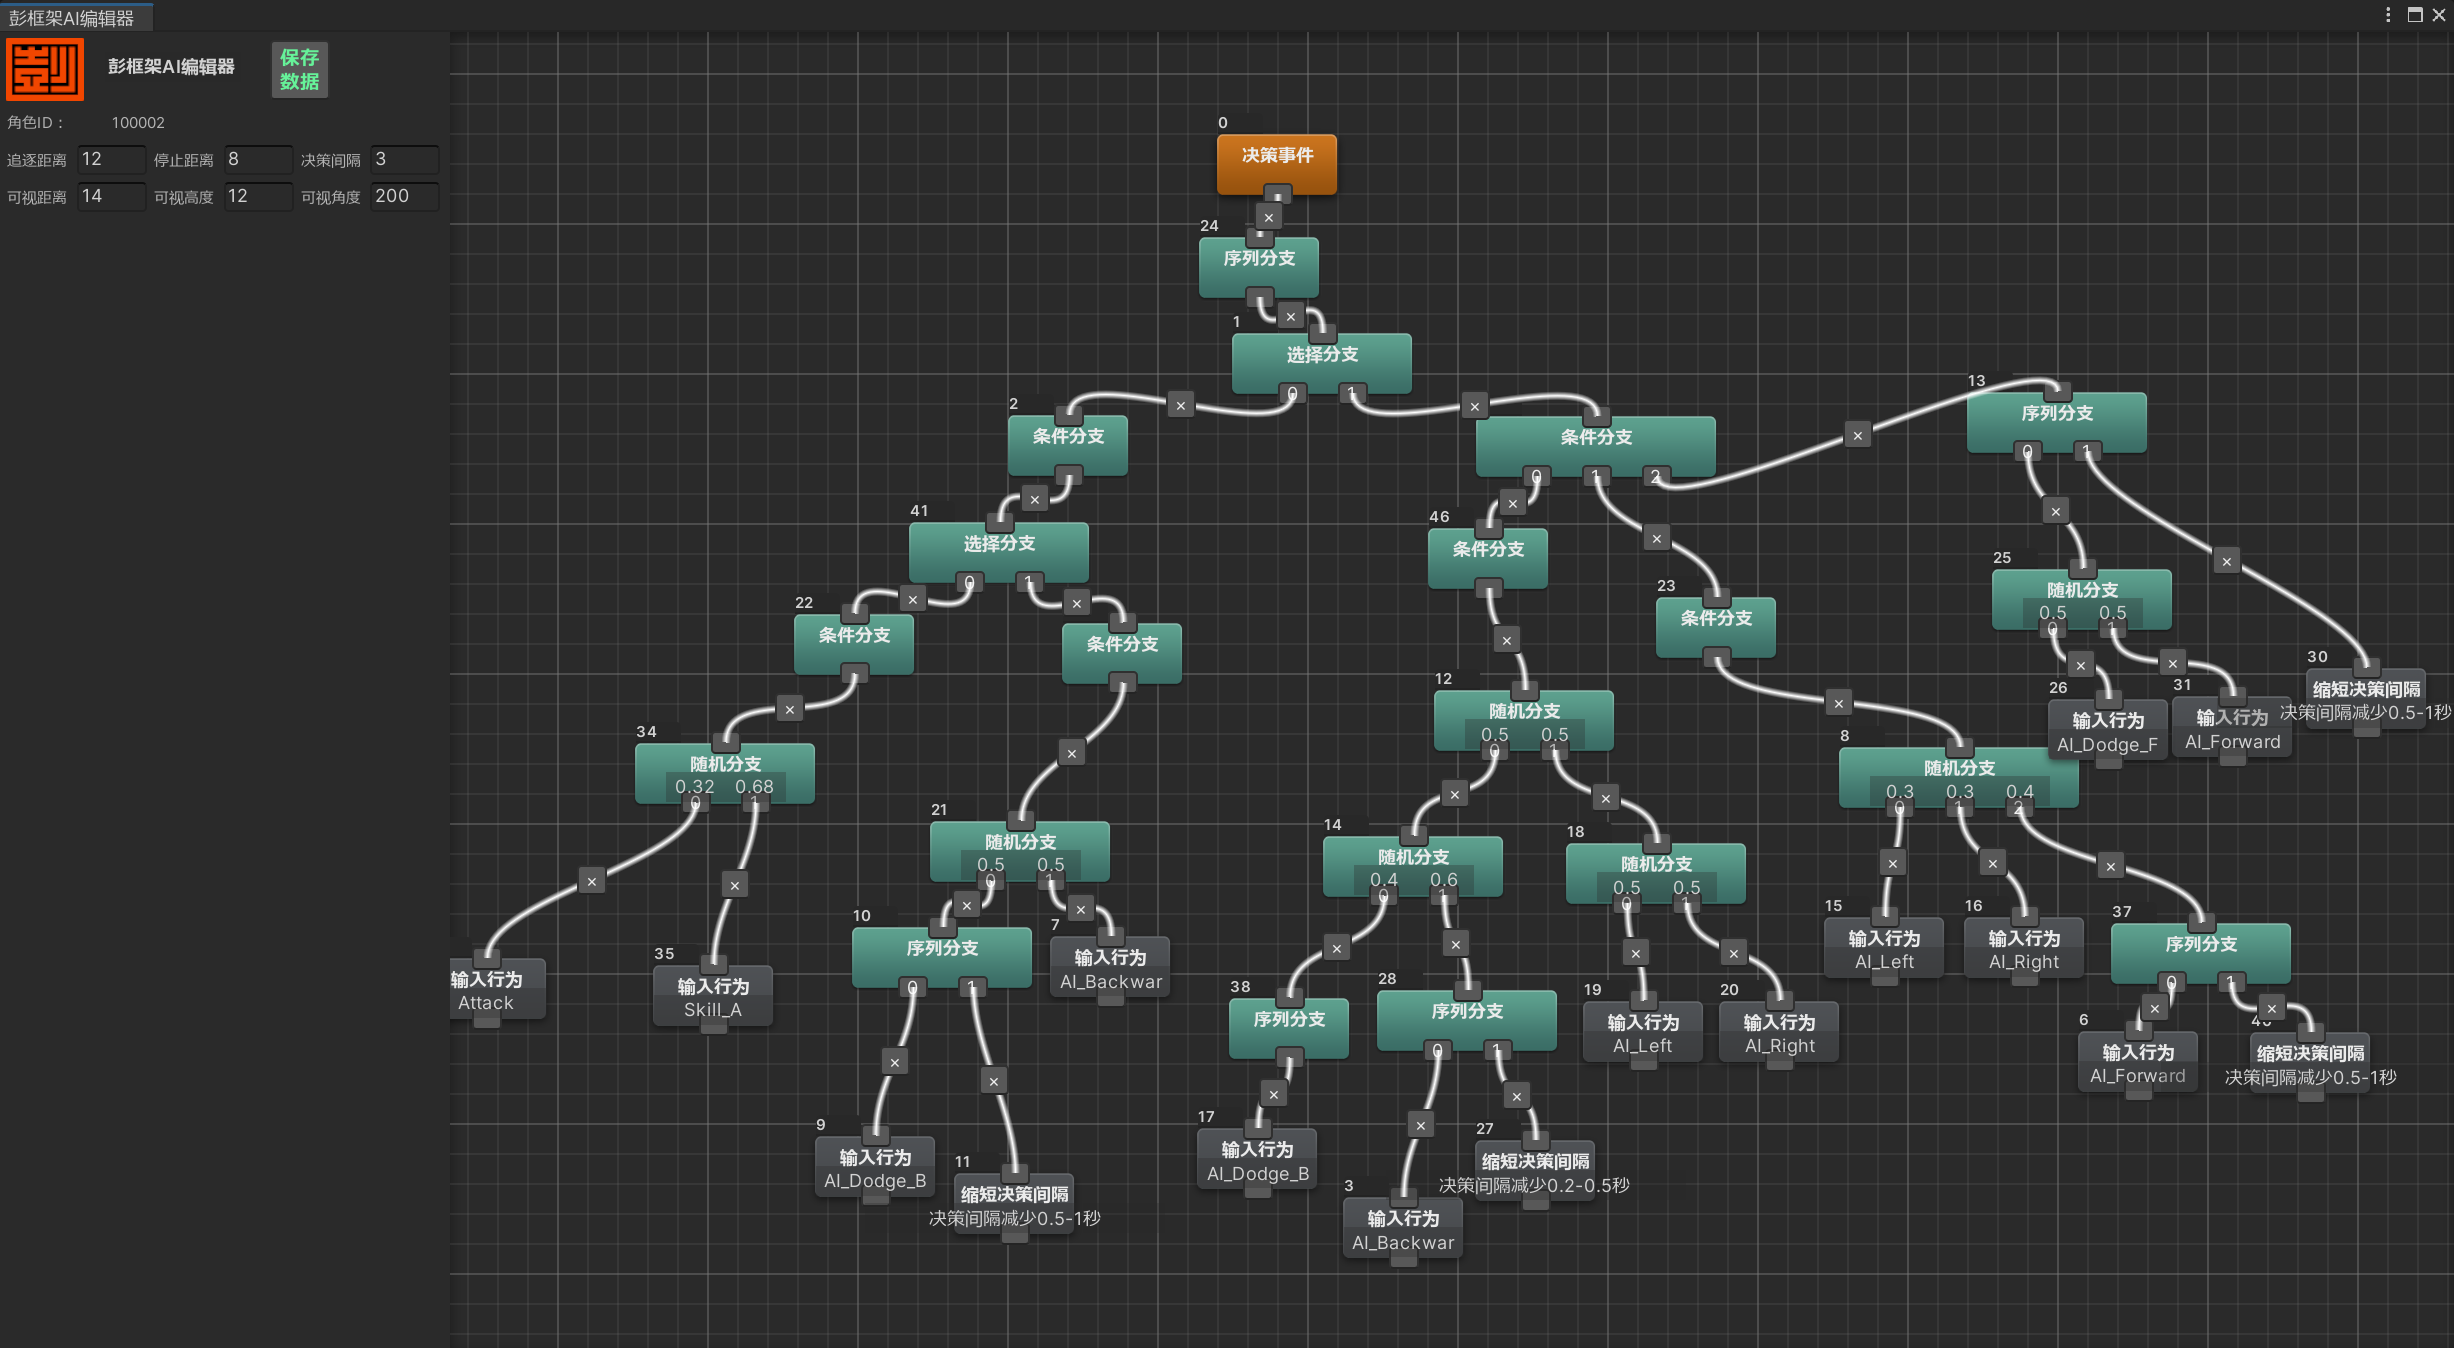
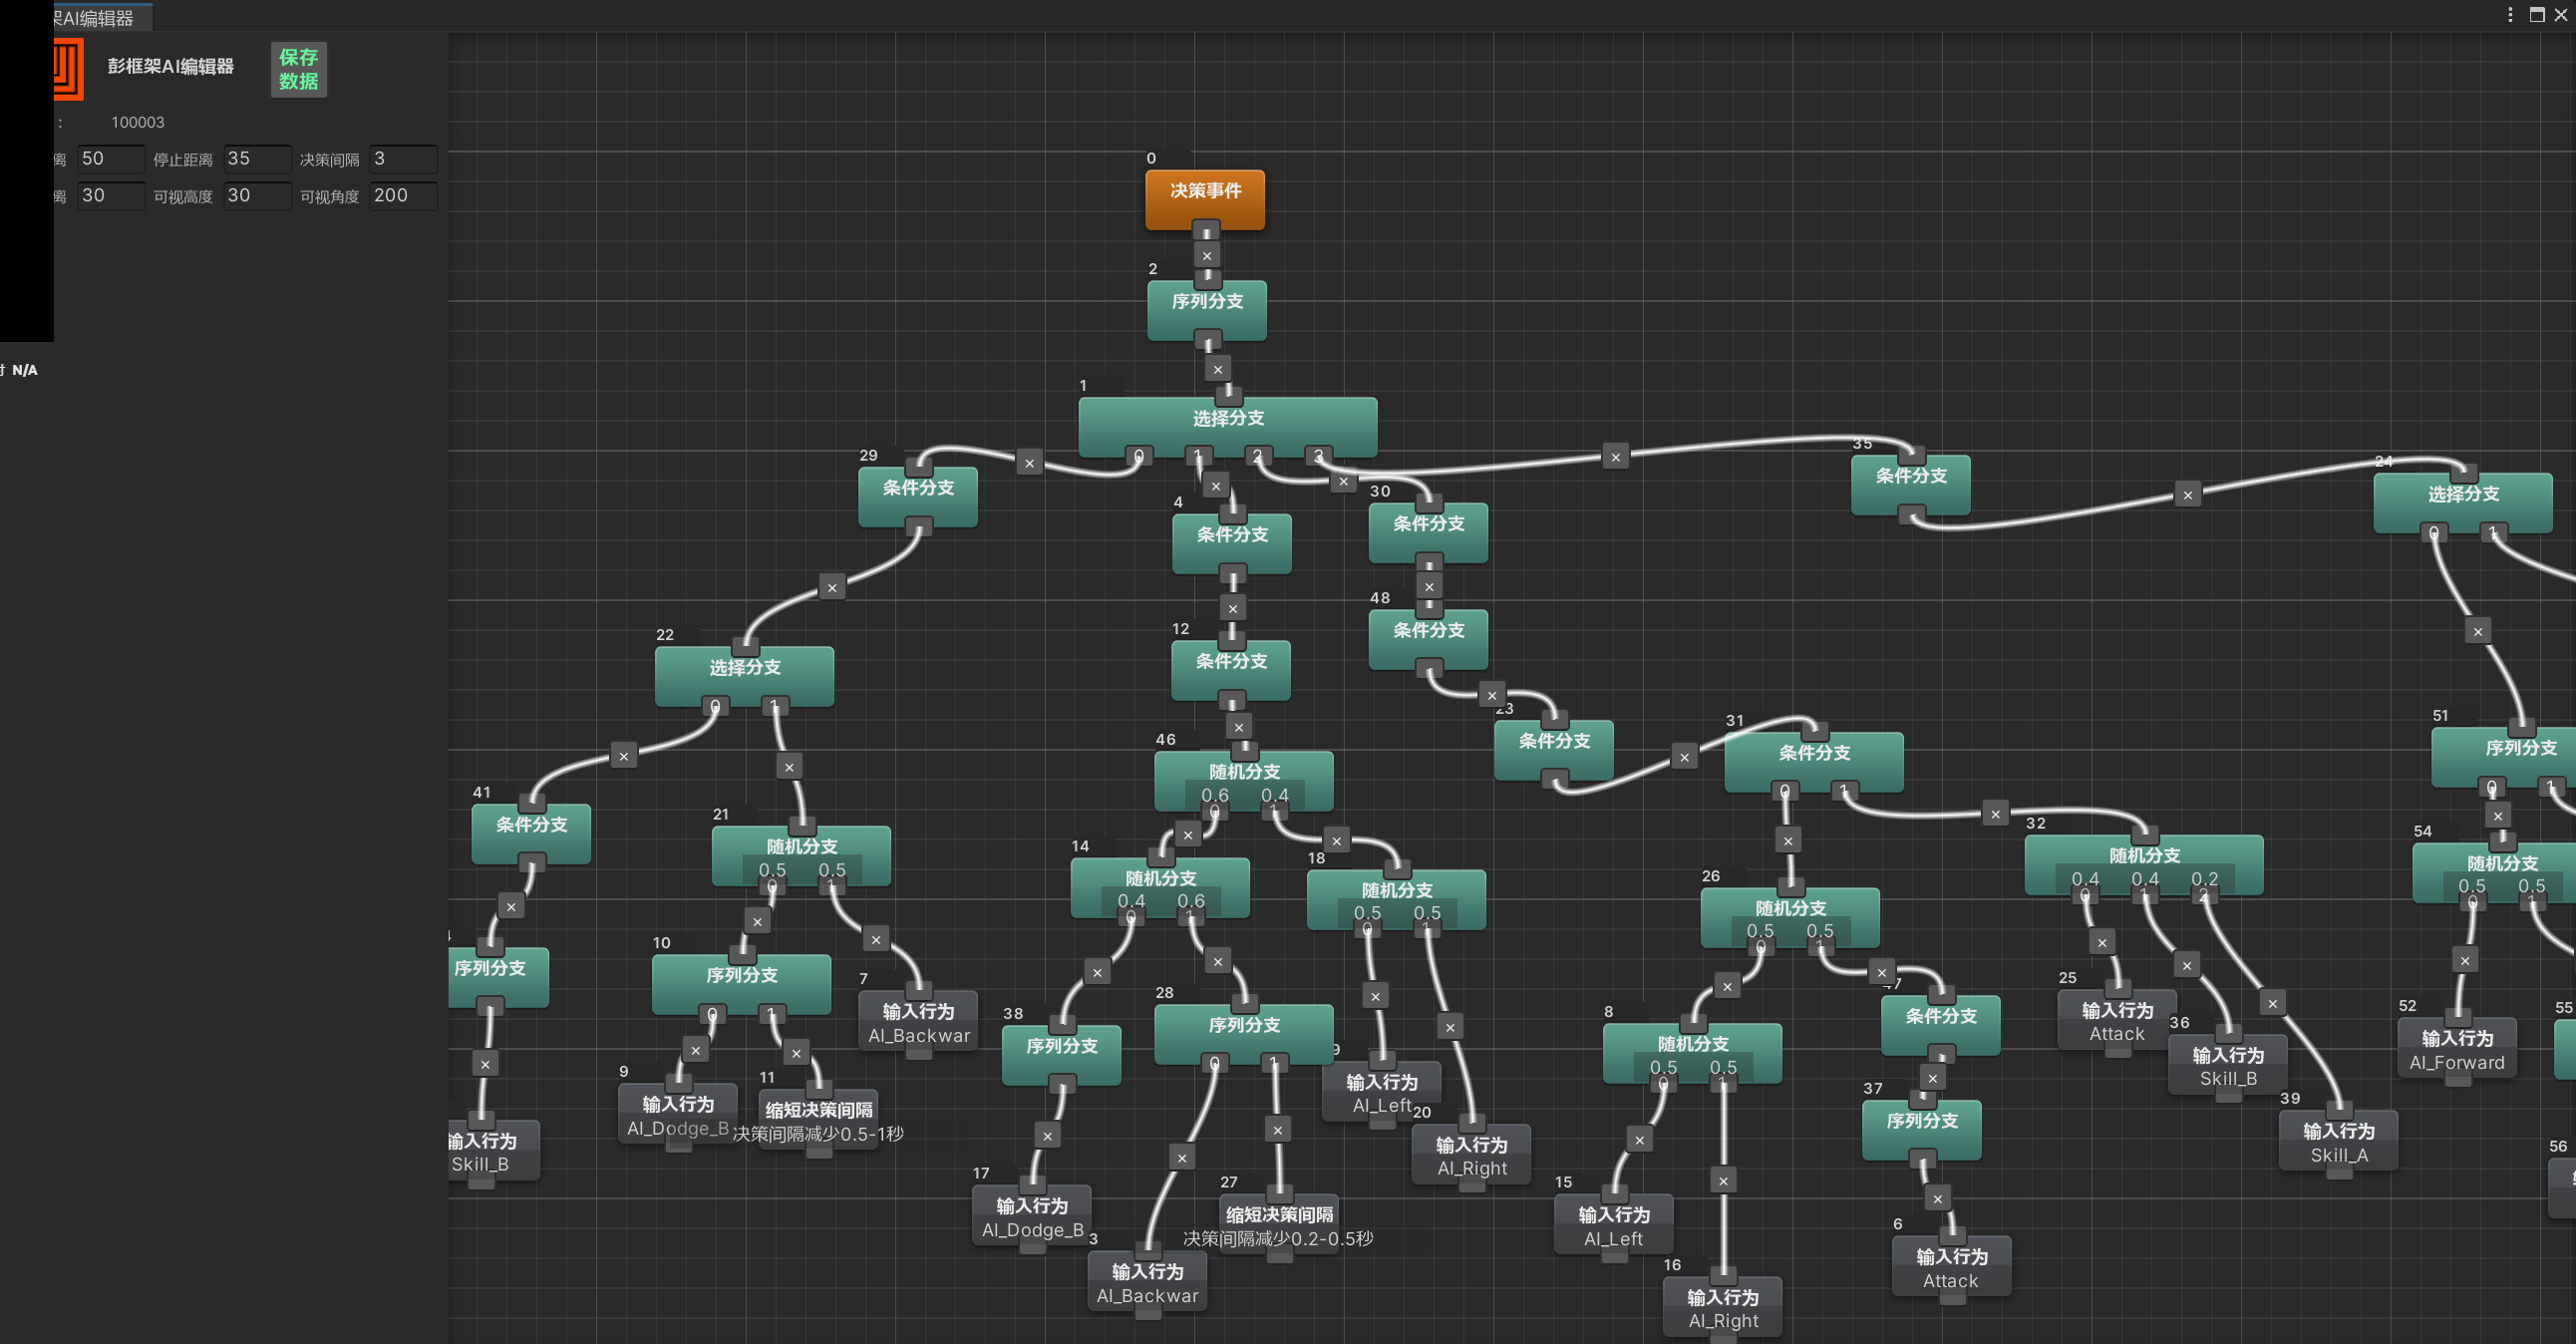
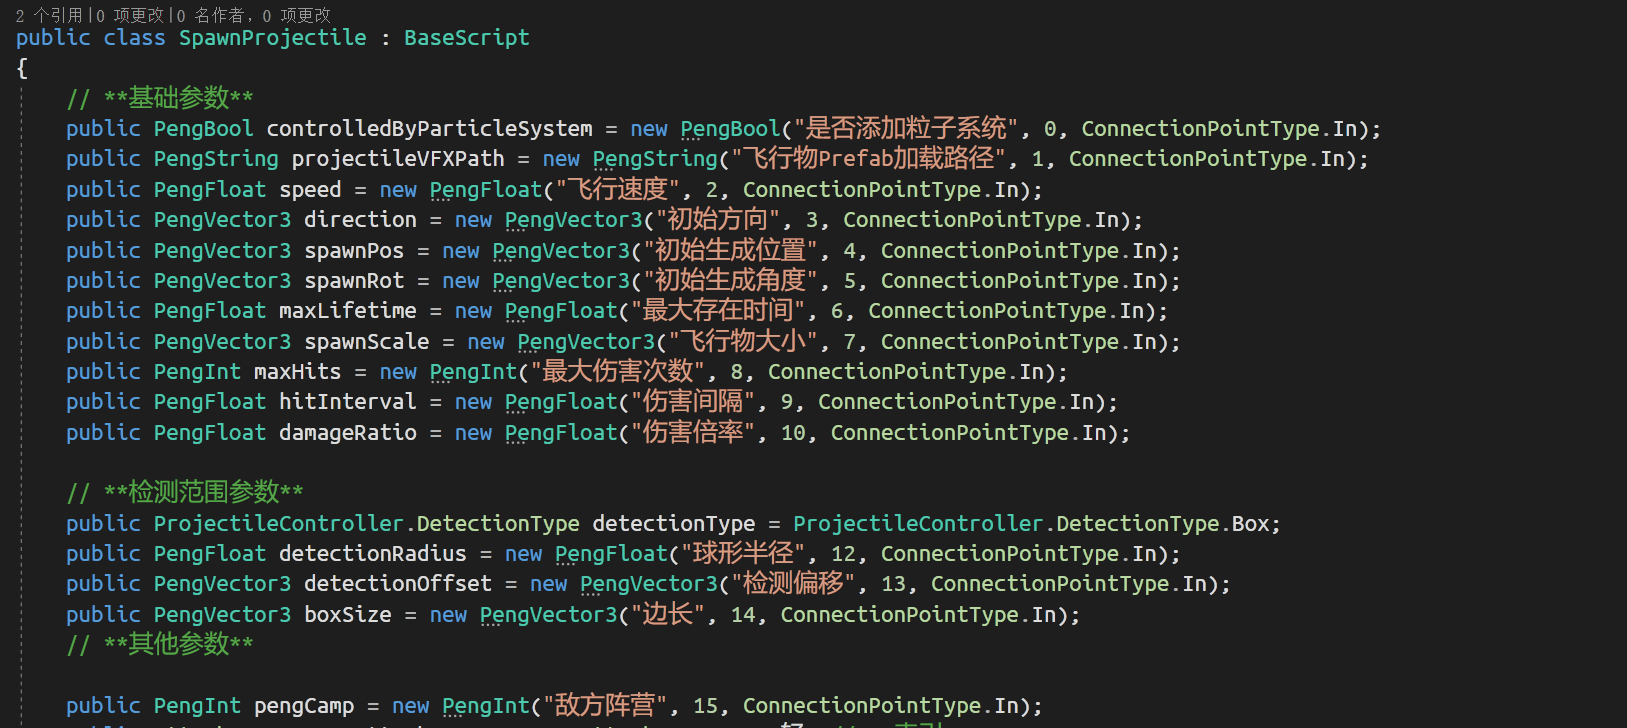
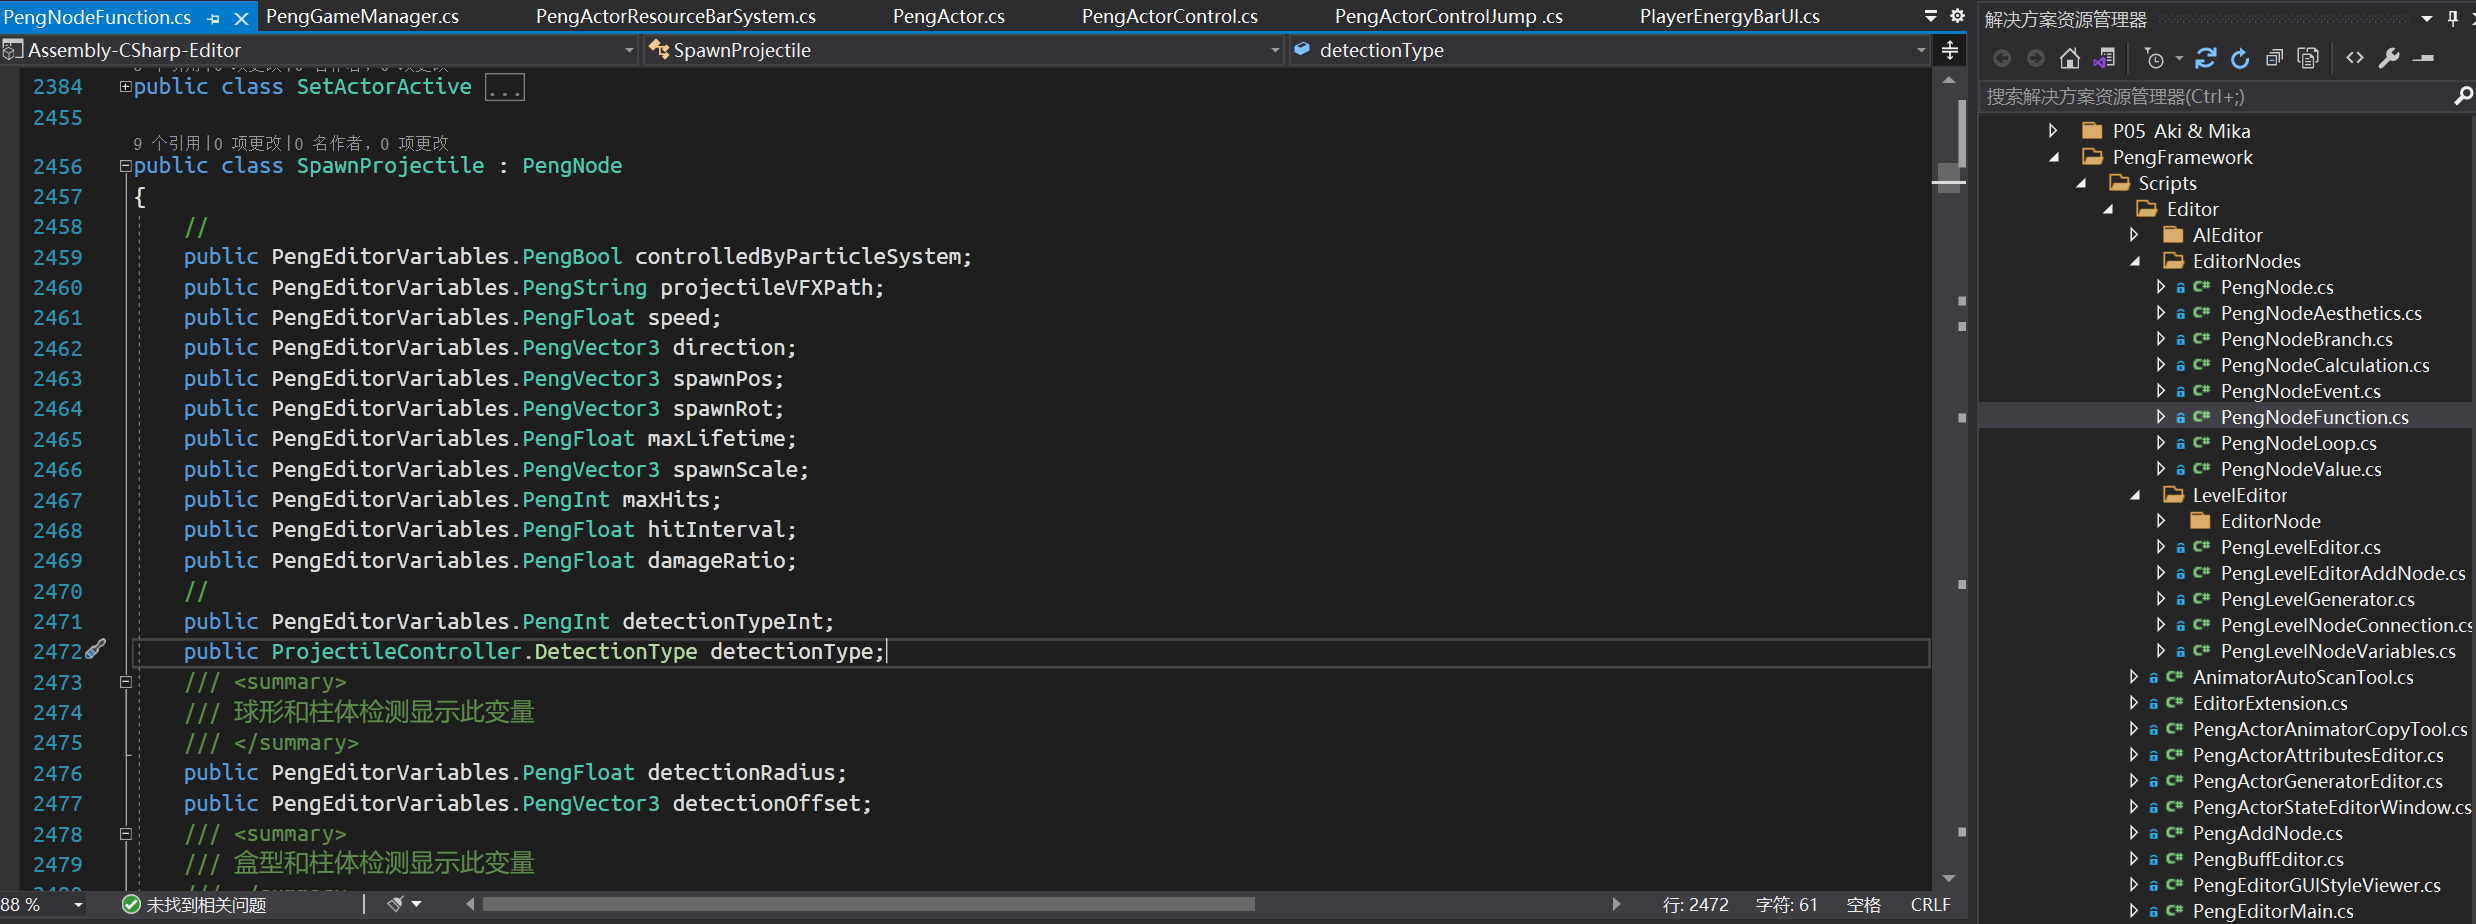
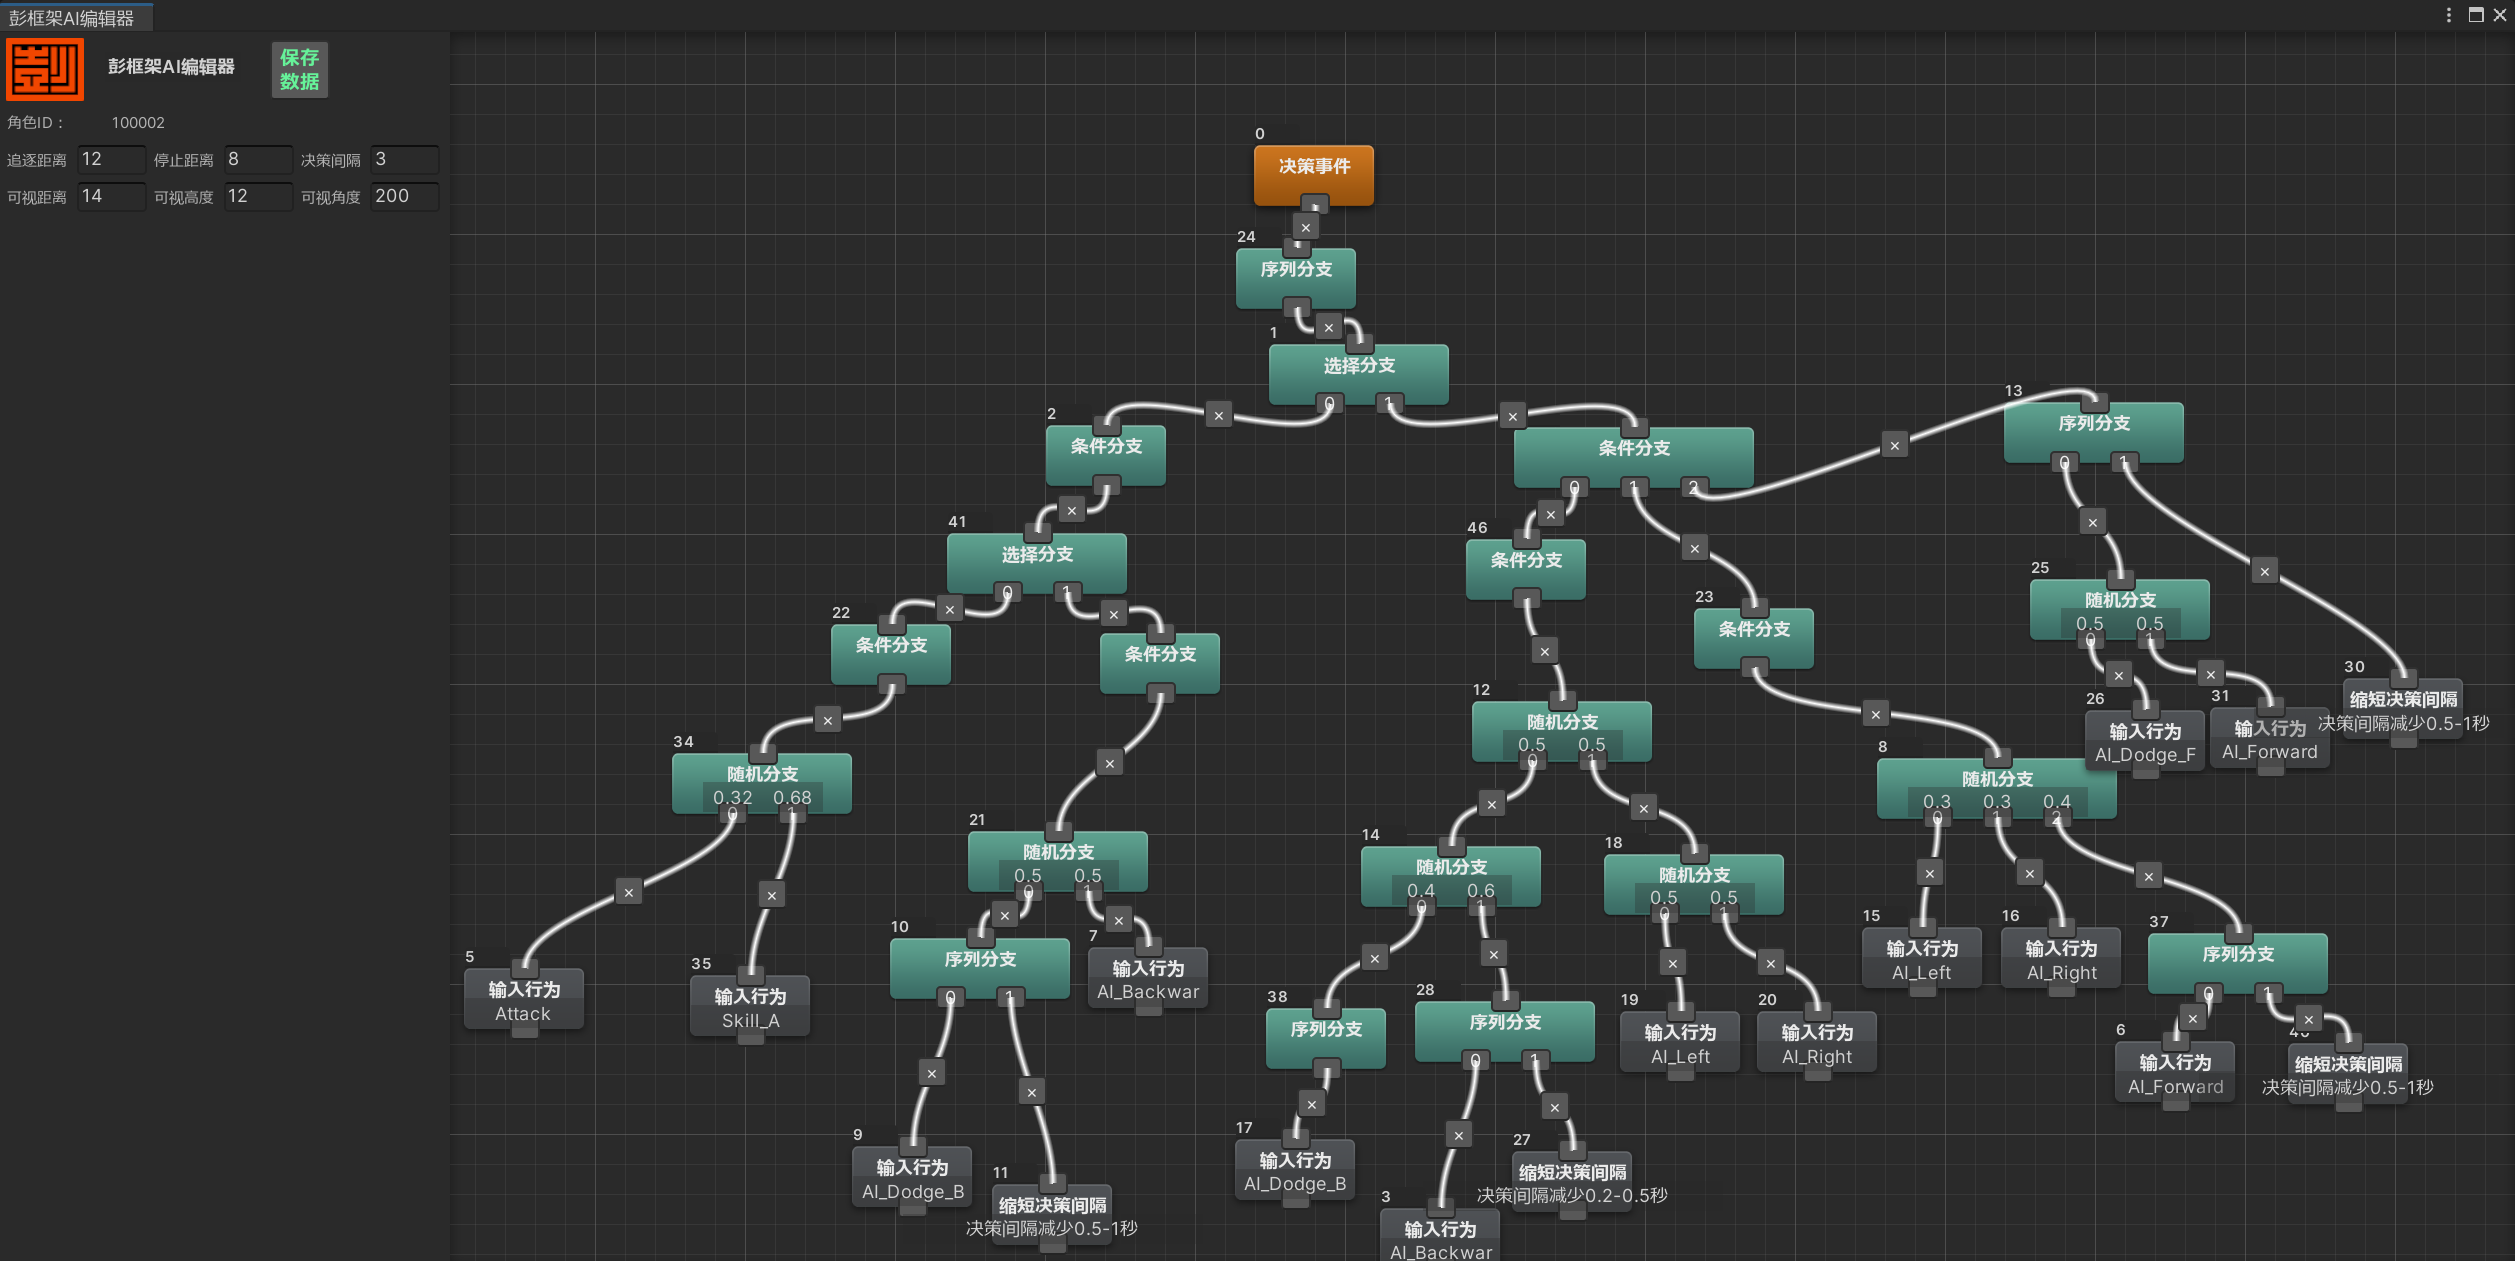
Based on the original editor, numerous custom nodes have been added.
 | |
|---|---|
| SpawnProjectile Node Runtime Script | SpawnProjectile Node Editor Script |
Methods for Enhancing Hit Feedback
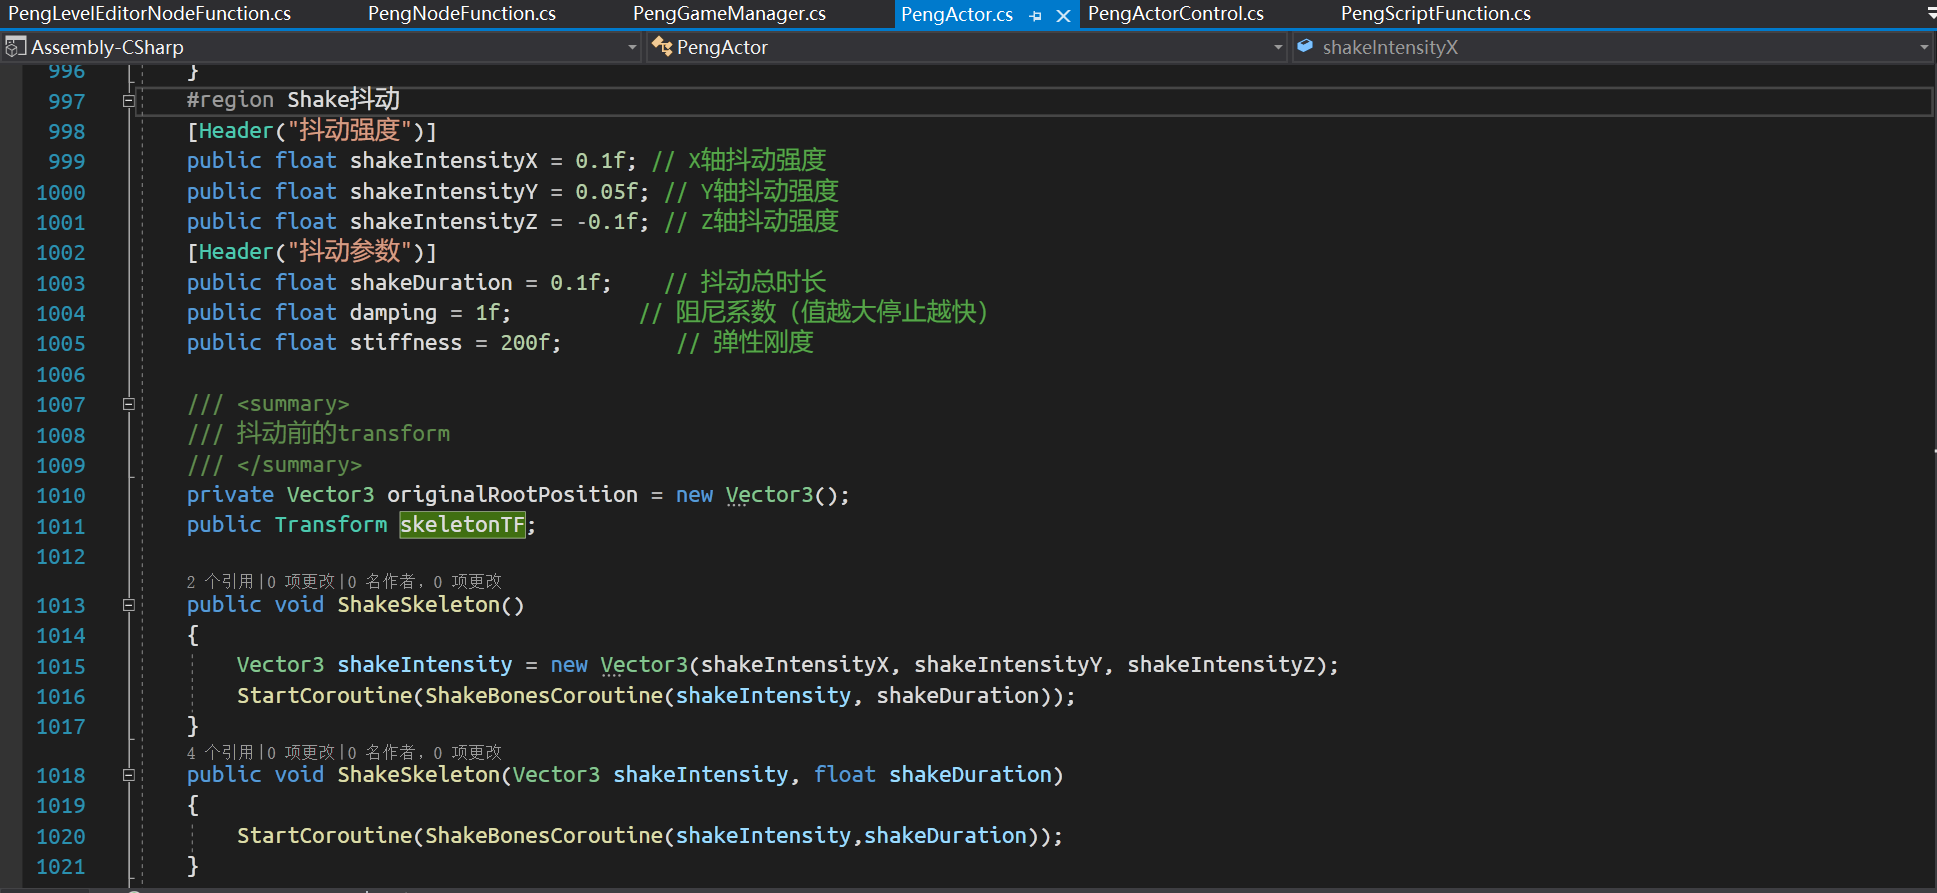
Character Jitter
When an attack does not interrupt the enemy’s state, the enemy’s skeleton will also perform simulated vibrations along the X/Y/Z axes, manifesting as jitter in different directions.
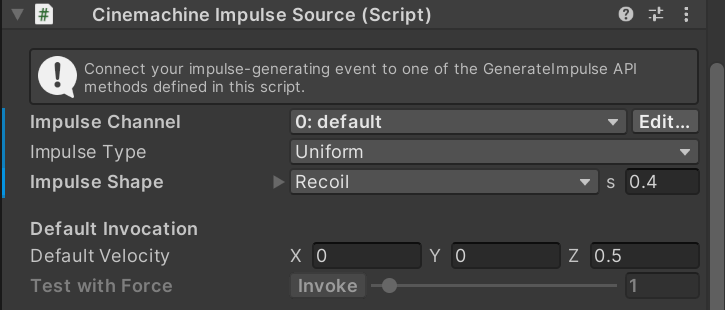
Screen Shake
Use the CinemachineImpulseSource (from the Cinemachine plugin) to add vibration to the screen. Align the vibration direction with the direction of the character’s attack action to enhance hit feel.
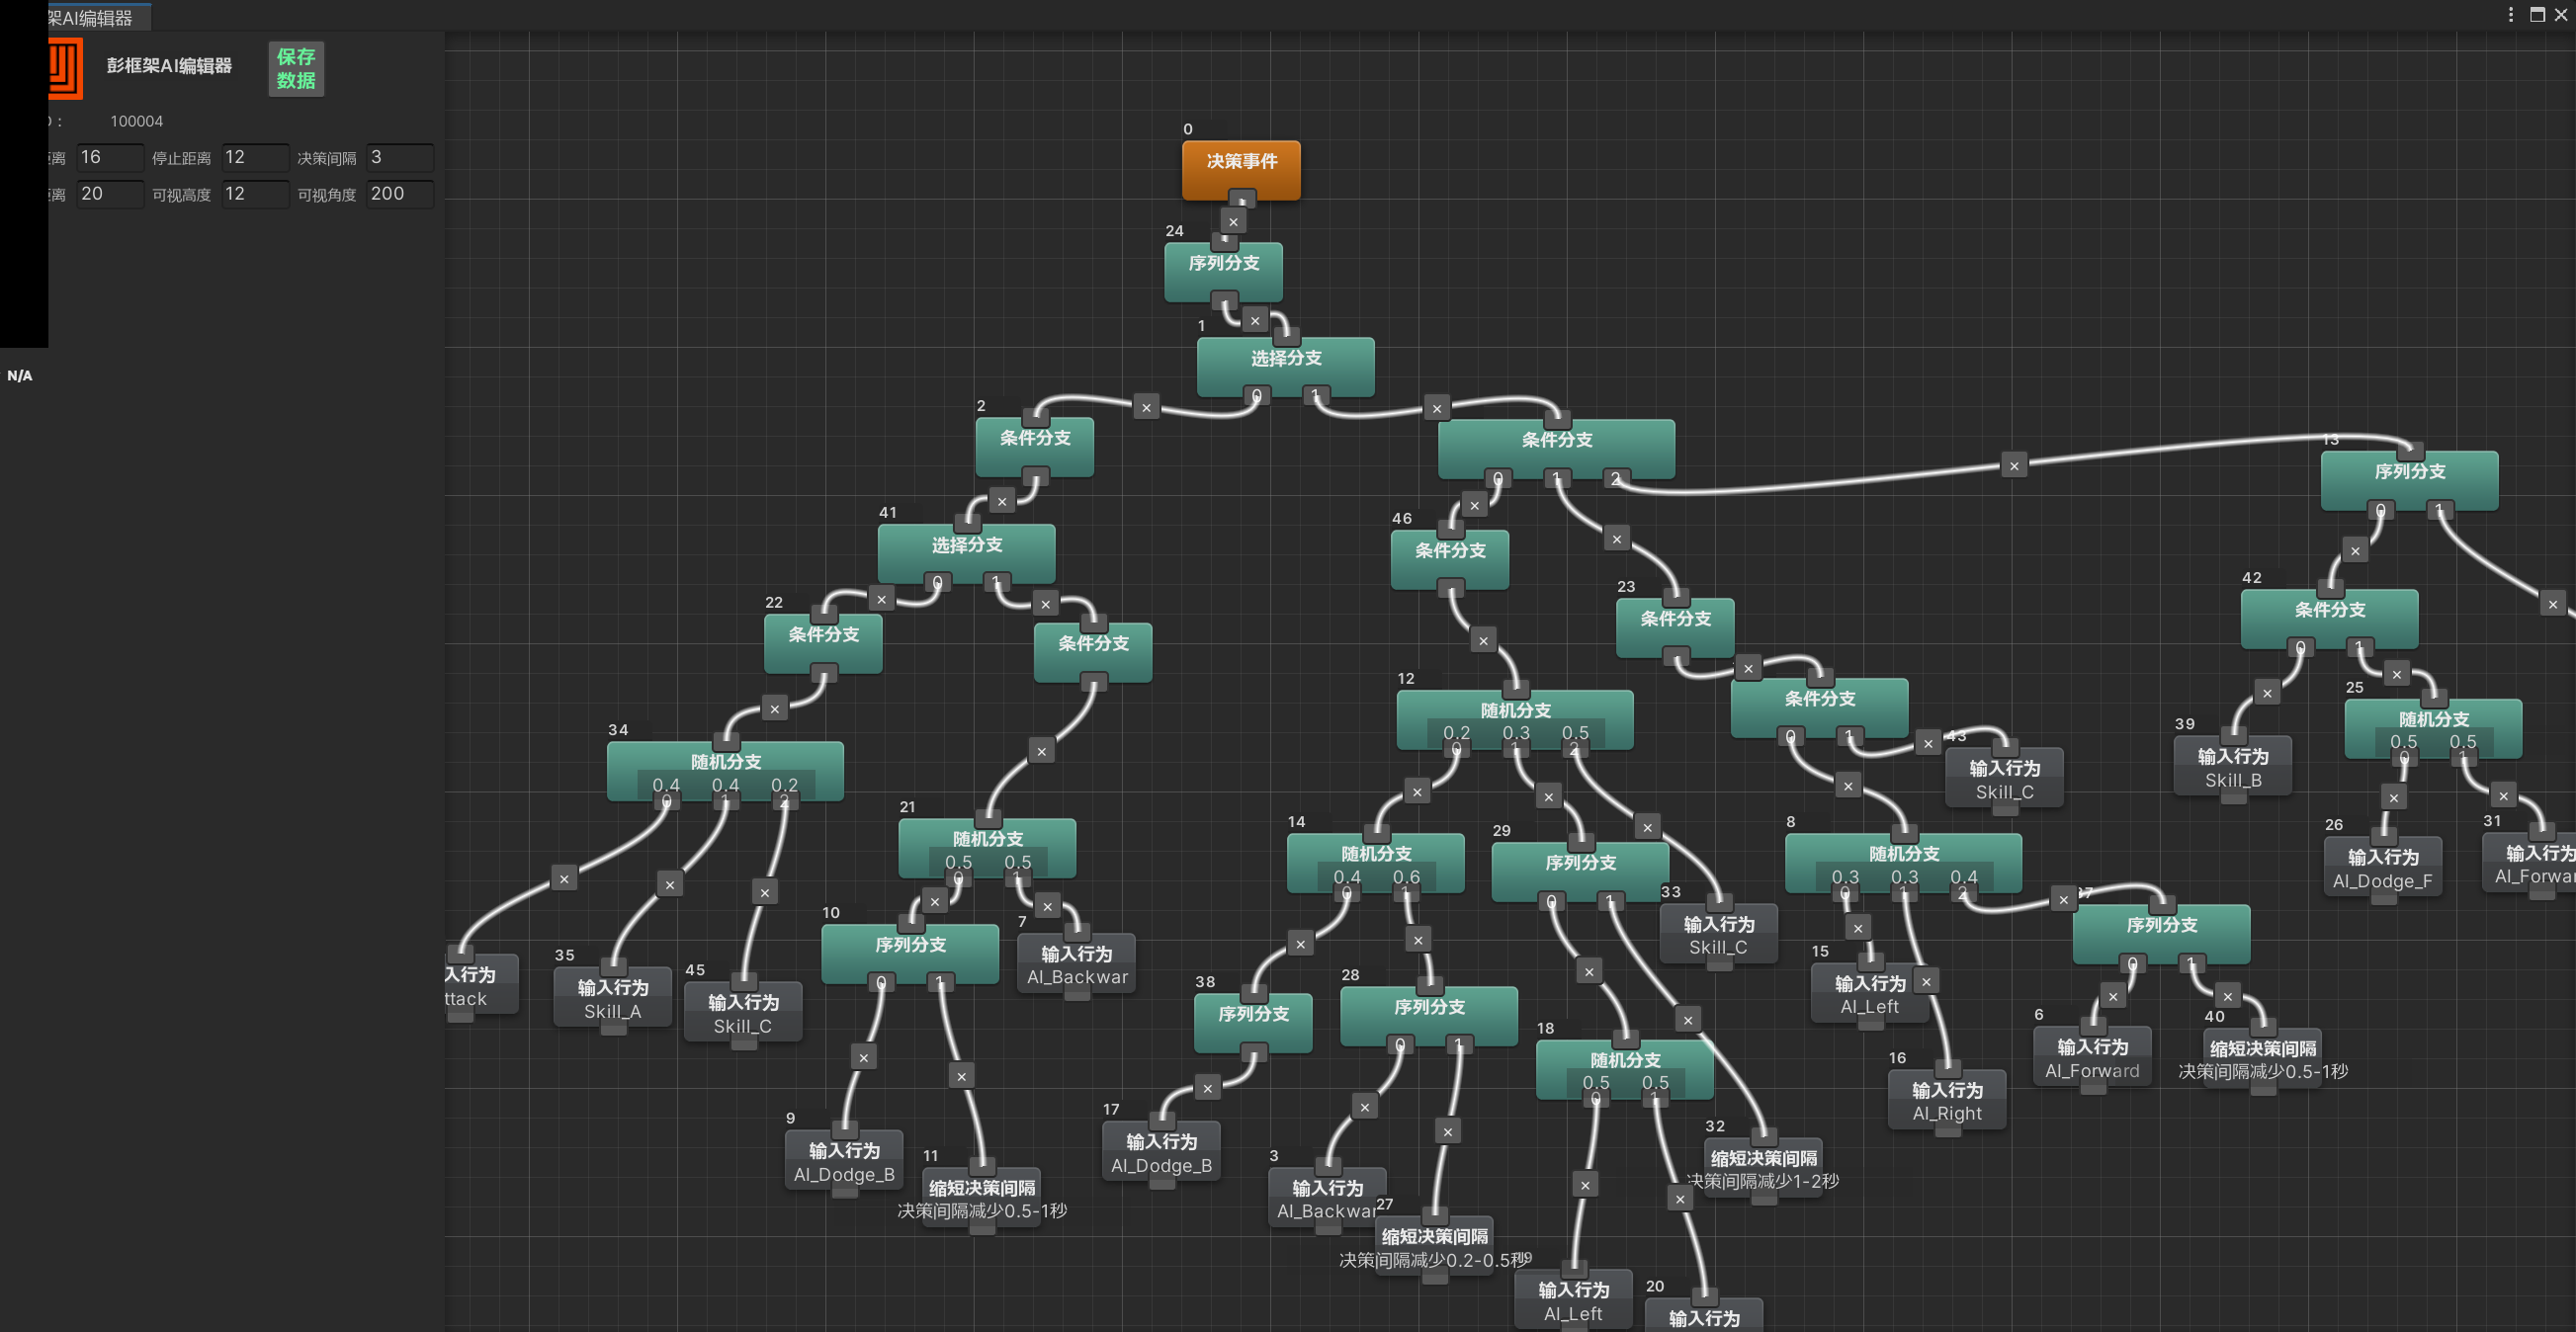
AI Design
The AI features 4 behavioral modes: Patrol, Return to Spawn Point, Chase, and Decision (powered by a Behavior Tree).
- Patrol: Activated when the AI has no target and valid patrol points are configured. Switches to Chase/Decision upon spotting a target within the appropriate distance; switches to Return to Spawn Point if no patrol points are available.
- Return to Spawn Point: Triggered when the AI has no target and no valid patrol points. The AI will teleport back to the spawn point if it fails to return within the time limit. If a target is detected mid-return, it will interrupt the process and switch to Chase/Decision; switches back to Patrol after successfully returning to the spawn point with no target present.
- Chase: Engaged when the AI has a target within the mid-to-long range threshold. Switches to Decision when the target closes in to melee range; switches back to Patrol if the target moves beyond the chase range and valid patrol points exist; switches to Return to Spawn Point if no target is present.
- Decision: Initiated when the AI has a target within melee range. Switches back to Chase if the target retreats to mid-range; switches to Patrol if the target moves out of chase range and valid patrol points exist; switches to Return to Spawn Point if no target is present.
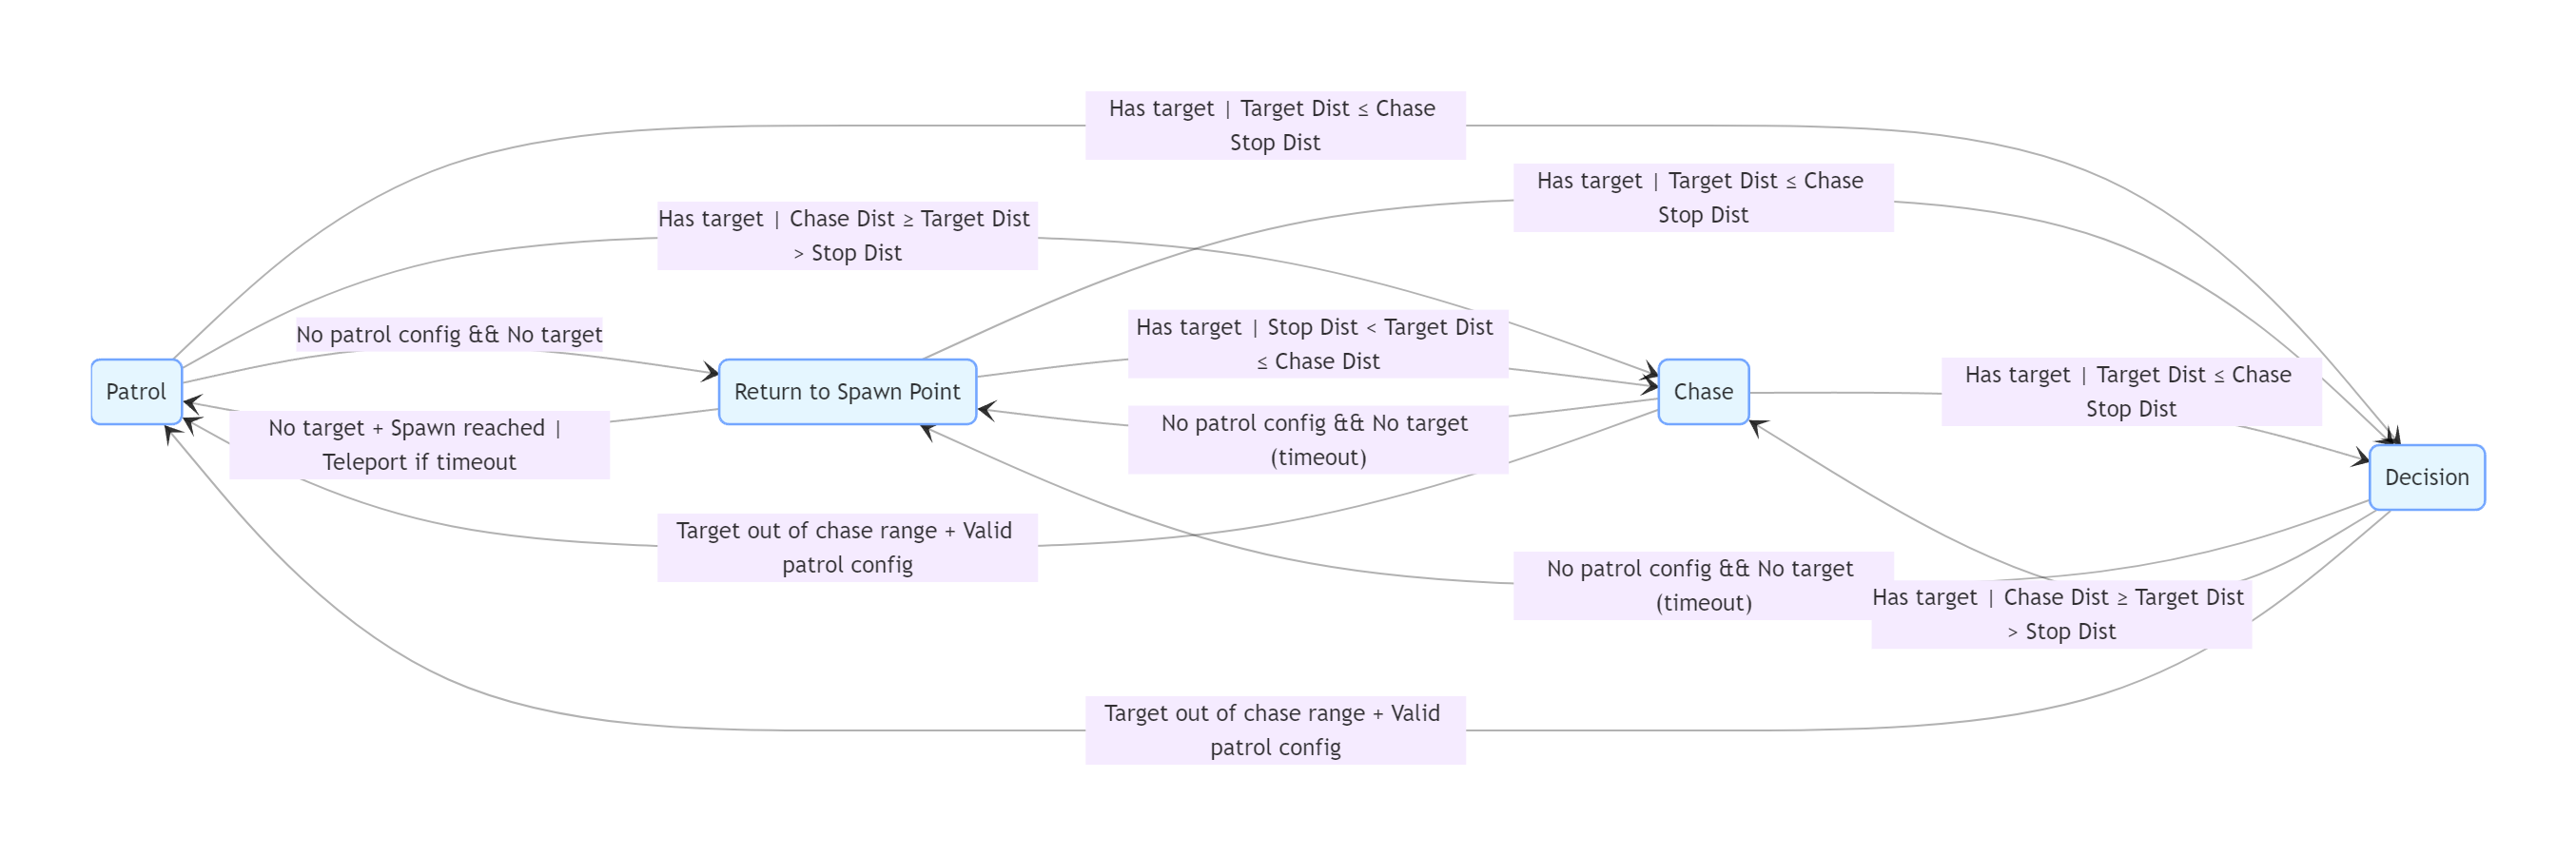
A Behavior Tree is used for AI decision-making, which issues combat and movement commands. The character’s state machine then processes these commands to handle state transitions.
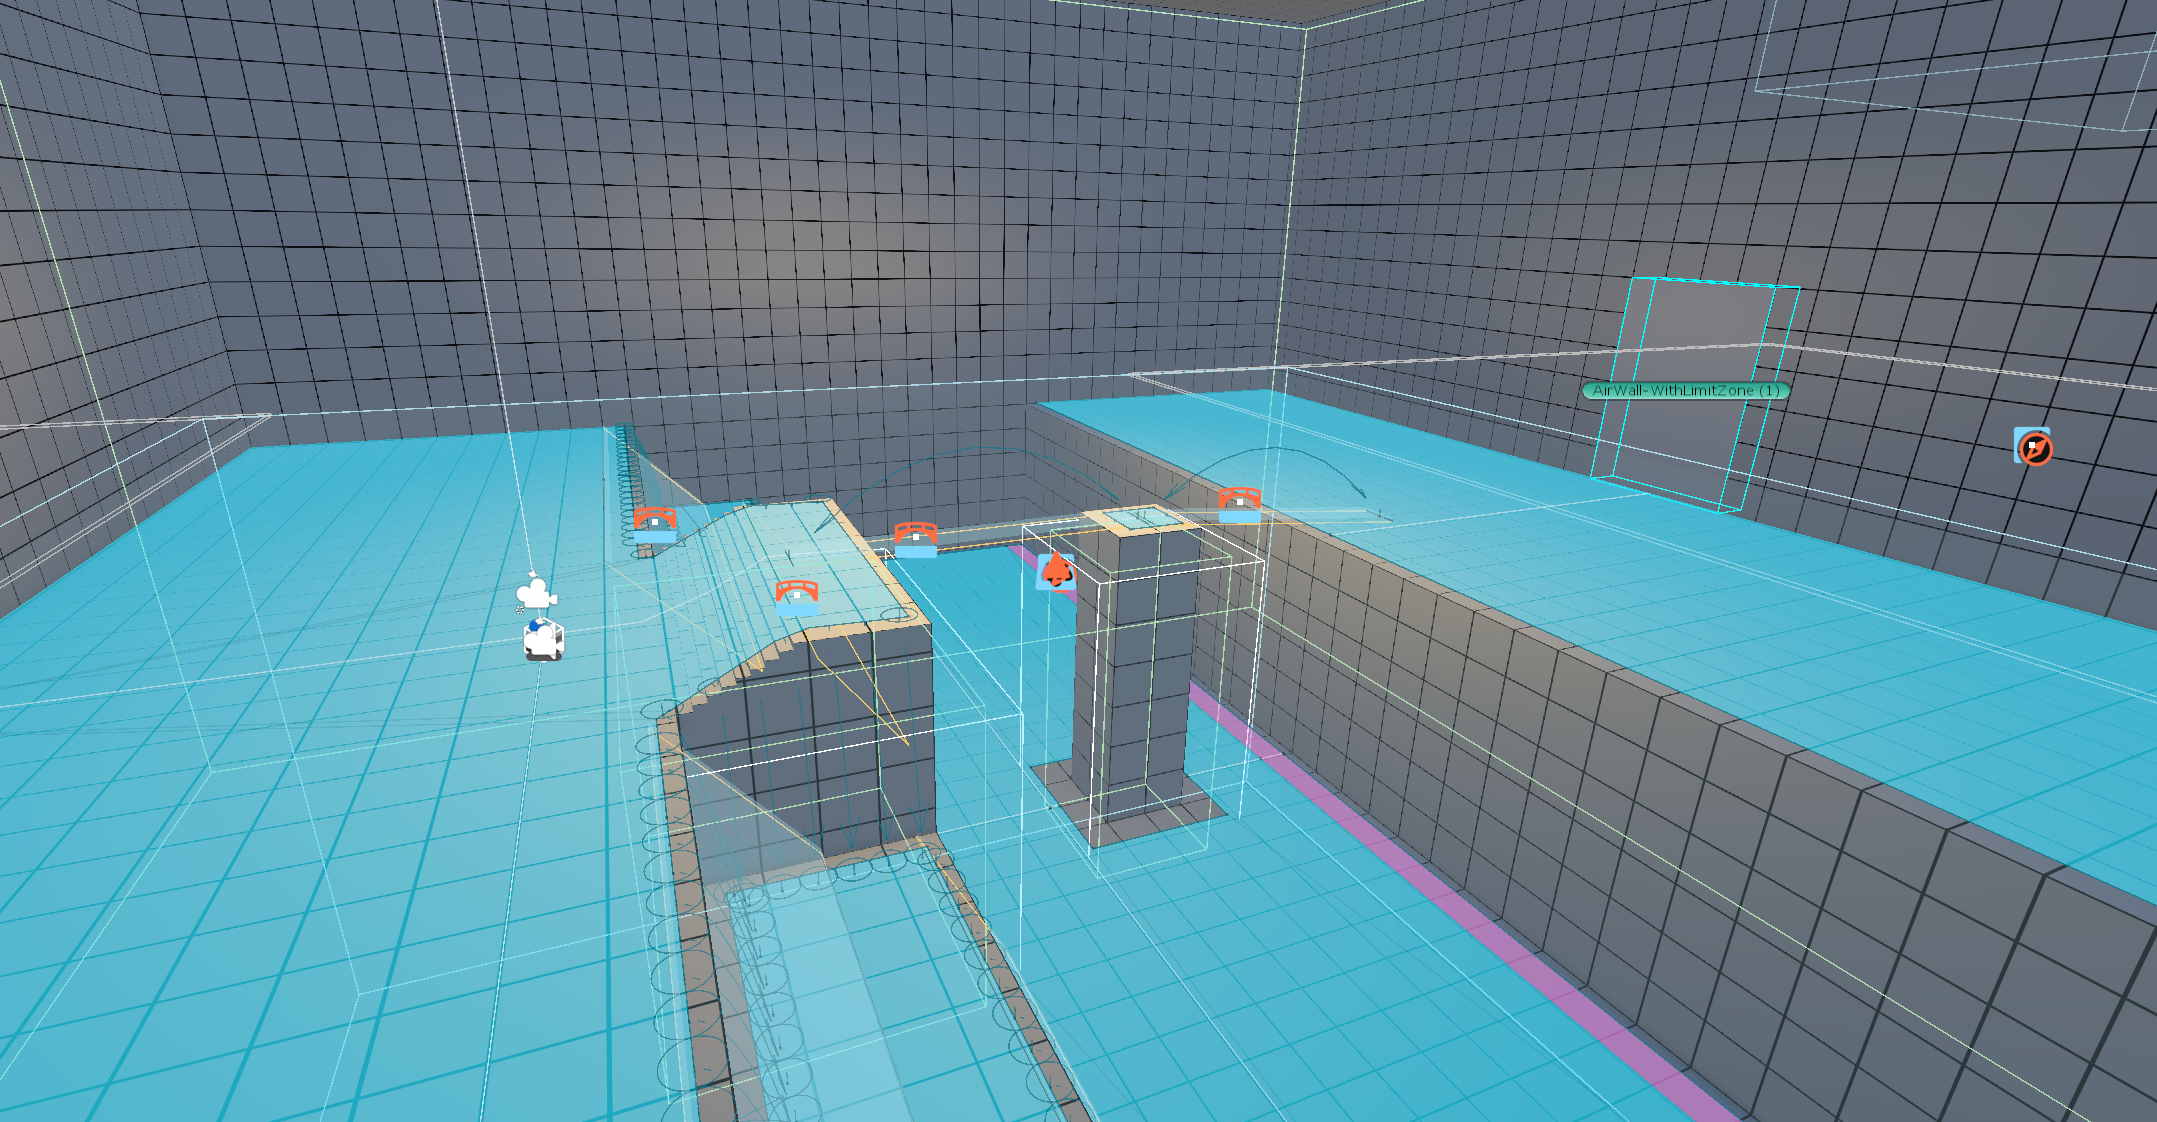
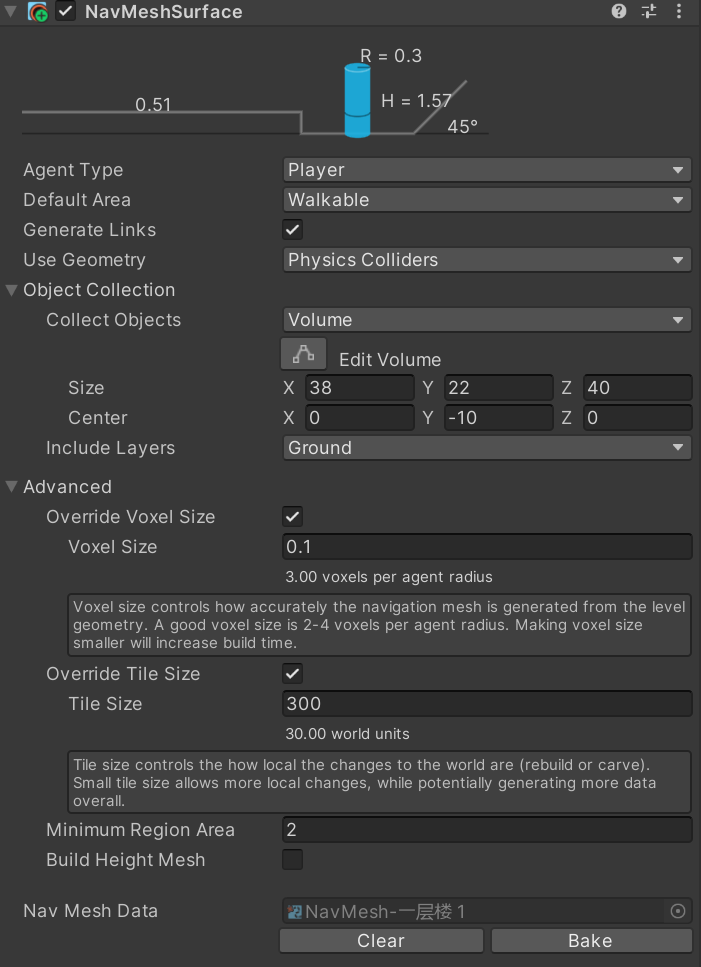
Unity’s Navigation System is implemented for AI pathfinding.
 |
|---|
Editor Improvements
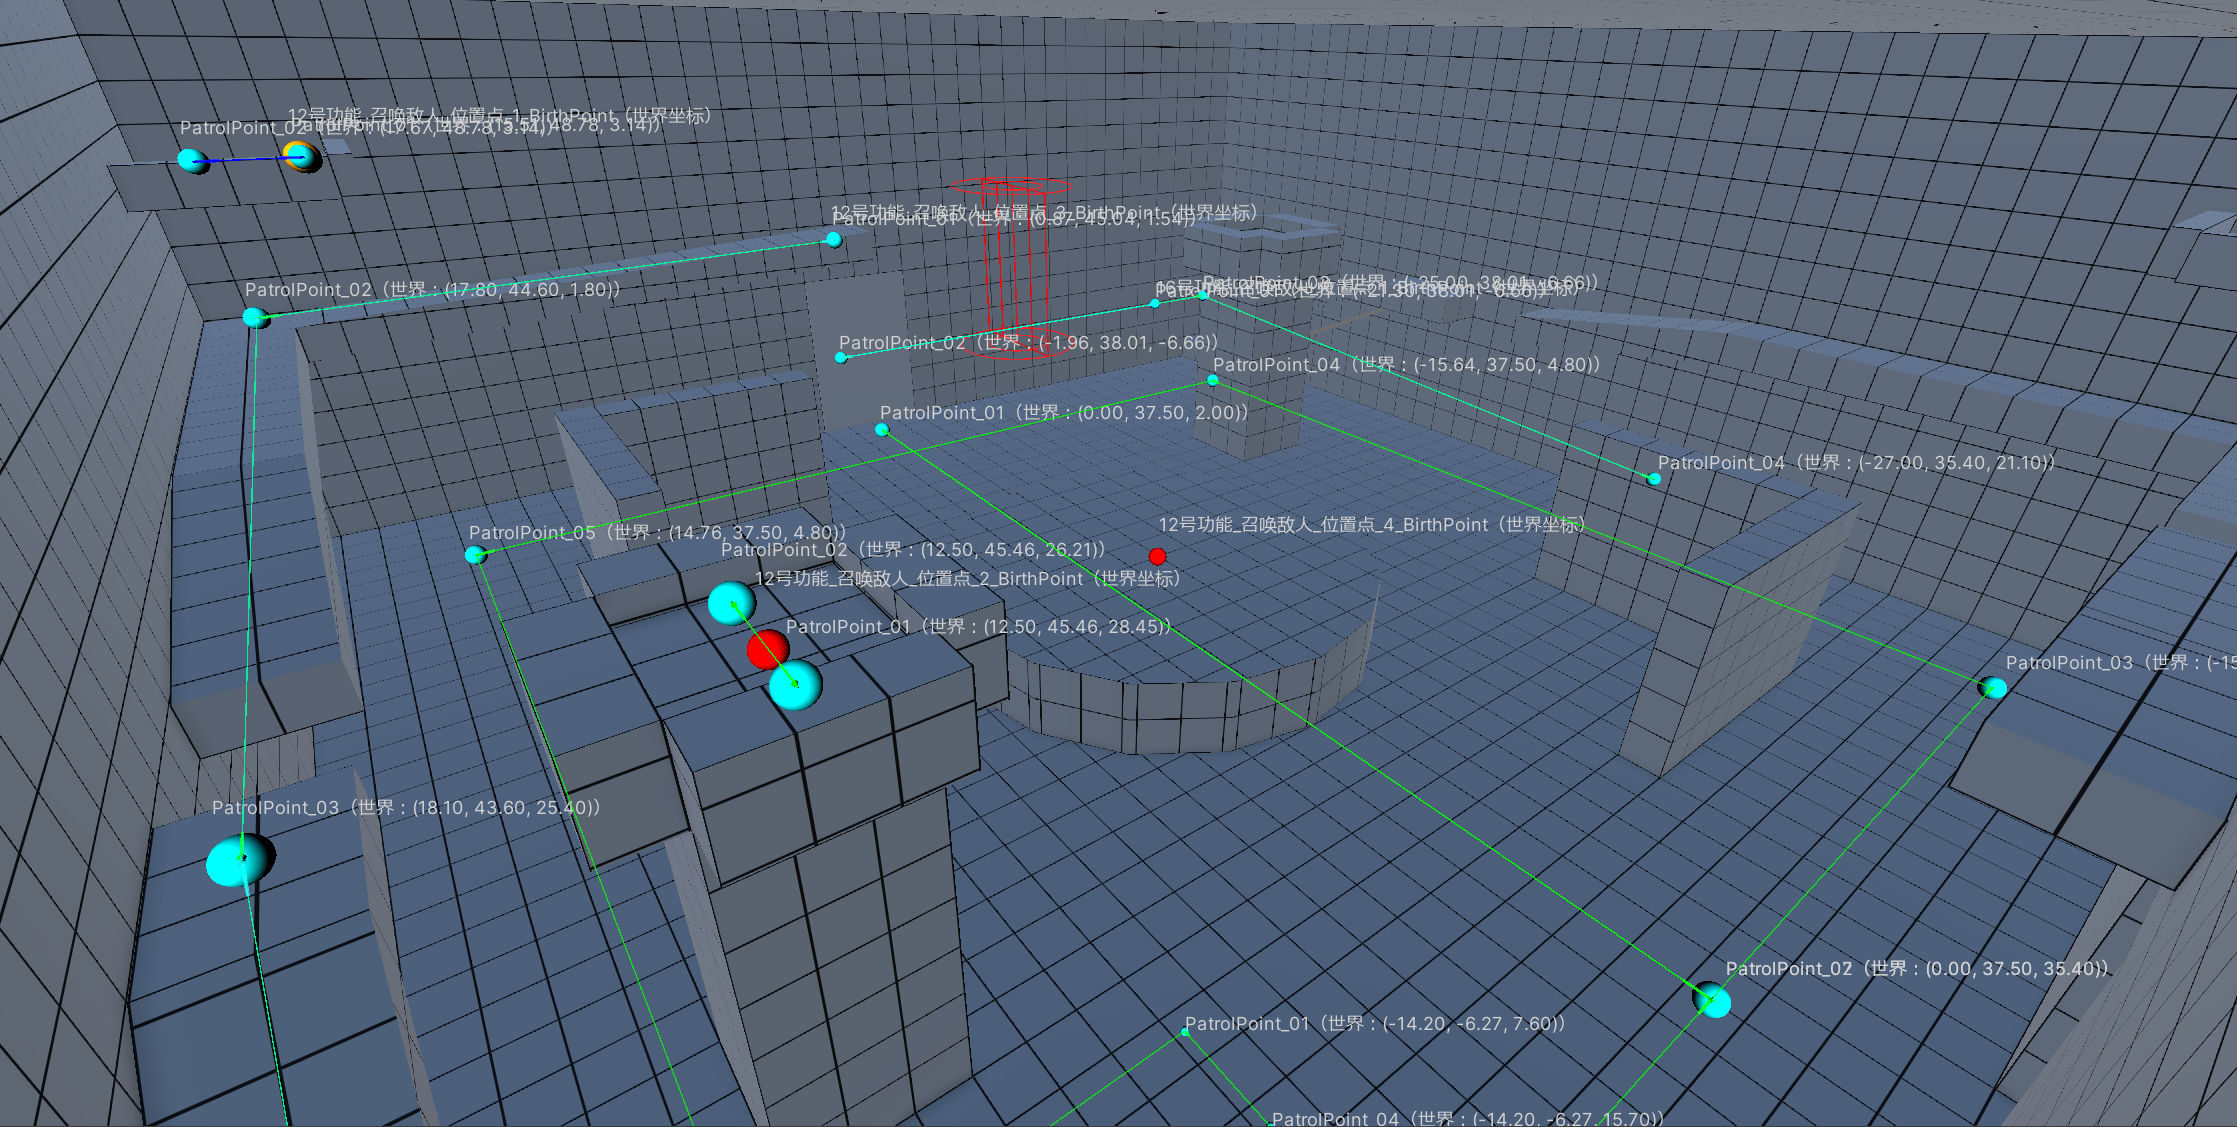
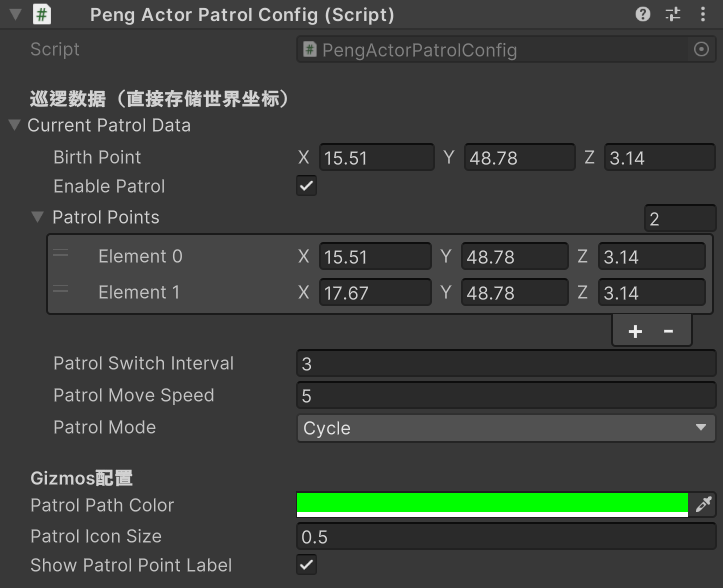
Spawn points and patrol points can now be configured directly within the level editor.
 |
|---|
Player Feedback & Optimization
- On occasion, AI may become stuck in place when returning to patrol points; the AI pathfinding logic needs further optimization.
- Adding QTE mechanics (e.g., executions, backstabs) would enhance combat interactivity and impact feedback.
- Camera switching and movement are currently monotonous; refining camera controls and adding dynamic camera movements will improve visual presentation.